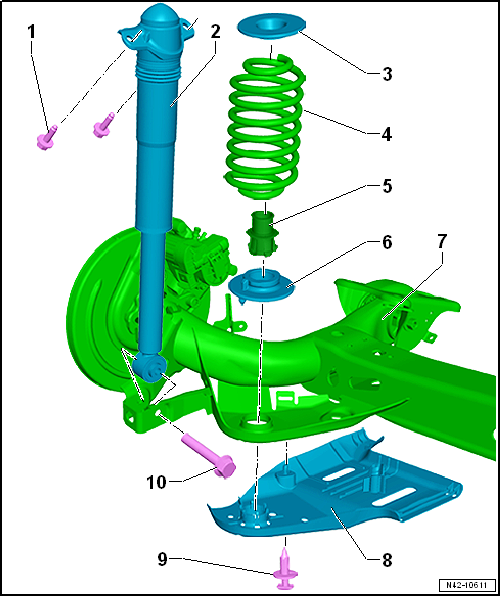
Volkswagen Golf Service & Repair Manual: Assembly overview - suspension strut, shock absorber, spring, torsion beam
axle

| Removing and installing
→ Chapter |
| Defective shock absorbers must always be degassed and drained before
disposal
→ Chapter |
| Removing and installing
→ Chapter |
| After installing stone deflector, press clamp ring on so it is flush |
| Turn end of spring against stop |
| When installing, fit pin in aperture in spring mounting on axle
beam. |
| Always tighten bolted connection with suspension in unladen position
→ Chapter |
1 -
Bolt
Renew after removing
50 Nm +45°
2 -
Shock absorber
Removing and installing ...
Other materials:
Safety precautions when working on the cooling system
Risk of scalding by hot coolant
When the engine is warm, the cooling system is under pressure.
Danger of scalding due to steam and hot coolant.
–
Always wear safety gloves.
–
Always wear safety goggles.
– ...
Painting parking aid sensor
To avoid malfunctions in the parking aid sensor, always
observe the following when painting:
Painting new parts
Maximum layer thickness 125 µm; a measurement of layer depth
is absolutely essential following ...
Matching wheels and tyres
General
When radial or lateral runout of the wheel and tyre
coincide, the imbalance of the wheel is amplified by the tyre.
For technical reasons, 100% true running is not possible
→ Chapter.
...
© 2016-2026 Copyright www.vwgolf.org


 Assembly overview - suspension strut, shock absorber, spring, multi-link
suspension
