Volkswagen Golf Service & Repair Manual: Assembly overview - flanging tool
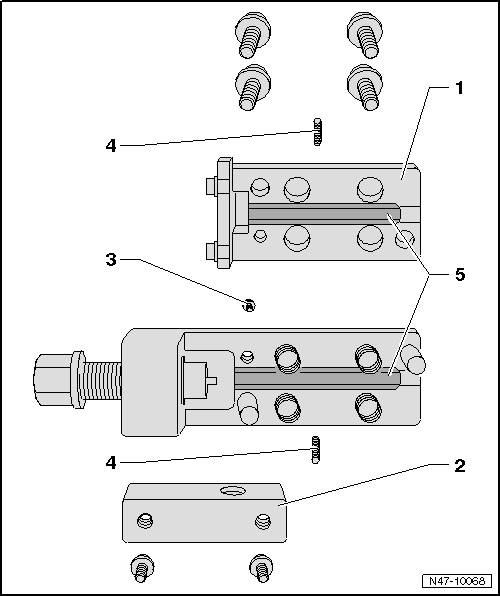
| 1 - |
Flanging tool upper part |
| Unbolt to change flanging jaws |
| Must be unscrewed to access securing bolt for upper part. |
| For flanging tool upper part |
| 4 - |
Grub screws for flanging jaws |
| For centring and holding flanging jaws |
| Hexagon socket head bolt, 2 mm |
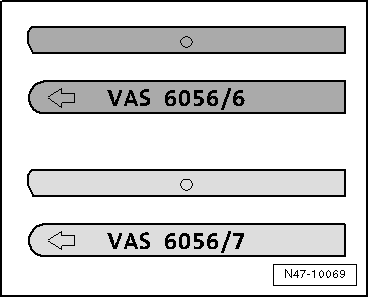
| Assembly instructions
→ Fig. |
| Flanging jaw assembly instructions: |
| VAS 6056/6 (dark) for black brake lines |
| VAS 6056/7 (light) for green brake lines |
 Note Note
| The arrow on the rounded side of the flanging jaws must
point to the edge of the housing, and the straight side of the
flanging jaws must be installed towards the spindle, or the
flange will not be formed correctly. |
|
|
|
Repairing brake lines
The flanging tool for brake lines -VAS 6056- can be used to
flange brake lines with an outer pipe diameter of 5 mm without ...
Unbolt relevant brake line at brake caliper or wheel brake
cylinder; catch escaping brake fluid and dispose of this as per
regulations.
&nb ...
© 2016-2026 Copyright www.vwgolf.org

 Brake lines
 Work instructions