Volkswagen Golf Service & Repair Manual: Removing and installing front door window
| Special tools and workshop equipment
required |
|
|
|
 Note Note
| Removal and installation are described only for the right
door window. The left side is similar. |
|
|
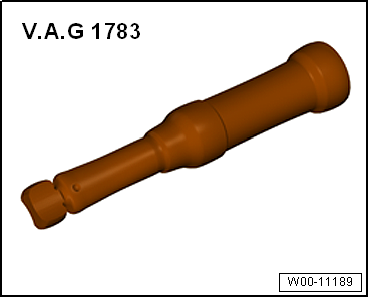
Torque wrench -V.A.G 1783- |
| – |
Remove front door trim
→ General body repairs, interior; Rep. gr.70. |
| – |
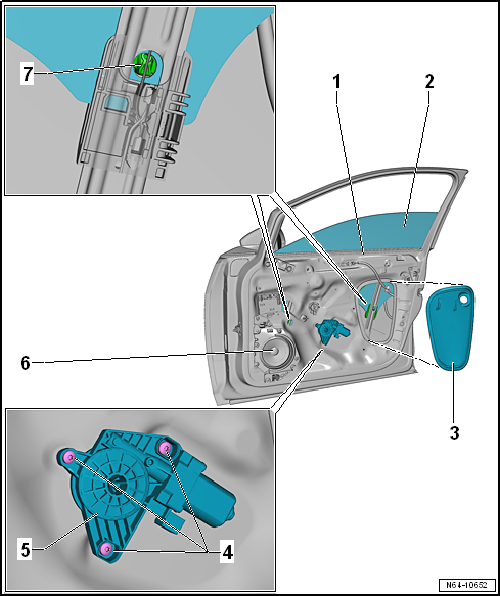
Remove inner door cover -3-
→ Chapter. |
| – |
Lower door window -2- until locking
hooks -7- for door window are accessible. |
Note
-
| |
If this part of the work cannot be done due to a fault in
window regulator motor, the window regulator motor can be removed
-5-. |
-
| |
The window can then be pushed to required working position. |
| – |
Carefully press locking hooks -7-
through opening in the window. Slightly lift the door window to avoid
that it does not fall back again in the locking hook. |
| – |
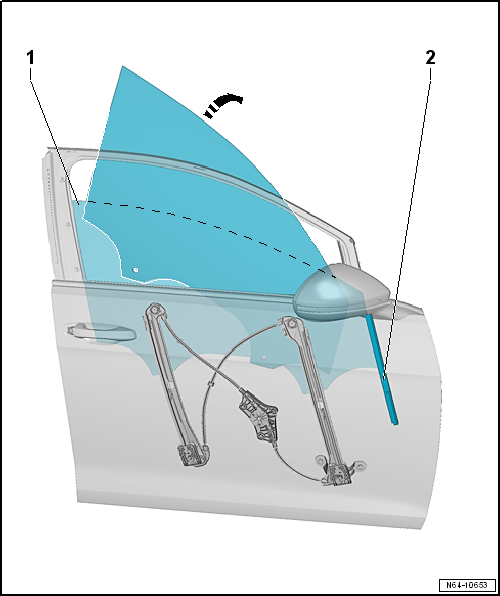
Lift door window -1- upwards out of
window regulator. |
| – |
Lift door window -1- from behind and
swing forwards out of window channels -2--arrow-. |
| – |
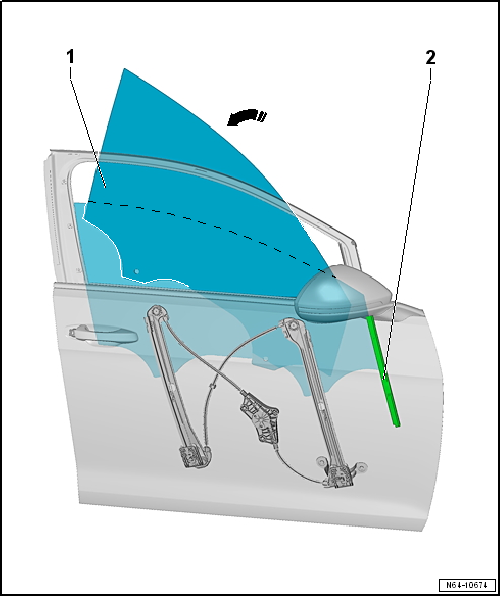
Insert door window -1- into window
channels -2--arrow-. |
Note
| Ensure that door window is properly located in window channel. |
| – |
Guide door window without force into clamping jaws of window
regulator. |
| – |
Align door window with rear window frame. |
| – |
Press door window -1- into clamping
jaws until the locking hooks -7- in the
door window engage. |
| Further installation is performed in the reverse order of removal. |
| – |
Before the inner door cover, the cable feed and the door trim are
installed, carry out a functional test. |
1 -
Fixed door window
Removing and installing
→ Chapter
2 -
Seal
Part of window
3 -
Bolt
...
Removing
–
Remove rear door trim
→ General body repairs, interior; Rep. gr.70.
...
Other materials:
Removing and installing radiator fan -V7
Risk of hand injury caused by the radiator fan
starting automatically.Do not grasp into the radiator fan when
disconnecting the connector.
Removing
Note
Reinstall all cable ties in the same locations when
installing.
...
Assembly overview - fuel rail with injectors
1 -
Fuel pressure sender -G247-
Checking
→ Chapter
Removing and installing
→ Chapter
Lubricate taper lightly with clean engine oil; do not lubricate
thread
22 Nm
...
Introduction
This chapter contains information on the following subjects:
→ Drink holders in the front centre console
→ Drink holders in the rear centre armrest
→ Drink holder in the rear side trim
Bottle holder
Bottle holders are located in the open stowage areas of t ...
© 2016-2026 Copyright www.vwgolf.org


 Assembly overview - fixed rear door window
 Removing and installing rear door window