Volkswagen Golf Service & Repair Manual: Assembly overview - A-pillar trim
 Note Note
| The illustration shows the A-pillar trims on the left side.
The right-hand side is similar (mirror image of left-hand side). |
|
|
|
| Upper A-pillar trim and trim for triangular window |
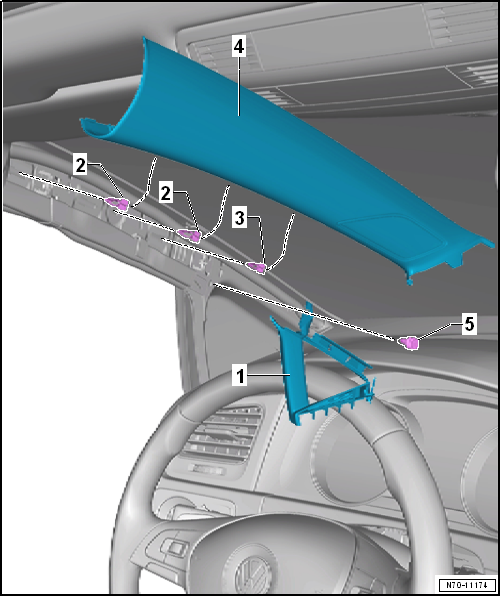
| 1 - |
Trim for triangular window |
- Removing and installing
→ Chapter
- With barbs
- Insert into trim
- Remove any retaining clips left in body mountings using removal tool
-T40280
- Always renew retaining clips
- Insert into trim
- Remove any retaining clips left in body mountings using removal tool
-T40280-
- Renew any damaged or deformed retaining clips
- Removing and installing
→ Chapter
- Remove and install together with trim for triangular window
- Insert into trim
- Renew clip if damaged or deformed
| Lower A-pillar trim, LHD vehicles |
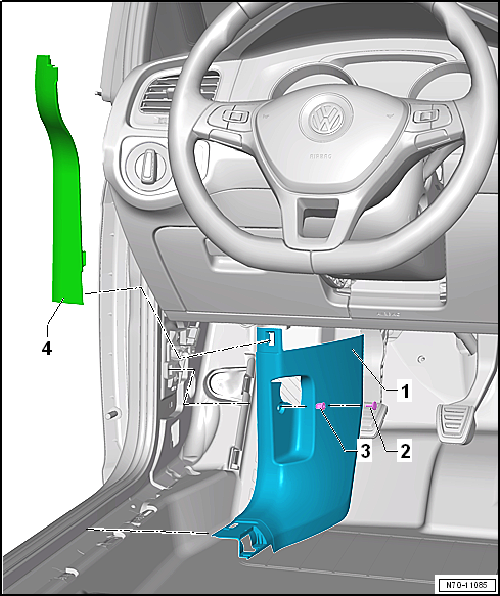
- Removing and installing
→ Chapter
- Removing and installing
→ Chapter
| Lower A-pillar trim, RHD vehicles |
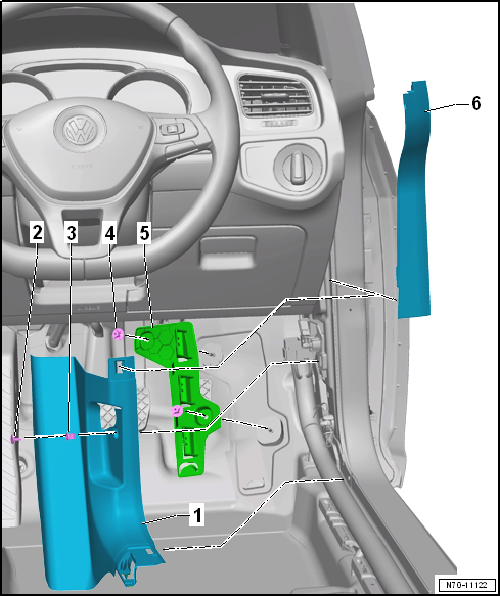
- Removing and installing
→ Chapter
- Removing and installing
→ Chapter
- Removing and installing
→ Chapter
Note
The illustration shows the sill panel moulding on the left side. The
right-hand side is similar (mirror image of left-hand side).
I: sill panel moulding, 4-door ...
Note
The illustration shows the B-pillar trims on the left side.
The right-hand side is similar (mirror image of left-hand side).
...
Other materials:
Removing and installing fog light, GTI and GTD
Note
Removal and installation are described for the left side.
Removal and installation on the right side are carried out in
the same way.
Removing
–
Switch off ignition.
...
Removing and installing gearbox mounting
Removing
–
Release hose clips -1- and
-2-, and remove air pipe.
–
Remove air filter housing
→ Chapter.
–
...
Wheel runout compensation
If run-out compensation is not performed, it is not possible
to adjust toe-in correctly!
The existing lateral run-out of the wheel must be
compensated for. Otherwise, the result of the measurement will
be incorrect.
...
© 2016-2026 Copyright www.vwgolf.org


 Assembly overview - sill panel moulding
 Assembly overview - B-pillar trim