Volkswagen Golf Service & Repair Manual: Repairs to wiring with cross sections up to 0.35 mm2
| Special tools and workshop equipment
required |
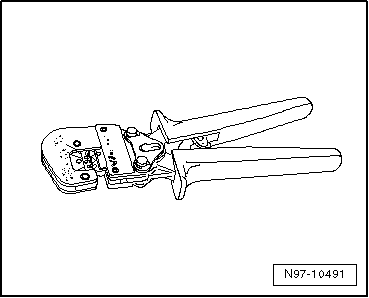
| Crimping pliers, complete -VAS 1978/1 A- |
|
|
|
| Head adapter 0.35 mmІ - 2.5 mmІ -VAS 1978/1-1- |
| For repairs to wiring with cross sections up to 0.35 mm2,
it is essential that contacts are crimped on using crimping
pliers for JPT contacts -VAS 1978/9A- or crimping pliers (base
tool) -VAS 1978/1-2- with attached head adapter for JPT contacts
-VAS 1978/9-1-. Due to the low current strength of these wires
in the micro and thousandths range, incorrectly crimped contacts
cause electrical resistances and result in faults or failure in
the respective system. The most common applications of these
contacts are: |
| With the use of crimping pliers for JPT contacts -VAS
1978/9A- or crimping pliers (base tool) -VAS 1978/1-2- with
attached head adapter for JPT contacts -VAS 1978/9-1-, the
correct connection between crimp contact, wire and single wire
seal is assured. The tool is only to be used for the application
described. |
 Note Note
| Crimped to the repair wiring are normal contacts and
gold-plated contacts. The repair contact must always be the same
type as the contact installed in the factory. |
| Crimping on new contact with single wire seal |
| – |
Insert head adapter for JPT contacts -VAS 1978/9-1- in
crimping pliers (base tool) -VAS 1978/1-2-
→ Chapter. |
|
|
|
| – |
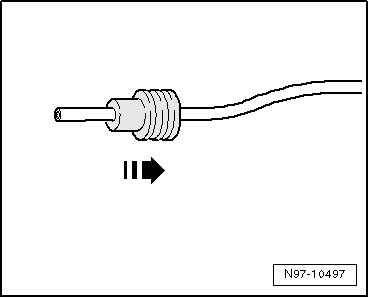
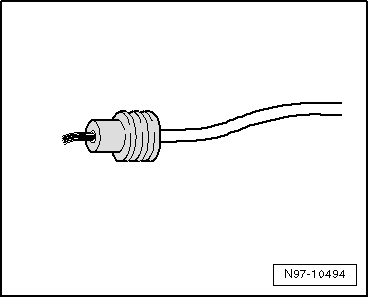
Attach the single wire seal to the repair wire. |
Note
| When doing this, the small diameter of the single wire seal
must face the contact to be crimped on. |
|
|
|
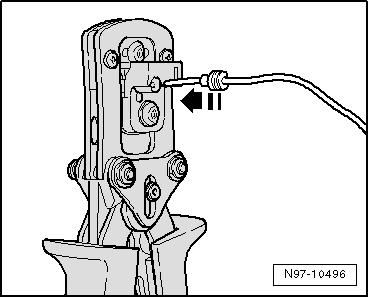
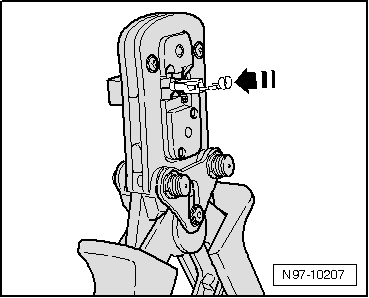
| – |
Open the crimping pliers and insert the end of the repair
wire in the opening of the crimping pliers for wire stripping. |
|
|
|
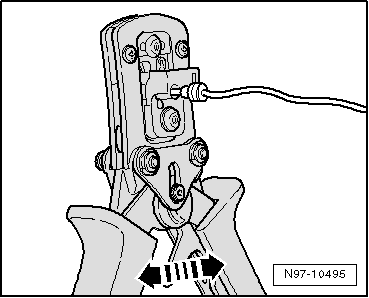
| – |
Close the crimping pliers fully. |
| – |
Open the crimping pliers again and removed the stripped wire
end. |
|
|
|
| – |
Push the single wire seal towards the stripped wire end
until it is flush with the wiring insulation. |
|
|
|
| – |
Insert the new crimp contact in the mounting of the crimping
pliers. |
|
|
|
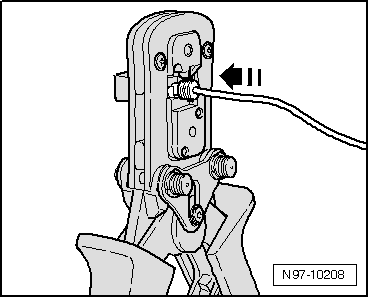
| – |
Insert the stripped wire end with the positioned single wire
seal in the crimp contact until it comes into contact with the
“wire stop”. |
| – |
Crimp the contact, wire and single wire seal by closing the
crimping pliers fully. |
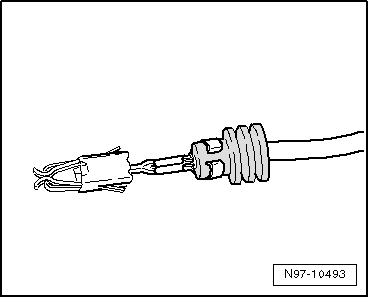
| – |
Open the crimping pliers again and remove the successfully
crimped contact. |
|
|
|
| Successful crimping can be identified by clean and equal
application of pressure on the wire and single wire seal in the
contact and by a stamp on the rear that indicates the correct
tool was used in the correct manner to carry out the crimping
process. |
|
|
|
A new approach to repair work on aerial wires has been
developed
→ Chapter.
Now connecting wires in different lengths and various
...
Repair position with single crimp connector
–
Place the wire to be repaired to one side (about 20 cm
eith ...
Other materials:
Removing and installing roof aerial -RX5-
Special tools and workshop equipment
required
Torque wrench -V.A.G 1783-
Note
Aerial wirings are directly plugged at the base of roof
aerial -RX5-.
...
Sanding
Avoid sanding through to substrate
–
It is recommended to carefully sand the marked area by hand
to avoid “sanding through” the cathodic dip primer.
Seam seals
S ...
Overview of the driver side
Fig. 5 Overview of the driver side (left-hand
drive vehicles)
Fig. 6 Overview of the driver side (right-hand
drive vehicles)
Key for and :
Button for interior monitoring
Light switch
Daytime running lights or daytime headlights
Automatic hea ...
© 2016-2026 Copyright www.vwgolf.org

 Renewal of aerial wiring
 Wiring open circuit with one repair position