Volkswagen Golf Service & Repair Manual: Repairing suspension strut
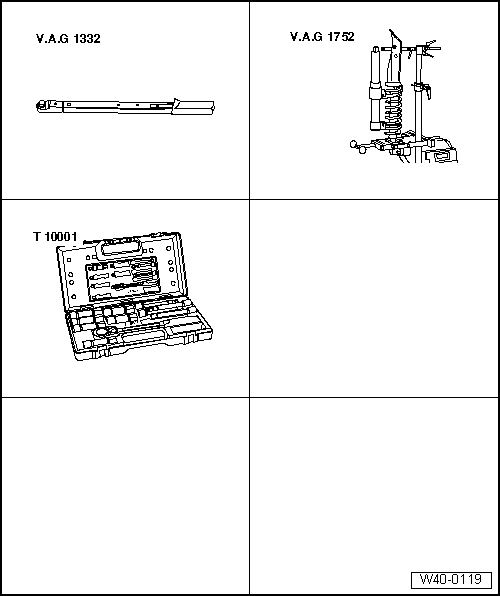
| Special tools and workshop equipment required |
| Torque wrench -V.A.G 1332- |
| Spring compressor -V.A.G 1752/1- |
| Spring retainer -V.A.G 1752/4- |
| Shock absorber set -T10001- |
| Commercially available ratchet handle |
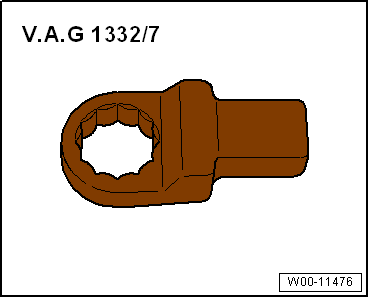
| Ring spanner insert -V.A.G 1332/7- |
| – |
Remove coil spring strut
→ Anchor. |
|
|
|
| – |
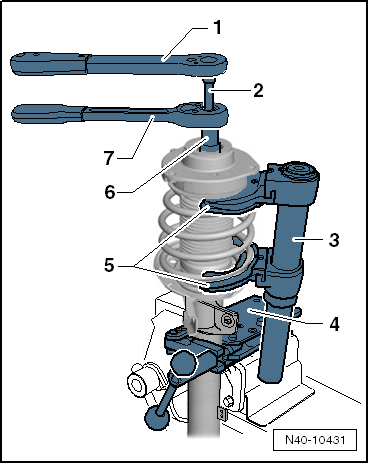
Clamp suspension strut support clamp -V.A.G 1752/20--4-
in a vice. |
| – |
Clamp suspension strut in suspension strut support clamp -V.A.G
1752/20--4-. |
| – |
Pre-tension coil spring with spring compressor -V.A.G
1752/1- until deep groove ball thrust bearing is free at top. |
| 1 - |
Torque wrench -V.A.G 1332- |
| 2 - |
Tool insert -T10001/8- |
| 3 - |
Spring compressor -V.A.G 1752/1- |
| 4 - |
Strut support clamp -V.A.G 1752/20- |
| 5 - |
Spring retainer -V.A.G 1752/4- |
| 6 - |
Tool insert -T10001/5- |
| 7 - |
Ratchet handle -T10001/11- |
 WARNING
| First compress spring far enough to ensure that
upper spring plate is free. |
|
|
|
|
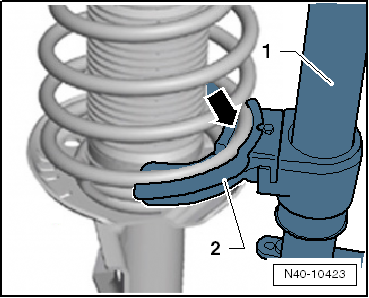
| – |
Ensure that coil spring is correctly seated in spring
retainer -V.A.G 1752/4--arrow-. |
|
|
|
| – |
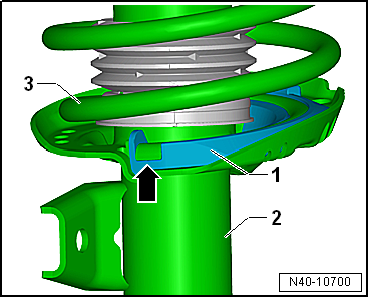
Insert spring seat -1- into
shock absorber -2-. |
| – |
Fit coil spring -3- with spring
compressor -V.A.G 1752/1- onto lower spring seat. |
| The end of the coil spring must lie against the stop
-arrow-. |
| – |
Assemble all other parts and use new nut on piston rod. |
| – |
Relieve tension on spring compressor -V.A.G 1752/1- and
remove from coil spring. |
| – |
Remove suspension strut from suspension strut support clamp
-V.A.G 1752/20-. |
| – |
Install suspension strut
→ Chapter. |
| → Chapter „Assembly overview - suspension strut, upper
suspension link“ |
|
|
 |
Special tools and workshop equipment required
Torque wrench -V.A.G 1332-
Spreader -3424-
Engine and gearbox jack -V.A.G 1383 A-
...
Other materials:
Seat heating
Fig. 53 In the centre console: buttons
for the front seat heating
First read and observe the introductory information
and safety warnings The seat cushions and backrests can be heated electrically
when the ignition is switched on. Some seat versions have heated backrests.
Do not switch o ...
Permissible deviation in tread depth
Only tyres of the same construction and tread pattern should
be used on all four wheels.
Always fit the tyres with the deeper tread to the front
axle.
It is basically possible to replace tyres individually.
...
Introduction
This chapter contains information on the following subjects:
→ Function
When the toll card system is switched on and functioning, tolls will be charged
automatically when driving through a toll booth. The charge will be confirmed by
an acoustic signal. The charges will be relayed ...
© 2016-2026 Copyright www.vwgolf.org

 Removing and installing suspension strut