Volkswagen Golf Service & Repair Manual: Repair set, aerial cable VAS 6720
| Checking the aerial wire:
→ Anchor |
| Changing tool adapter:
→ Anchor |
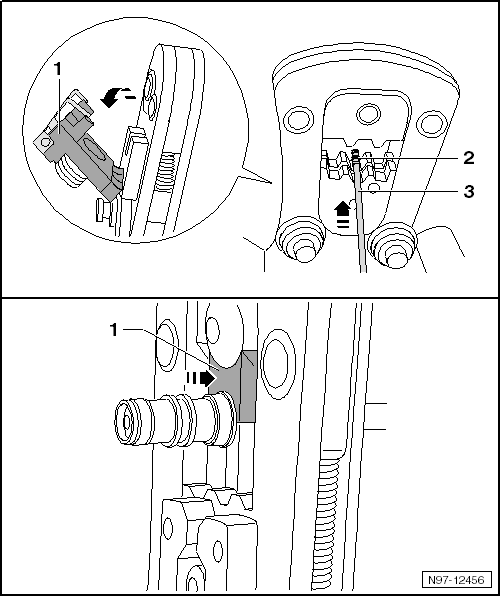
| Cutting aerial wire:
→ Anchor |
| Stripping shielding:
→ Anchor |
| Stripping outer sleeve:
→ Anchor |
| Stripping inner insulation:
→ Anchor |
| Crimping inner conductor:
→ Anchor |
| Crimping outer conductor:
→ Anchor |
| Special tools and workshop equipment
required |
| Repair set, aerial cable -VAS 6720- |
| The repair set, aerial cable -VAS 6720- makes it possible to
attain optimal repair quality in the repair of aerial wiring RG
174 (blue) and RKT 031 (black). The set includes the respective
stripping tools and crimping tools for both aerial cables. In
addition, the case includes all the separate parts needed to
connect the Genuine plug in nearly production quality. In this
case, only the 0-coded connector (green) is required. All other
connecting wires for the various infotainment systems can be
found in ETKA (EL-electrical connection elements) in plate
035-XX. These various adapter aerial wires are specific to
vehicle models and must always be ordered separately. All the
separate parts can be found in the above-named plate for
reordering. The compartments of the case are labelled with the
part numbers of the consumable materials. The repair set is
based on the existing adapters and pliers system of the VAS
1978B. |
 Note Note
| Additional information:
→ Operating manual, Repair set, aerial cableVAS 6720 |
| Checking the aerial wire: |
|
|
|
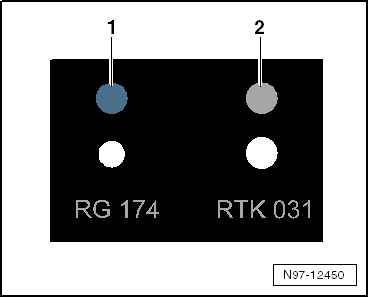
| Before beginning repairs, determine which aerial wire is
affected using the gauge. |
| -2- System RTK 031 = grey |
| In both systems, the positioner of the adapters is
colour-coded accordingly. |
| – |
Select appropriate adapter according to check of aerial wire
→ Anchor. |
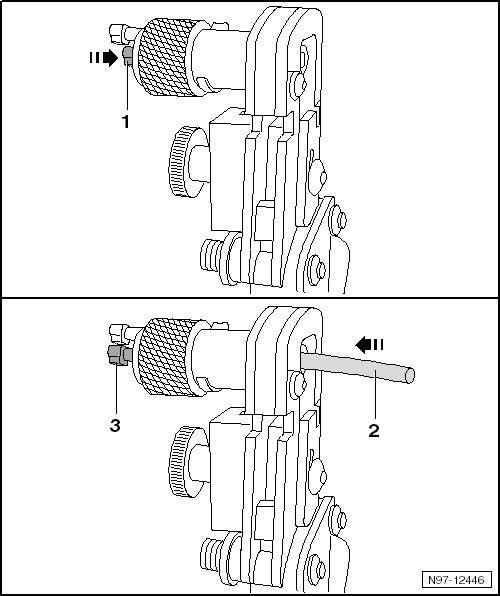
| – |
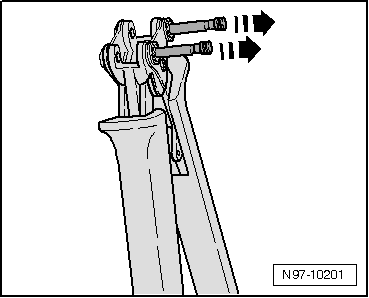
Open handles of pliers completely. |
|
|
|
| – |
Release the two locking pins -arrows-
from handles of pliers and pull them out. |
|
|
|
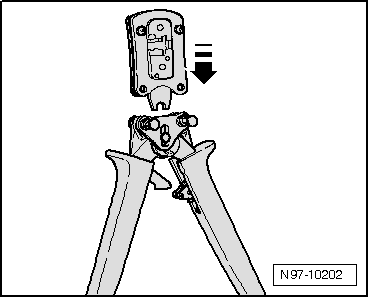
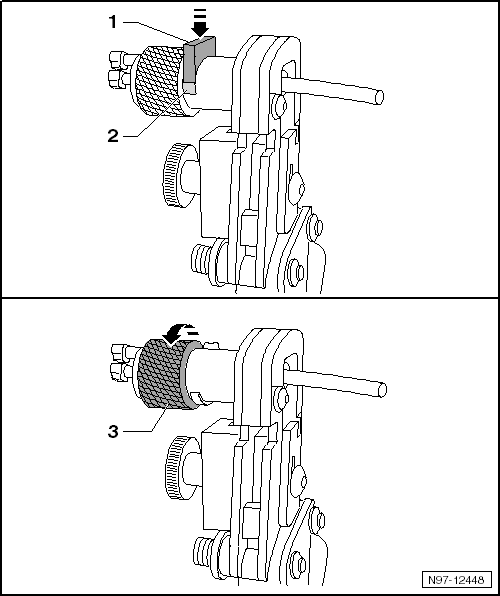
| – |
Insert required tool adapter from above
-arrow- into handles of pliers. |
|
|
|
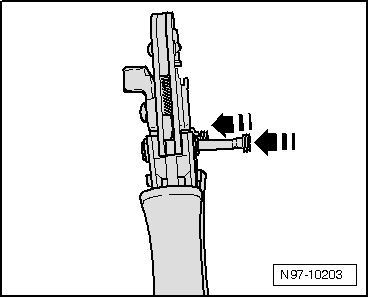
| – |
Lock adapter into handles of pliers by pressing in pins
-arrows-. |
|
|
|
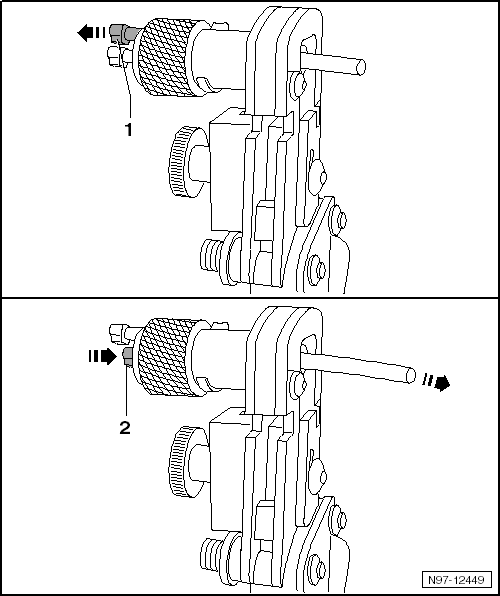
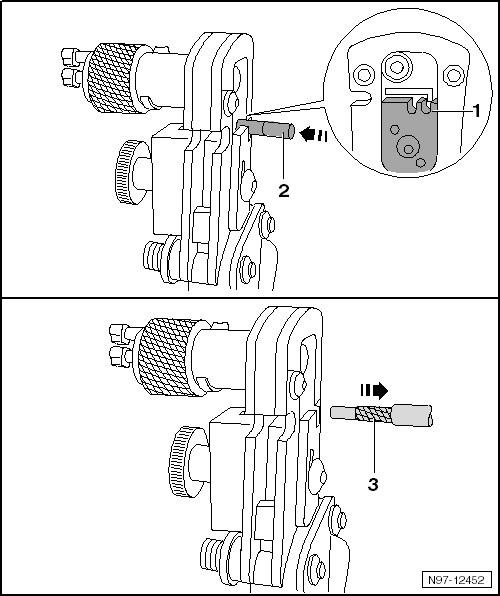
| – |
Push aerial wire -2- into
cutting mechanism -1-. |
| – |
Close tool and open it again. |
| – |
Pull aerial wire out of cutting mechanism. |
|
|

|
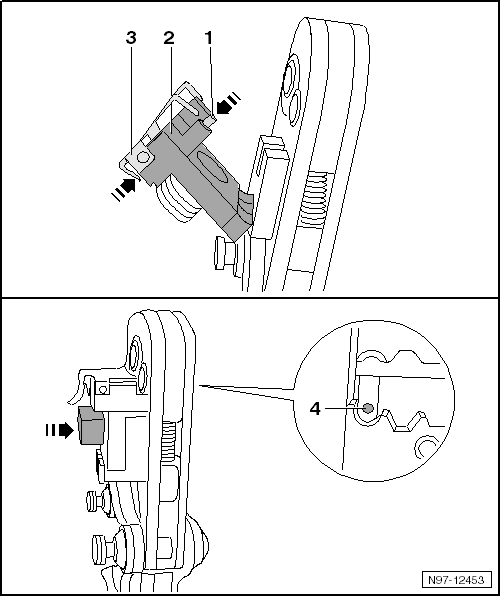
| – |
Push locating pin -1- into rotary
cutter to stop. |
| – |
Push aerial wire -2- into rotary cutter
to stop. The locating pin -3- is again
entirely visible. |
| – |
Push blade holder -1- against shaft of
rotary cutter until it engages. The gap -2-
beneath the blade holder is completely closed. |
| – |
Hold aerial wire securely so that it cannot turn. |
| – |
Turn rotary cutter -3- approximately 2
times in direction of arrow until it rotates easily. |
| – |
Pull release pin -1-. The blade holder
is released and separates from aerial wire. |
| – |
Push locating pin -2- into rotary
cutter to stop. The aerial wire is pressed out of rotary cutter. |
| – |
Remove shielding from aerial wire. |
| – |
Remove remnants of insulation from rotary cutter. |
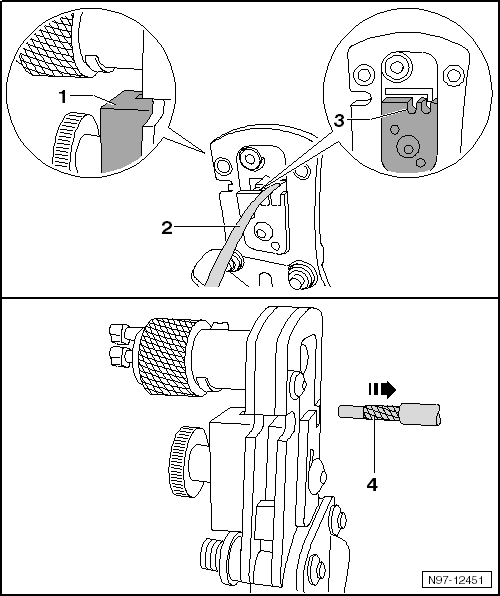
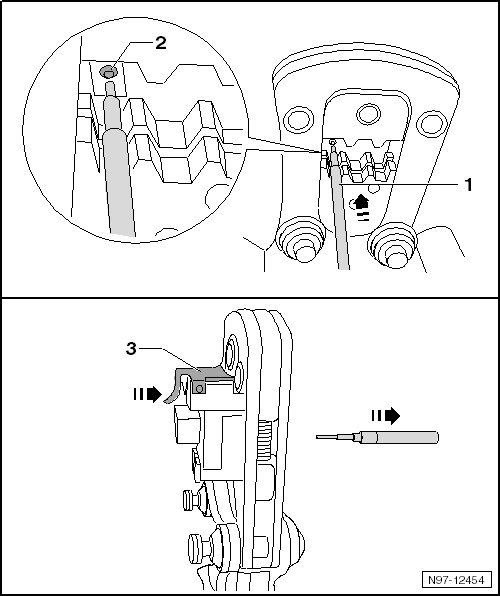
| – |
Push aerial wire -2- through notch
-3- into tool adapter to stop
-1-. |
| – |
Close tool and open it again. |
| – |
Pull out aerial wire -4-. |
| Stripping inner insulation: |
|
|
|
| – |
Push aerial wire -2- through notch
-1- into tool adapter to stop. |
| – |
Close tool and open it again. |
| – |
Pull out aerial wire -3-. |
| Crimping inner conductor: |
|
|
|
| – |
Select appropriate adapter according to check of aerial wire
→ Anchor
→ Anchor. |
| – |
Tilt back swinging positioner -2-. |
| – |
Open positioning piece -3-. Positioning
piece swings upwards. |
| – |
Push inner contact -1- into swinging
positioner to stop and loosen positioning piece. The inner contact is
fixed in place. |
| – |
Tip swinging positioner inwards. The inner contact
-4- is positioned in the tool adapter. |
| – |
Push aerial wire -1- into inner contact
-2- in tool adapter. Hold swinging position
in place while doing so. |
| – |
Close tool until it opens by itself. |
| – |
Open positioning piece -3- and pull out
aerial wire. |
| Crimping outer conductor: |
|
|
|
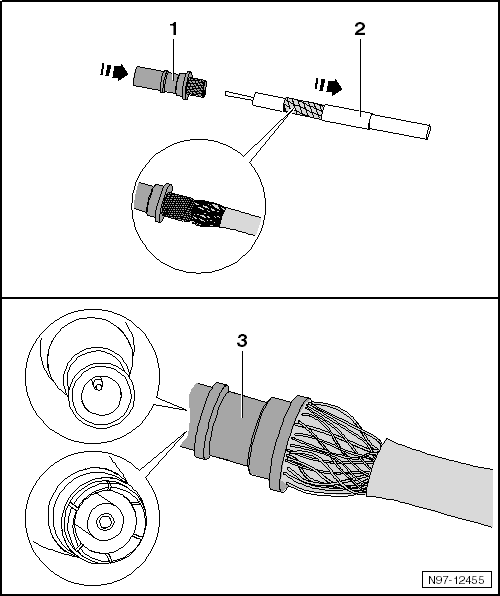
| – |
Push sleeve -2- and outer contact
-1- over inner conductor. The knurled
contact part must be pushed under shielding -3-
but over the aluminium foil. |
| – |
Push on outer contact -4- completely.
Ensure proper seating of female connector and pin. |
| – |
Push on sleeve -3- to outer contact. |
| – |
Open tool and tilt out swinging positioner -1-. |
| – |
Position mounted outer contact -2- in
tool adapter in middle notch on contact edge -4-. |
| – |
Close tool and open it again. |
Removing
–
Pull fibre optic cable connector off the relevant control
unit.
–
Release the locking m ...
Note
Observe the general notes on repairs to the vehicle
electrical system
→ Chapter.
Allocation of the a ...
© 2016-2026 Copyright www.vwgolf.org

 Detaching fibre optic cable from cable harness connector
 Notes on repairs to contact housings and connectors