Volkswagen Golf Service & Repair Manual: Renewing trim elements, bonded trim elements
| Special tools and workshop equipment
required |
|
|
|
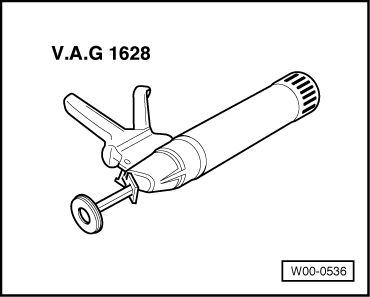
| Cartridge gun -V.A.G 1628- |
|
|
|
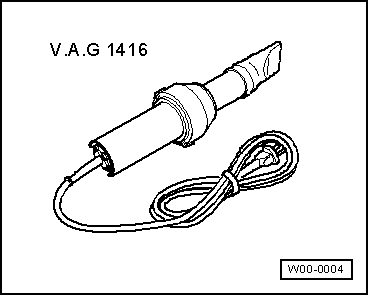
| Hot air blower -V.A.G 1416- |
|
|
|
|
|
-DH 009 100 A2- |
|
|
-LSE 020 100 A3- |
 Note
Note
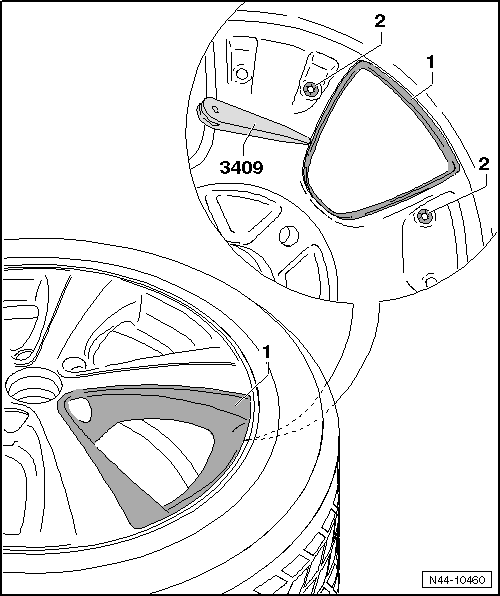
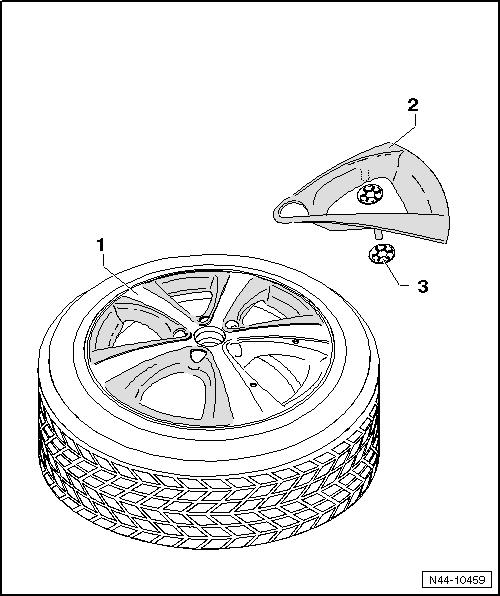
| The trim element cannot be removed without causing damage to the
element. |
| – |
Remove clamping washers -2- on inner
side of alloy wheel. |
| – |
Heat outer side of trim element -1-
with hot air blower -V.A.G 1416-. |
 Caution Caution
| Use only low heat on tyres and alloy wheels (do not
overheat). |
|
| – |
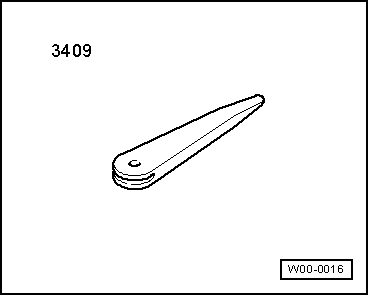
Release trim element -1- on inner side
of alloy wheel using wedge -3409-. |
| – |
Grasp under a corner on the outside and pull trim element
-1- forcefully off alloy wheel. |
Note
| Cut back adhesive PUR beads on alloy wheel. |
| Residual material is used as a bonding base for the new trim
element. |
| The new trim element can be installed immediately. |
| These alloy wheels are fitted with exchangeable trim elements.
Follow these instructions during installation. |
| Ensure bonding surfaces in alloy wheel and trim element are free of
dust and grease. |
| Clean bonding surfaces with silicone remover -LSE 020 100 A3-. |
| – |
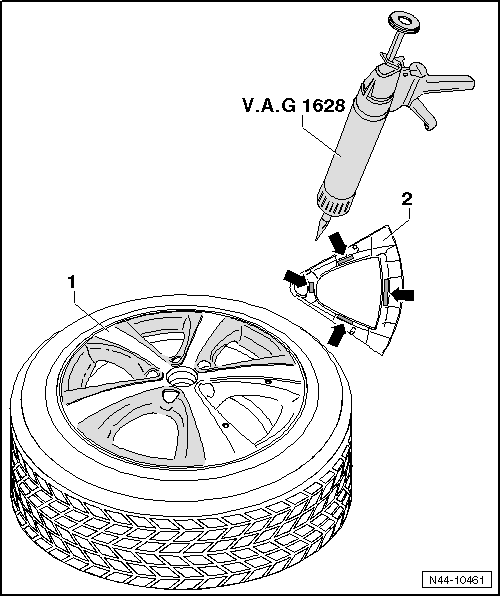
Apply 1K window adhesive -DH 009 100 A2- to bonding surfaces
-arrows- using cartridge gun -V.A.G 1628-. |
| Adhesive bead: length = approx. 25 mm and diameter = approx. 10 mm. |
| – |
Push trim element -2- forcefully into
alloy wheel -1-. |
| – |
Secure trim element -2- on inner side
of alloy wheel -3- with clamping washers. |
| Minimum curing period: 3 hours at a minimum room temperature of
15°C. |
 WARNING WARNING
| Alloy wheel must be rebalanced
→ Chapter. |
|
These wheels are fitted with exchangeable trim elements.
Follow these instructions during installation.
–&n ...
© 2016-2026 Copyright www.vwgolf.org


 Renewing trim elements, bolted trim elements