Volkswagen Golf Service & Repair Manual: Removing and installing treble horn -H2- / bass horn -H7-
 Note Note
| Removal and installation are described for the left side.
Removal and installation on the right side are carried out in
the same way. |
|
|
|
| – |
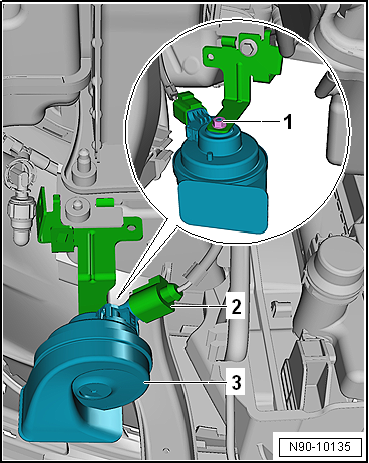
Detach horn -3- from bracket. |
| – |
Disconnect electrical connector -2-. |
| Install in the reverse order of removal, observing the
following: |
| → Chapter „Assembly overview - horn“ |
| Removing bracket together with horn |
|
|
|
| – |
Remove bracket together with horn -3-. |
| – |
Disconnect electrical connector -2-. |
| Installing bracket together with horn |
| Install in the reverse order of removal, observing the
following: |
| → Chapter „Assembly overview - horn“ |
|
|

|
1 -
Bracket
For horn
Removing and installing
→ Chapter
2 -
Bolt
Specified torque ...
© 2016-2026 Copyright www.vwgolf.org

 Assembly overview - horn