Volkswagen Golf Service & Repair Manual: Removing and installing tank flap unit, e-Golf
| – |
Remove wheel housing liner
→ Chapter. |
| – |
Disconnect connector -2- for switch
-3-. |
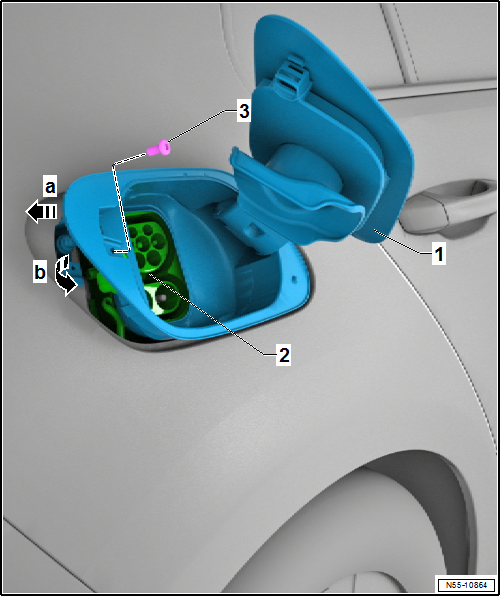
| – |
Slightly pull tank flap unit towards rear
-arrow a- out of catches. |
| – |
Swing tank flap unit -1- out of the
side panel -arrow b-. |
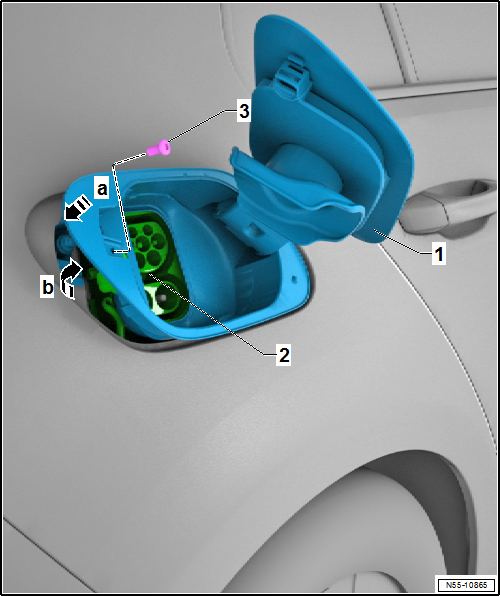
| – |
Push electrical wiring for switch into side panel, and connect it. |
| – |
Swing tank flap unit -1- into the side
panel -arrow b-. |
| – |
Then, push tank flap unit completely into side panel
-arrow a-. |
| l |
Check function of release components. |
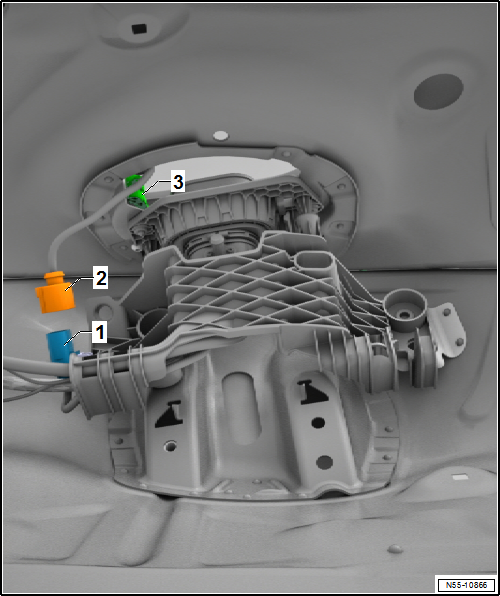
Removing
–
Screw off tank cover.
–
Remove bolt -3-.
–
Slightly ...
Removing
–
Push tank flap -1- out of catches of
tank flap unit -2--arrows-.
–
Remove tank flap.
Installing
...
Other materials:
Removing and installing sun visor
Note
Removal and installation is described for the sun visor
on driver side. Follow same instructions for the front passenger
side as appropriate.
Special tools and workshop equipment
required
&n ...
Checking vacuum generation
Note
The average air pressure of the earth's atmosphere at sea
level is 1013 mbar and decreases steeply as the altitude
increases (approx. 100 mbar/1,000 m altitude). Local and time
fluctuations also influence vacuum generation.
...
Infrared heater -VAS 6877
Designation:
Infrared heater -VAS 6877-
Product description:
The infrared heater is used to dry putty, filler, base coat,
top coat and clear coat on vertical or horizontal surfaces.
...
© 2016-2026 Copyright www.vwgolf.org

 Removing and installing tank flap unit
 Removing and installing fuel tank flap