Volkswagen Golf Service & Repair Manual: Removing and installing rear seat backrest cover and padding
| Special tools and workshop equipment
required |
|
|
|
| |
|
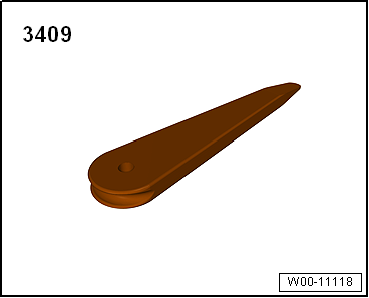
Removal wedge -3409 |
| – |
Remove rear seat backrest
→ Chapter. |
| – |
Remove rear head restraint
→ Chapter. |
| – |
Remove trim for locking mechanism
→ Chapter. |
| – |
Remove net partition mounting on right rear seat backrest
(2/3)
→ Chapter. |
| Continued for all vehicles |
|
|
|
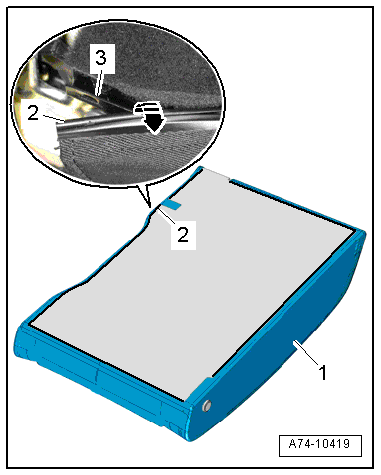
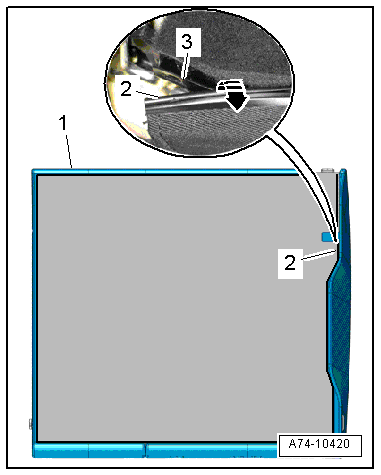
| – |
Release clips -2- in area of
inner support pin from backrest cover -1-. |
|
|
|
| Left rear seat backrest (1/3) |
| – |
Starting at locking mechanism, lever beading strip
-2- for backrest cover all round
off backrest frame -3--arrow- using
a screwdriver. |
| – |
Remove rear head restraint guides
→ Chapter. |
| – |
Remove backrest cover -1- with
backrest padding from backrest frame. |
|
|
|
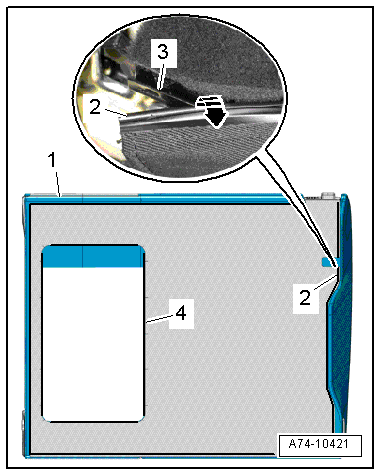
| Right rear seat backrest (2/3) without through-loading
aperture |
| – |
Remove rear centre belt guide
→ Chapter. |
| – |
Starting at locking mechanism, lever beading strip
-2- for backrest cover all round
off backrest frame -3--arrow- using
a screwdriver. |
| – |
Remove rear head restraint guides
→ Chapter. |
| – |
Remove backrest cover -1- with
backrest padding from backrest frame. |
|
|
|
| Right rear seat backrest (2/3) with through-loading aperture |
| – |
Remove rear centre belt guide
→ Chapter. |
| – |
Remove lid for through-loading aperture with rear centre
armrest
→ Chapter. |
| – |
Remove cover frame for through-loading aperture
→ Chapter. |
| – |
Starting at locking mechanism, lever beading strip
-2- for backrest cover all round
off backrest frame -3--arrow- using
a screwdriver. |
| – |
Lever beading strip -4- for
backrest cover all round off through-loading aperture using a
screwdriver. |
| – |
Remove rear head restraint guides
→ Chapter. |
| – |
Remove backrest cover -1- with
backrest padding from backrest frame. |
|
|
|
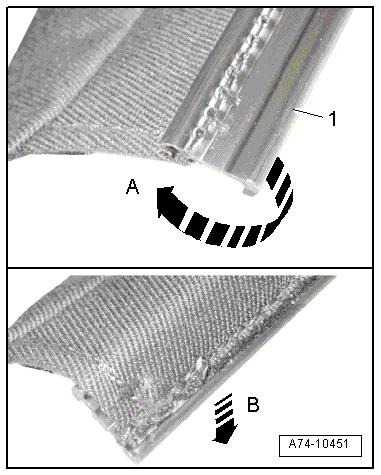
| Install in reverse order, but note the following: |
| – |
Fold beading strip -1- 90°
inwards -arrow A-. |
| – |
Attach side beading strips into grooves in backrest frame
-arrow B-. |
| – |
Attach fastening frame into backrest frame in area of head
restraint. |
|
|
|
Removing
–
Remove rear bench seat
→ Chapter.
–
...
Removing
–
Fold down lid for through-loading aperture.
–
Release locking lugs -1- using
a screwdri ...
Other materials:
Removing and installing dash panel insert trim
Special tools and workshop equipment
required
Removal wedge -3409
Removing
–
Remove side vent on driver side
→ ...
Checking valve guides
Special tools and workshop equipment
required
Universal dial gauge bracket -VW 387-
Dial gauge -VAS 6079-
...
Gaskets, seals
After removing gaskets and seals, always inspect contact
surface of housing or shaft for burrs resulting from removal or
for other signs of damage.
Before installing seals, lightly oil outer diameter and
half-fill space between sea ...
© 2016-2026 Copyright www.vwgolf.org

 Removing and installing bench seat cover and padding
 Removing and installing intermediate padding, backrest with through-loading
aperture
Removing and installing intermediate padding, backrest with through-loading
aperture