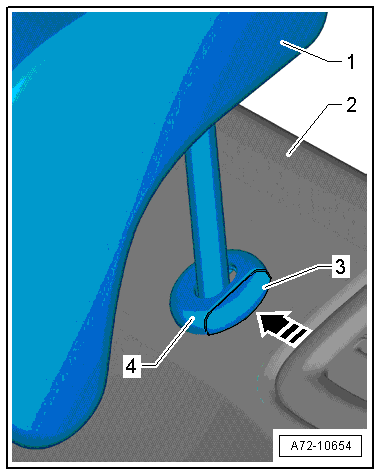
Volkswagen Golf Service & Repair Manual: Removing and installing head restraint
| – |
Press release button -3- for
height adjustment on head restraint guide
-4- in -direction of arrow-. |
| – |
At the same time pull head restraint
-1- out of rear seat backrest -2-
as far as stop. |
|
|
|
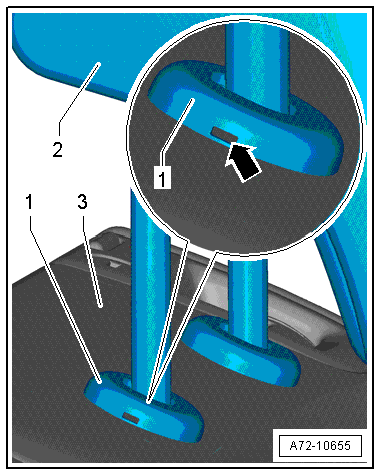
| – |
Insert a small flat-bladed screwdriver into opening
-arrow- of head restraint guide
-1- and press in locking spring as
far as stop. |
 Note Note
| The aperture in the head restraint guide
-arrow- may be on
»right« or
»left« as seen from direction of travel. |
| – |
At the same time pull head restraint
-2- out of rear seat backrest -3-
and remove it. |
| Installation is carried out in reverse order. |
|
|
|
Special tools and workshop equipment
required
Torque wrench -V.A.G 1410-
...
Note
2 commercially available screwdrivers with a blade height of
0.4 mm and a blade width of 8 mm are required for removal.
...
© 2016-2026 Copyright www.vwgolf.org

 Removing and installing centre armrest
 Removing and installing head restraint guide