Volkswagen Golf Service & Repair Manual: Removing and installing fuel gauge sender 2 -G169
| Special tools and workshop equipment
required |
|
|
|
| – |
Observe safety precautions
→ Chapter. |
| – |
Observe rules for cleanliness
→ Chapter. |
| – |
Move front seats to foremost position. |
| – |
Remove rear bench seat
→ General body repairs, interior; Rep. gr.72. |
| – |
Draining fuel tank
→ Chapter |
|
|
|
| – |
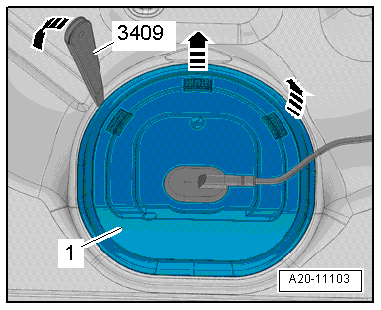
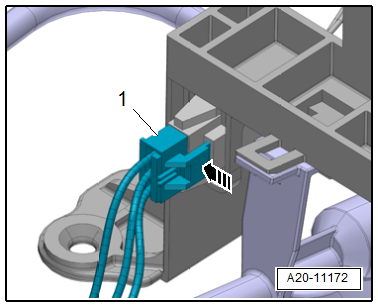
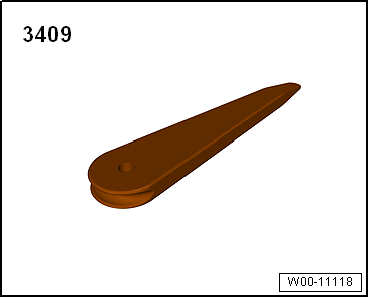
Unclip cover -1- for sealing
flange on left from retaining tabs
-arrows- using removal wedge -3409-. |
|
|
|
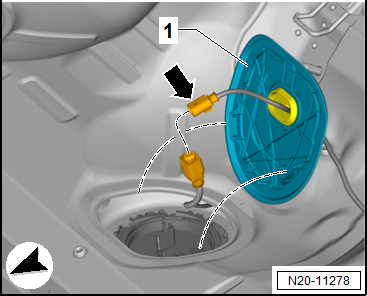
| – |
Disconnect electrical connector
-arrow-. Lay cover -1- with
wiring harness to one side. |
|
|
|
| – |
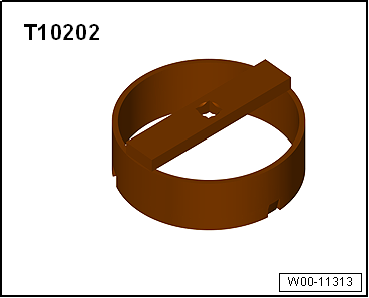
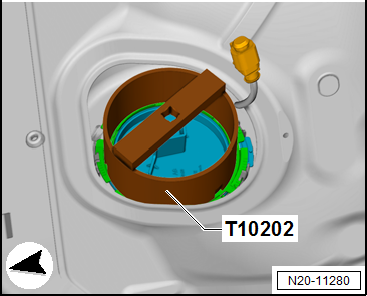
Open locking ring using wrench -T10202-. |
| – |
Remove flange and seal from opening in fuel tank. |
|
|
|
| – |
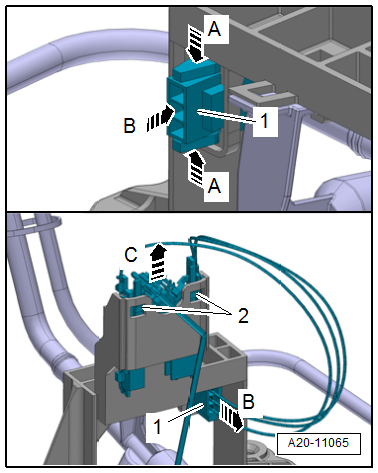
Reach through opening into fuel tank. Release connector
catches -arrow-, and disconnect
connector -1-. |
|
|
|
| – |
Grasp through opening in fuel tank., release connector
catches -arrows A-, and push
connector -1- out of retainer
-arrow B-. |
| – |
Grasp through opening in fuel tank, release retaining tab at
lug -2-, and at the same time pull
out fuel gauge sender 2 -G169- upwards
-arrow C-. |
| Installation is carried out in the reverse order; note the
following: |
| → Chapter „Assembly overview - fuel delivery unit and fuel gauge
sender“ |
 Note Note
| Note installation position of flange. |
| Ensure that the connectors are engaged correctly. |
|
|
|
Removing
–
Remove fuel delivery unit
→ Chapter.
–
Disconnect connector -4- from
r ...
Removing
Note
The tank pressure sensor -G400- is located in the pressure
regulating valve on the activated charcoal filter
→ ...
© 2016-2026 Copyright www.vwgolf.org

 Removing and installing fuel gauge sender -G-, vehicles with four-wheel
drive
Removing and installing fuel gauge sender -G-, vehicles with four-wheel
drive Removing and installing tank pressure sensor -G400