Volkswagen Golf Service & Repair Manual: Removing and installing brake pads, FS III front brake
| Special tools and workshop equipment
required |
|
|
|
| Torque wrench -V.A.G 1331- |
|
|
|
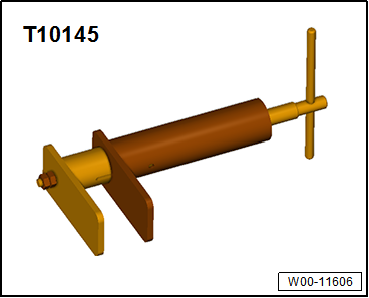
| Piston resetting appliance -T10145- |
| Lithium grease -G 052150 A2- |
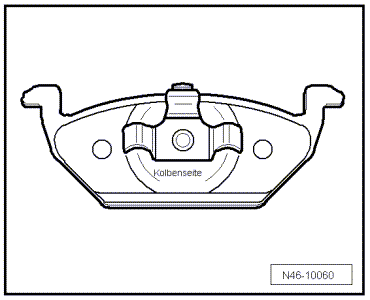
| Mark brake pads/linings when removing if they are to be
reused. Fit in same position when installing, or braking will be
uneven. |
|
|
|
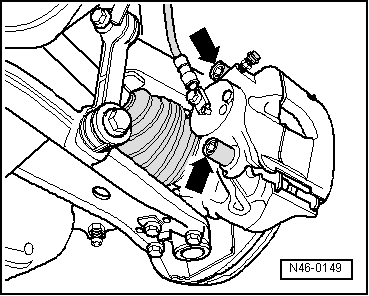
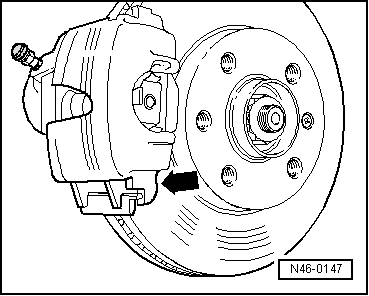
| – |
Unscrew and remove both guide pins
-arrows- from brake caliper. |
| – |
Remove brake caliper and secure with wire so that weight of
brake caliper does not strain or damage brake hose. |
| – |
Take brake pads out of brake caliper. |
Health hazard due to poisonous dust coming out of brake system.Risk of
irreversibly deposited dust particles in the lungs. Risk of respiratory
health problems.Never blow out the brake system with compressed air.
| – |
Thoroughly clean contact surfaces for brake pads on brake
carrier, and remove corrosion. |
 Note Note
| Use only methylated spirits for cleaning the brake caliper
housing. |
| Before pressing pistons back, draw off some brake fluid from
reservoir with a bleeder bottle. Otherwise, particularly if
reservoir has been topped up, fluid will overflow and cause
damage. |
| – |
Lightly grease guide surface on brake carrier with lithium
grease -G 052150 A2-. |
|
|
|
| – |
Insert brake pads into brake caliper and piston. |
|
|
|
| – |
Insert brake pad with “piston side” written on backing plate
into brake piston. |
|
|
|
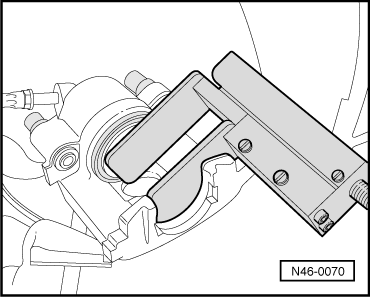
| – |
Install brake caliper with brake pads on wheel bearing
housing. |
| – |
First position brake caliper at bottom
-arrow- of brake carrier. |
| Brake caliper stud must be positioned behind brake carrier
guide! |
| – |
Bolt brake caliper to brake carrier with both guide pins. |
Note
| After every brake pad change, depress brake pedal firmly
several times with vehicle stationary, so that brake pads are
properly seated in their normal operating position. |
| Check brake fluid level after changing brake pads. |
| → Chapter „Assembly overview - FS III front brake“ |
| Wheel bolts
→ Running gear, axles, steering; Rep. gr.44. |
|
|
|
Note
After every brake pad change, depress brake pedal firmly
several times with vehicle stationary, so that brake pads are
properly seated in th ...
Special tools and workshop equipment
required
Torque wrench -V.A.G 1331-
...
Other materials:
Various securing systems
Fig. 77 On the rear seats: figures Ⓐ and
Ⓑ illustrate the main securing points for the child restraint system on the lower
retaining rings and top tether. Figure Ⓒ shows how to secure the child restraint
system using the vehicle seat belt
First read and observe the introductory informa ...
Assembly overview - belt pulley, Sanden air conditioner compressor
1 -
Nut
25 Nm
Note
In order to protect the thread of the air conditioner compressor
drive shaft an additional plastic cap is fitted (not shown in
illustration).
–
To unfasten and tighten the hex ...
Removing and installing air conditioner compressor fuse -S355-
Special tools and workshop equipment
required
Torque wrench -V.A.G 1783
Torque wrench -V.A.G 1331-
Removing
...
© 2016-2026 Copyright www.vwgolf.org

 Assembly overview - front brakes PC57 and C60
 Removing and installing brake pads, front brakes PC57 and C60