Volkswagen Golf Service & Repair Manual: Plug-in connectors
Separating plug-in connectors
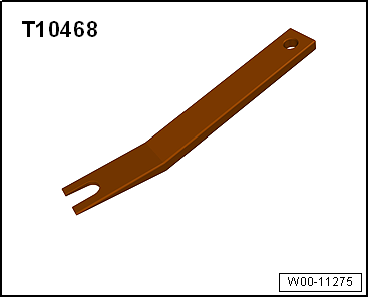
| Special tools and workshop equipment
required |
|
|
|
| Assignment of plug-in connectors |
 Note Note
| The plug-in connectors for fuel, vacuum and breather lines
are colour coded. There is either a coloured dot on the plug-in
connector or the release button is of the respective colour
→ Anchor. |
| Plug-in connectors for fuel lines must engage
»audibly« when joined. |
| Ensure plug-in connector is secured properly by pulling it. |
|
|
|
| Plug-in connector |
Colour
code on plug-in connector |
| Fuel supply |
Black |
| Fuel return line |
Blue |
| Breather |
White, beige |
| Vacuum |
Green |
| The fuel system is pressurised.Risk of injury
due to fuel which may spurt out.Wear eye protection.Wear protective
gloves.Release pressure: place clean cloth around connection and
carefully open connection. |
|
|
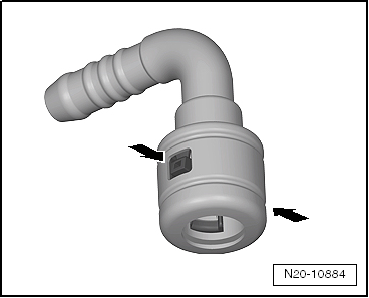
| Plug-in connector with release buttons
-arrows- on right and left |
|
|
|
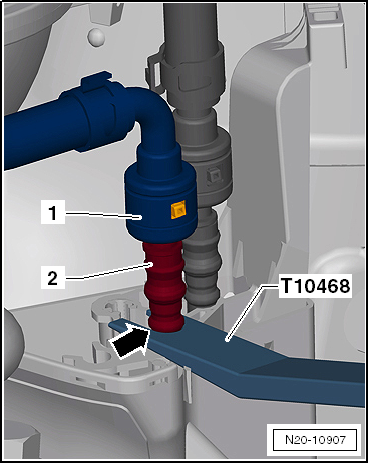
| It is necessary to counterhold the fuel connection
-1- in the engine compartment. |
| – |
Insert lever between heat shield and stop -T10468--arrow-
of fuel line -2- and counterhold. |
|
|
|
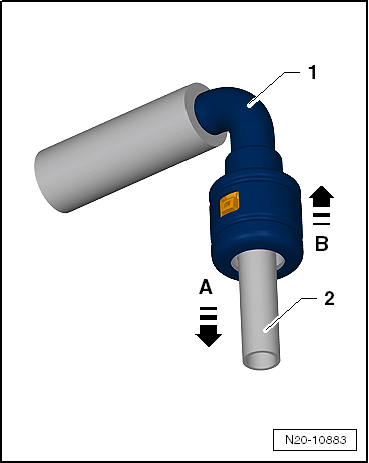
| Continuation for all coupling points of fuel system: |
| – |
Push plug-in connector -1- in
-direction of arrow A-. |
| – |
Press and hold release buttons. |
| – |
Pull plug-in connector -1- off
fuel line -2- in
-direction of arrow B-. |
| Take note of colour assignment during installation
→ Anchor |
| Plug-in connectors for fuel lines must engage
»audibly« when joined. |
| – |
Ensure plug-in connector is secured properly by pulling it. |
|
|
|
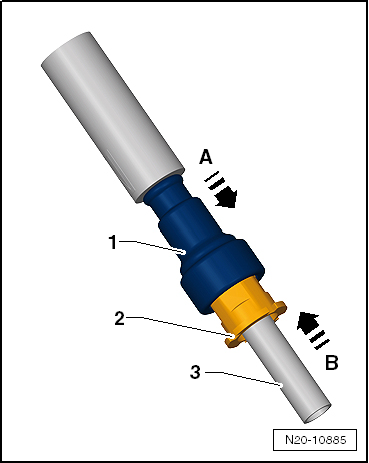
| Push-fit coupling with pull-release mechanism
-arrow-. |
|
|
|
| – |
Push plug-in connector -1- in
-direction of arrow A-. |
| – |
Pull pull-release mechanism -2-
in -direction of arrow B-. |
| – |
Pull plug-in connector -1- off
fuel line -3- in
-direction of arrow B-. |
| Take note of colour assignment during installation
→ Anchor |
| Plug-in connectors for fuel lines must engage
»audibly« when joined. |
| – |
Ensure plug-in connector is secured properly by pulling it. |
|
|
|
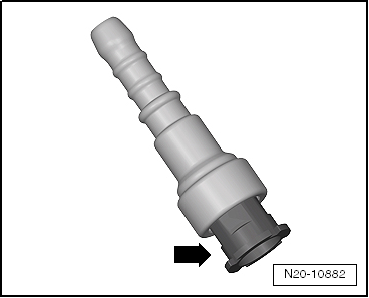
| Push-fit coupling with front button
-arrow- |
| – |
Press release button -arrow-
and pull off plug-in connectors. |
| Take note of colour assignment during installation
→ Anchor. |
| Plug-in connectors for fuel lines must engage
»audibly« when joined. |
| – |
Ensure plug-in connector is secured properly by pulling it. |
|
|
|
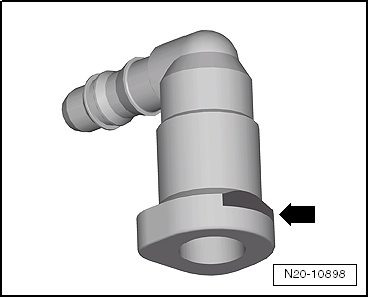
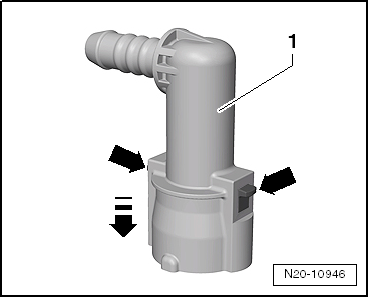
| Push-fit coupling with release button
-arrows- on right and left |
| – |
Push plug-in connector in -direction
of arrow A-. |
| – |
Press release buttons -arrows-
and pull off plug-in connector. |
| Take note of colour assignment during installation
→ Anchor. |
| Plug-in connectors for fuel lines must engage
»audibly« when joined. |
| – |
Ensure plug-in connector is secured properly by pulling it. |
|
|

|
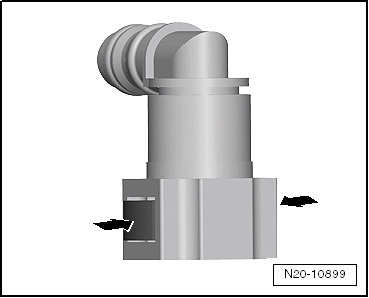
| Push-fit coupling with release buttons
-arrows- on right and left |
| – |
Press release buttons -arrows-
and pull off plug-in connector. |
| Take note of colour assignment during installation
→ Anchor. |
| Plug-in connectors for fuel lines must engage
»audibly« when joined. |
| – |
Ensure plug-in connector is secured properly by pulling it. |
|
|
|
| Push-fit coupling with release buttons
-arrows- on right and left |
| – |
Push plug-in connector -1- in
-direction of arrow- and maintain
pressure. |
| – |
Press release buttons -arrows-
and pull off plug-in connector. |
| Take note of colour assignment during installation
→ Anchor. |
| Plug-in connectors for fuel lines must engage
»audibly« when joined. |
| – |
Ensure plug-in connector is secured properly by pulling it. |
|
|
|
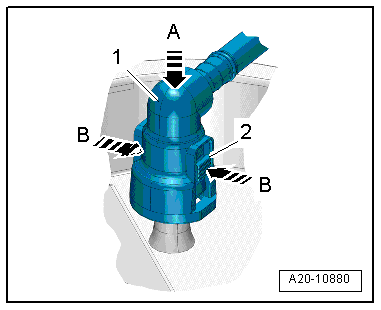
| Plug-in connector -1- with
release buttons -2- on right and
left: |
| – |
Press plug-in connector -1- in
-direction of arrow A- and maintain
pressure. |
| – |
Press release button -2- in
-direction of arrow B- and pull off
plug-in connector -1-. |
| Take note of colour assignment during installation
→ Anchor. |
| Plug-in connectors for fuel lines must engage
»audibly« when joined. |
| – |
Ensure plug-in connector is secured properly by pulling it. |
|
|
|
| Pressure limiting valve and fuel filter are integrated in
fuel delivery unit and cannot be renewed individually
→ Chapter. |
|
|
|
Removing
Fitting location
→ Item:
–
Release and pull off conn ...
© 2016-2026 Copyright www.vwgolf.org

 Removing and installing control unit for fuel tank leak detection -J909-