Volkswagen Golf Service & Repair Manual: Emptying fuel tank if it is more than 3/4
full
| Special tools and workshop equipment
required |
|
|
|
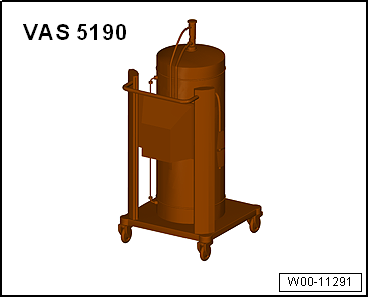
| Fuel extractor -VAS 5190- |
| Fuel extractor -VAS 5190 A- for E 85 fuel (not shown). |
 Note Note
| To extract E 85 fuel, use only fuel extractor -VAS 5190 A-! |
| – |
Observe safety precautions
→ Chapter. |
| – |
Observe rules for cleanliness
→ Chapter. |
|
|
|
| – |
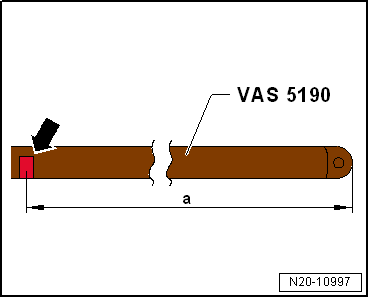
Make a mark -arrow- at
dimension -a- from end of
extraction hose of fuel extractor -VAS 5190-. |
| – |
Use insulating tape for this. |
|
|
|
| Rear axle |
Distance a
(mm) |
| Vehicles with multi-link
rear suspension |
945 mm |
| Vehicles with torsion
beam rear suspension |
1010 mm |
| Vehicles with four-wheel drive |
960 mm |
| – |
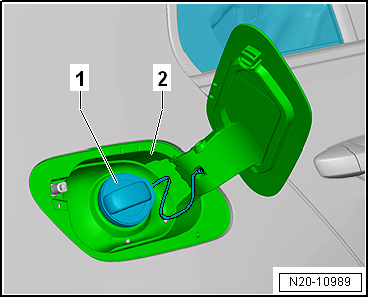
Open tank flap unit -2-. |
| – |
Clean area around fuel filler neck. |
| – |
Unscrew cap -1- for fuel filler
neck. |
| – |
Secure earth wire of fuel extractor to a bare metal part of
the body. |
|
|
|
| – |
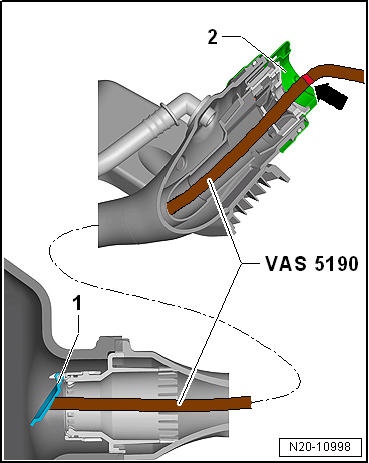
Push extraction hose of extraction unit into fuel tank until
previously attached marking -arrow-
on hose coincides with filler neck -2-. |
| – |
Drain fuel tank via filler neck as far as possible. |
Note
| There is a flap -1- on the
lower end of the fuel filler neck in the fuel tank which must
not be damaged by the extraction hose. Therefore push hose into
filler neck only as far as marking -arrow-. |
| If the extraction hose catches on the non-return valve when
being extracted, do not apply force to pull the extraction hose
out. |
| In this case, remove the fuel delivery unit and open the
non-return valve manually. Ensure that your arm does not come
into contact with fuel. |
| – |
Pull extraction hose out carefully. |
Note
| When no more fuel is extracted, the tank is emptied just
enough for the sender flange to be opened without danger. |
| If work has to be done on fuel delivery unit or on fuel
gauge sender, proceed as follows
→ Chapter: |
|
|
|
Special tools and workshop equipment required
Removal wedge -3409-
Remote control -V.A.G 1348/3A-
Test instrument adapter/DSO (5-pin) -V ...
Special tools and workshop equipment required
Removal wedge -3409-
Wrench -T10202-
Torque wrench -V.A.G 1332-
Fuel extr ...
© 2016-2026 Copyright www.vwgolf.org


 Emptying fuel tank with fuel pump intact, engine code CWVA
 Emptying fuel tank if it is less than 3/4
full
Emptying fuel tank if it is less than 3/4
full