Volkswagen Golf Service & Repair Manual: Checking function and voltage supply of the fuel pump, engine code CWVA
| Special tools and workshop equipment
required |
|
|
|
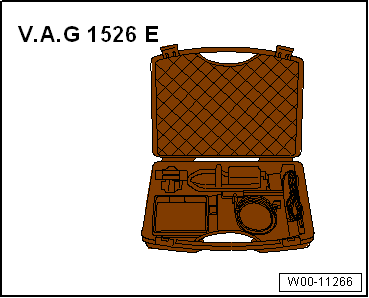
| Multimeter e.g. hand-held multimeter -V.A.G 1526E- |
|
|
|
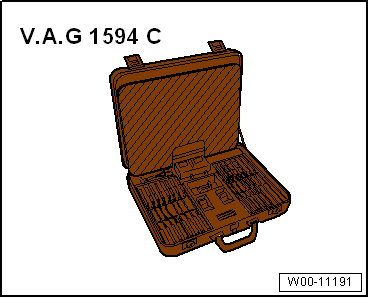
| Auxiliary measuring set -V.A.G 1594C- |
| Vehicle diagnostic tester |
| Battery voltage must be at least 11.5 V. If necessary,
charge battery
→ Electrical system; Rep. gr.27. |
| Fuses OK. → Current
flow diagrams, Electrical fault finding and Fitting locations |
 Note Note
| Function of fuel pump is checked using final control
diagnosis. |
| – |
Observe safety precautions
→ Chapter. |
| – |
Observe rules for cleanliness
→ Chapter. |
|
|
|
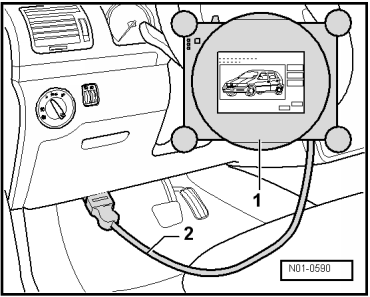
| – |
Connect vehicle diagnostic tester-1-
as follows: |
| – |
Connect diagnosis cable connector -2-
to diagnostic connection in driver footwell. |
| – |
Select final control diagnosis for fuel pump in vehicle
self-diagnosis program. |
| The fuel pump must now run slowly up to maximum speed. |
Note
| The fuel pump runs very quietly. |
| If the final control diagnosis is to be carried out several
times in succession, it may be necessary to start the engine
briefly before repeating the final control diagnosis. |
| If fuel pump does not run: |
| – |
Remove right rear seat
→ General body repairs, interior; Rep. gr.72. |
|
|
|
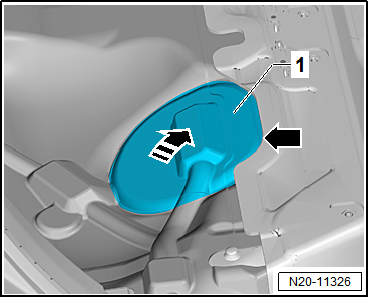
| – |
Partially detach cover -1- in
floor covering at parting line -arrow-. |
| – |
Do not detach cover completely from floor covering in order
to ensure it is reinstalled in the correct installation
position. |
| – |
Detach it just enough that the cover can be folded upwards. |
| – |
Fold up cover in -direction of arrow-. |
| – |
Remove rear bench seat
→ General body repairs, interior; Rep. gr.72. |
|
|
|
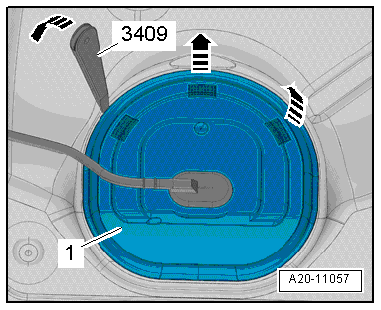
| Continuation for all vehicles: |
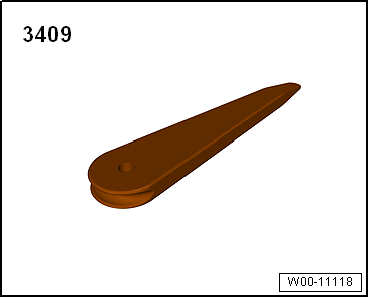
| – |
Unclip cover -1- for flange on
right at retaining tabs -arrows-,
using removal wedge -3409-. |
|
|
|
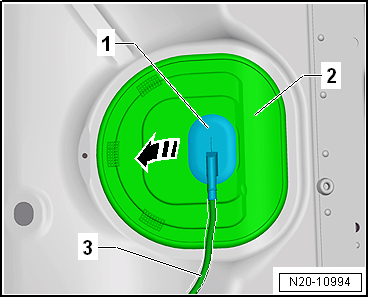
| – |
Unclip sealing grommet -1-
downwards from cover -2-. |
| – |
Push cover -2- back along
wiring harness -3-. |
|
|
|
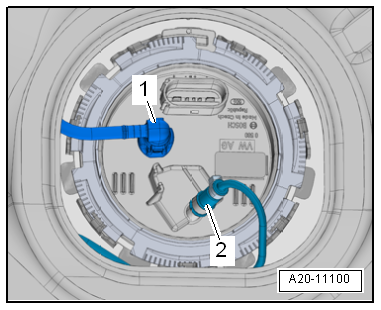
| – |
Check that connector -arrow- is
fitted securely by pulling connector without pressing catch. |
| – |
If connector was not inserted correctly, repeat final
control diagnosis of fuel pump. |
| – |
Release and pull off connector -arrow-. |
| – |
Check contacts on plug and on fuel delivery unit for damage. |
|
|

|
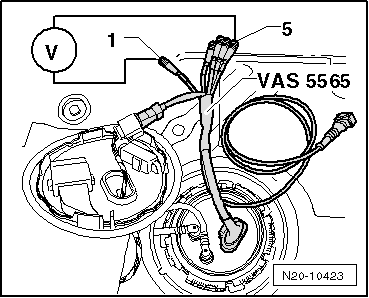
| – |
Connect test instrument/DSO adapter (5-pin) -VAS 5565- to
connector and fuel delivery unit. |
| – |
Connect multimeter to cables -1-
and -5- of test instrument
adapter/DSO (5-pin) -VAS 5565-. |
| Specification: approx. battery voltage |
| If the specification is not attained: |
| – |
Locate and eliminate open circuit referring to current flow
diagram → Current
flow diagrams, Electrical fault finding and Fitting locations. |
|
|
|
The fuel system is pressurised.Risk of injury due to fuel which may
spurt out.Wear eye protection.Wear protective gloves.Release pressure:
place clean cloth around connection and carefully open connection.
| – |
Draining fuel tank
→ Chapter |
| – |
Pull fuel line -1- off flange.
Separate plug-in connectors
→ Chapter. |
| Vehicles with auxiliary heater: |
| – |
Remove fuel line -2- leading to
metering pump -V54- for auxiliary heater from sealing flange. |
| – |
To do this, open clip at bottom. |
| – |
Carefully pull out fuel line -2-. |
|
|
|
| Continuation for all vehicles: |
| – |
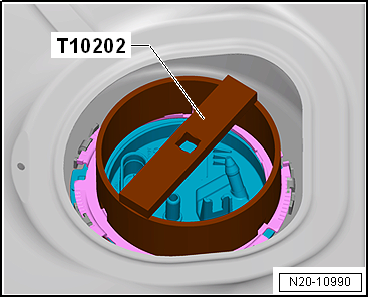
Open locking ring using wrench -T10202-. |
| – |
Check that electrical wires between flange and fuel pump are
connected. |
| – |
Check contacts for damage. |
| If no open circuit can be found: |
| – |
Fuel pump is defective, renew fuel delivery unit
→ Chapter. |
|
|
|
Special tools and workshop equipment
required
Removal wedge -3409-
...
Special tools and workshop equipment required
Removal wedge -3409-
Pressure tester -VAS 6550-
Connector cable -VAS 6550/3-3-
...
Other materials:
Removing and installing plenum chamber bulkhead
Special tools and workshop equipment
required
Torque wrench -V.A.G 1783-
Removing
–
Removing plenum chamber cover
→ Chapter.
...
Indicator lamp
First read and observe the introductory information
and safety warnings
Lit up
Possible cause
Solution
Windscreen washer fluid level too low.
Fill up the washer fluid reservoir as soon as possible
.
Several warnin ...
Charging battery in maintenance mode with solar panel -VAS 6102A-
Solar panel VAS 6102A
General description:
Solar panel -VAS 6102A- supports onboard supply and prevents
spontaneous battery discharging.
Solar panel -VAS 6102A- achieves max. voltage of 14.3 V and
...
© 2016-2025 Copyright www.vwgolf.org

 Checking operation and power supply of fuel pump
 Checking fuel pressure