Volkswagen Golf Service & Repair Manual: Cavity sealing, overview of body
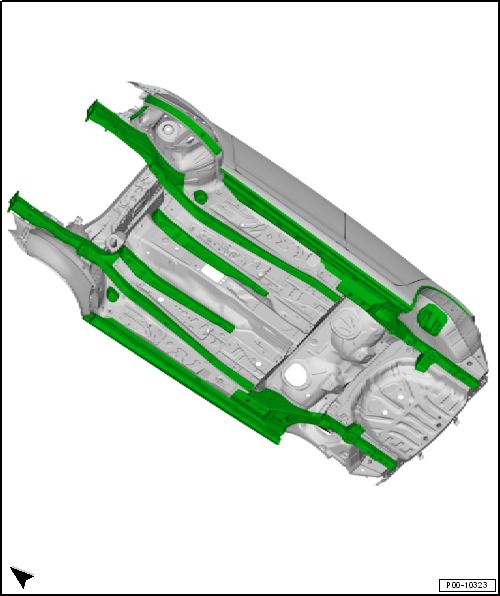
| Cavity sealing, bottom view of body |
 Note
Note| The indicated areas have been treated with cavity sealant and must be resealed following repairs. |
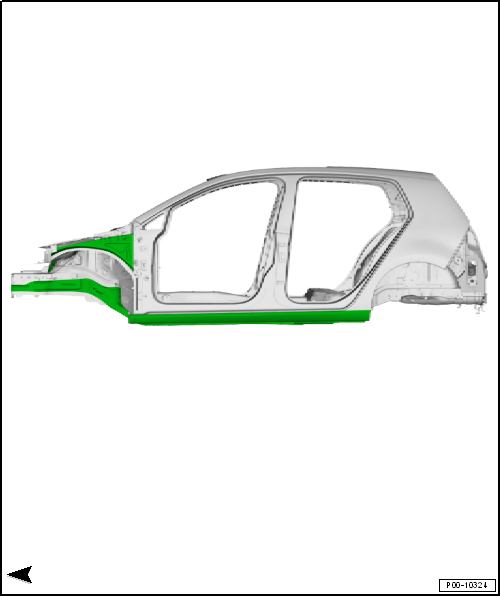
| Cavity sealing, side view of body |
| Illustration shows left side. The right side is the mirror image. |
Note| The indicated areas have been treated with cavity sealant and must be resealed following repairs. |
 Cavity sealing
...
 Cavity sealing, body at front and centre
Cavity sealing, door of 2-door
Illustration shows left side. The right side is the mirror image.
Note
The indicated areas have been treated with cavity seal ...
Other materials:
Assembly overview - suspension, multi-link suspension, front-wheel drive
1 -
Wheel bearing housing
Removing and installing
→ Chapter
2 -
Bonded rubber bush
Renewing
→ Chapter.
3 -
Bolt
Specified torque
͛ ...
Diagonal washout
Diagonal washout on a tyre
Diagonal washout runs at an angle of approx. 45° to the
direction of rotation.
It usually occurs at one point only, but can also occur at
several points around the circumference of the tyre.
...
Conducting a road test before balancing wheels
If a customer brings a vehicle to the workshop complaining
about “vibration”, a road test is essential prior to balancing
the wheels.
This will give you information about the nature of the
vibration.
...
