Volkswagen Golf Service & Repair Manual: Repairs to contacts in contact housings
| If necessary, first open or disengage the secondary locking
mechanism of the contact housing
→ Chapter. |
|
|
|
| – |
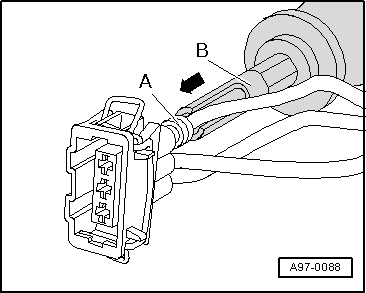
Disengage the contact (primary locking mechanism) using the
appropriate release tool
→ Chapter. |
| – |
Pull the contact by the single wire out of the contact
housing. |
| – |
Select the yellow repair wire with the correct contact from
the wiring harness repair set. |
| – |
Place the wire to be repaired from the vehicle's own wiring
harness to one side (about 20 cm either side of the repair
position). |
| – |
If necessary, unbind the wiring harness using the folding
knife. |
|
|

|
| – |
Push the new contact of the repair wire into the contact
housing until it engages. |
| – |
Slide the single wire seal onto the repair wire. |
 Note Note
| The small diameter of the single wire seal must face the
contact housing. |
| – |
Slide the single wire seal into the contact housing using
the correct assembly tool
→ Chapter. |
|
|
|
| – |
Trim the repair wire and the single wire of the vehicle's
own wiring harness accordingly using wire strippers -VAS
1978/3-. |
|
|
|
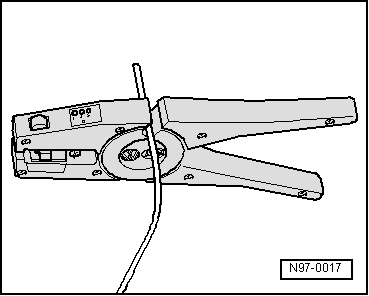
| – |
Strip the 6 - 7 mm of insulation from the end of the repair
wire and the vehicle's own single wire using the wire strippers. |
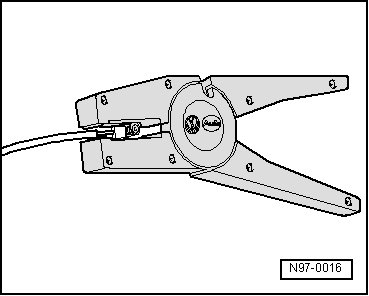
| – |
Crimp the stripped ends of the repair wire and single wire
of the vehicle's own wiring harness using the crimping pliers
and a crimp connector, as described in the chapter entitled
“Wiring open circuits with one repair position”
→ Chapter. |
Note
|
|
|
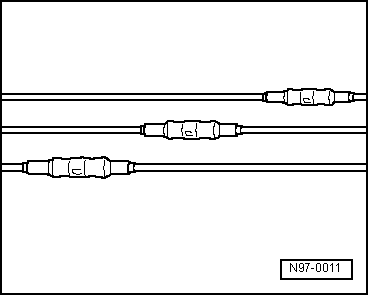
| Ensure that, where several wires have to be repaired, the
crimp connectors are not directly adjacent to each other. To
prevent the circumference of the wiring harness from becoming to
great, position the crimp connectors so they are offset
slightly. |
| If the repair position was already wrapped, this section has
to be wrapped again with yellow insulation tape once the repair
has been carried out. |
| Attach the repaired wiring harness with a cable tie, if
necessary, to prevent it from generating noise when the vehicle
is in motion. |
|
|
|
Note
Observe the general notes on repairs to the vehicle
electrical system
→ Chapter.
Allocation of the a ...
Note
Single wire seals prevent the ingress of moisture and dirt
in the contact housing. They are installed, for example, in the
engine compartmen ...
Other materials:
Maximum permitted gross combination weight
First read and observe the introductory information
and safety warnings All data in the official vehicle documents take precedence
over these data. All data in this manual apply to the basic German model. The vehicle
data sticker in the service schedule and the official vehicle documents sho ...
Removing and installing mounting bracket, LHD vehicles
Remove dash panel end cover on driver side
→ General body repairs, interior; Rep. gr.70.
–
Remove footwell cover on driver side
→ General body repairs, interior; Rep. gr.68.
â ...
Assembly overview - brake caliper FS III
When carrying out repairs, install all parts supplied in repair kit.
Use only methylated spirits for cleaning the brake.
Apply thin coat of lithium grease -G 052 150 A2- to brake cylinder,
piston and seal.
1 -
Dust cap
...
© 2016-2026 Copyright www.vwgolf.org

 Notes on repairs to contact housings and connectors
 Fitting single wire seals