Volkswagen Golf Service & Repair Manual: Removing and installing washer jets
 Note Note
| Removal and installation are described for the left side.
Removal and installation on the right side are carried out in
the same way. |
|
|
|
| – |
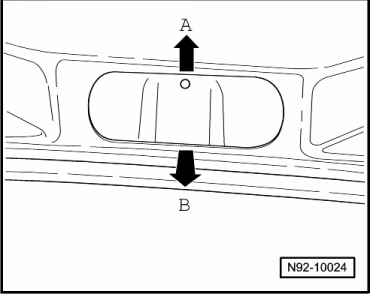
Push spray jet upwards -arrow A-
and pull out of flap at the rear -arrow B-. |
|
|
|
| – |
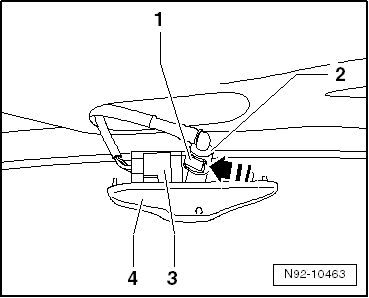
Release hose clip -1- in
-direction of arrow- and pull hose
connection -2- off spray jet
-4-. |
| – |
Release and detach connector -3-
and remove spray jet -4-. |
| Install in the reverse order of removal, observing the
following: |
Note
| When connecting the washer fluid line, ensure that the
securing clip engages audibly in the connection. |
| – |
Starting at the top, push spray jet into mounting hole until
it locks in place audibly. |
| – |
Adjusting spray jets
→ Chapter |
|
|
 |
Special tools and workshop equipment
required
Drip tray
Removing
–
Remove washer fl ...
Caution
Danger of causing damage.
Do not use any objects for cleaning spray jets!
...
© 2016-2026 Copyright www.vwgolf.org

 Removing and installing washer pump, »R«
 Adjusting spray jets