Volkswagen Golf Service & Repair Manual: Removing and installing thermostat for small cooling circuit
| – |
Remove coolant pump
→ Chapter. |
|
|
|
| – |
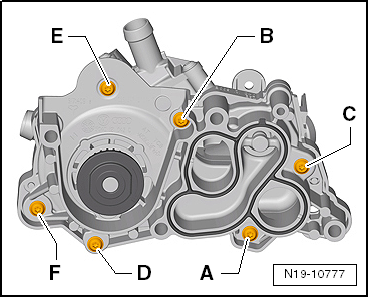
Remove bolts in the sequence -F … A-. |
| – |
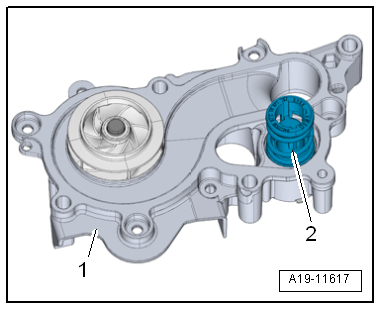
Detach coolant pump from thermostat housing. |
|
|
|
| – |
Detach thermostat -2- from
coolant pump -1-. |
| Installation is carried out in the reverse order; note the
following: |
 Note Note
| – |
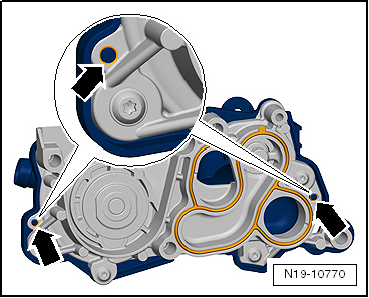
Moisten gasket with coolant. |
|
|
|
| – |
Fit thermostat housing onto coolant pump. |
| Centring pins on thermostat must be fitted in guides
-arrows- on coolant pump. |
| – |
Tighten bolts for thermostat housing
→ Fig.. |
| – |
Install coolant pump
→ Chapter. |
| – |
Replenish coolant
→ Anchor. |
| → Fig. „“Thermostat housing to coolant pump - tightening torque
and sequence”“ |
|
|
|
Special tools and workshop equipment
required
Hose clip pliers -VAS 6362-
...
Special tools and workshop equipment
required
Hose clamps up to 25 mm -3094-
...
© 2016-2026 Copyright www.vwgolf.org

 Removing and installing thermostat for large cooling circuit
 Removing and installing charge air cooling pump -V188-