Volkswagen Golf Service & Repair Manual: Mounting tyre, wheels without and with tyre pressure monitoring
| Only trained personnel may perform any assembly work on
run-flat tyres. |
| If fitted, check tyre pressure sensor using vehicle
diagnostic tester, and renew it as necessary. |
| – |
Ensure proper assembly temperature for tyres
→ Chapter. |
 Note Note
| The tyre pressure sensor (if fitted) must not come into
contact with water or be blown upon with compressed air when the
wheel rim is cleaned. |
| If bonded wheel trims are fitted, treat them with great
care. The surface is susceptible to scratches. |
| If the wheel trim is damaged, renew wheel rim. |
| – |
Insert new tyre valve using valve fitting tool -VAS 6459-. |
| – |
Liberally apply tyre assembly paste to wheel rim flanges,
tyre beads and inner side of the upper tyre beads. |
| – |
Place tyres with inner side facing downwards onto wheel rim. |
|
|
|
Only trained personnel may perform any assembly work on
run-flat tyres and ultra-high-performance tyres.
If fitted, check tyre pressure sensor ...
© 2016-2026 Copyright www.vwgolf.org

 Caution
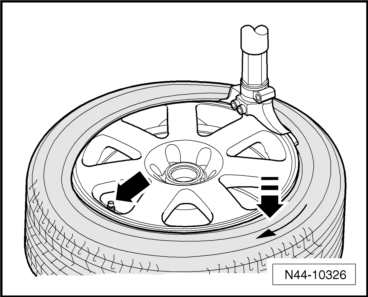
 Mounting tyre
 Mounting tyre, run-flat tyres, ultra-high performance tyres