Volkswagen Golf Service & Repair Manual: Mounting tyre, run-flat tyres, ultra-high performance tyres
| Only trained personnel may perform any assembly work on
run-flat tyres and ultra-high-performance tyres. |
| If fitted, check tyre pressure sensor using vehicle
diagnostic tester, and renew it as necessary. |
| – |
Ensure proper assembly temperature for tyres
→ Chapter. |
 Note Note
| If bonded wheel trims are fitted, treat them with great
care. The surface is susceptible to scratches. |
| If the wheel trim is damaged, renew wheel rim. |
| – |
Insert new tyre valve using valve fitting tool -VAS 6459-. |
| – |
Liberally apply tyre assembly paste to wheel rim flanges,
tyre beads and inner side of the upper tyre beads. |
| – |
Place tyres with inner side facing downwards onto wheel rim. |
|
|
|
| – |
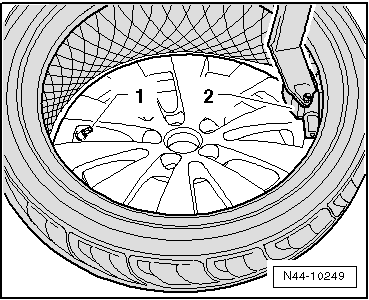
Turn wheel rim, until tyre valve or tyre pressure sensor are
positioned opposite to assembly head. |
|
|
|
| – |
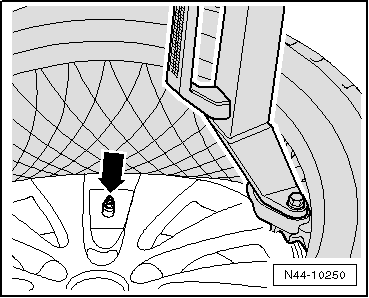
Run tyre fitting unit clockwise until assembly head is
positioned before tyre valve or tyre pressure sensor
-arrow-. The lower tyre bead will
now slide over the wheel flange. |
|
|
|
| – |
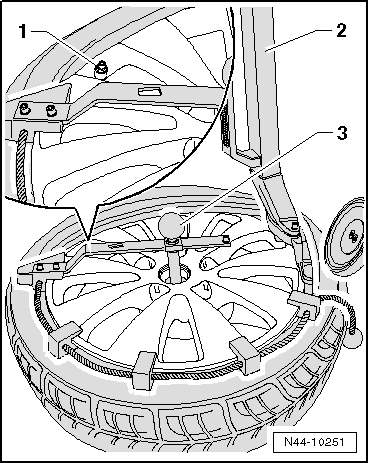
Turn wheel rim, until tyre valve or tyre pressure sensor
-1- are positioned opposite to
assembly head -2-. |
| – |
Insert depressor -3- on the
wheel rim. |
|
|
|
Only trained personnel may perform any assembly work on
run-flat tyres.
If fitted, check tyre pressure sensor using vehicle
diagnos ...
If necessary, eliminate flat spots caused by storage or
handling
→ Chapter.
–
Press tyre off wheel rim
→&n ...
© 2016-2026 Copyright www.vwgolf.org

 Caution
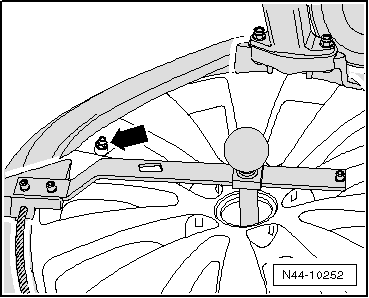
 Mounting tyre, wheels without and with tyre pressure monitoring
 Matching wheel rims and tyres