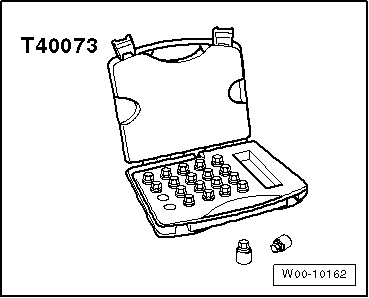
Volkswagen Golf Service & Repair Manual: Fitting wheel, fitting instructions for Volkswagen
| Vehicles with tyre pressure sensor |
| If the wheels are changed (e.g. switch from summer to winter
tyres), the wheel electronics transmit data as soon as the speed
of the new wheels exceeds 25 km/h. The new wheel electronics' ID
numbers are automatically detected and entered by the control
unit. |
| The acceleration data are additionally checked against the
vehicle speed. This process takes approx. 7 minutes. |
| The tyre pressure monitoring system control unit -J502- must
first switch to learning mode before it can automatically learn
the wheel electronics. |
| To do this, the vehicle must remain stationary for 20
minutes. Following the detection of a flat tyre, this time is 5
minutes. |
| If the stationary time is not maintained and the control
unit consequently does not switch to learning mode, the system
detects interference in transmission and will learn the wheel
electronics automatically only after a stationary period of 20
minutes. |
 Note Note
| When changing wheels, note that only wheel and tyre
combinations approved by the vehicle manufacturer with the tyre
inflation pressure specified in the tank flap may be installed. |
| If unapproved wheel and tyre combinations are installed, a
certificate from the responsible technical inspection authority
must be available for the respective vehicle, and a second wheel
set must be adapted via the → Vehicle
diagnostic tester. |
| An adaptation is also necessary if the tyre pressure
deviates from the tyre pressure specified on the tank flap. |
| Tyre sets with other specified tyre inflation pressures |
| If a vehicle is fitted with tyres requiring nominal tyre
inflation pressures other than those specified on the tank flap
sticker, these tyres (second wheel set) can also be monitored
with the TPM system. |
| Nominal tyre inflation pressures for the second wheel set
must be specified to the system with the → Vehicle
diagnostic tester. |
| The wheel electronics for the wheels of the second wheel set
are not automatically detected and adapted by the TPM system
(unlike the wheel electronics for the wheel set with wheel and
tyre combinations approved by the vehicle manufacturer). |
| The following work has to be performed to switch to the
second wheel set: |
| Read ID numbers (IDs) of the wheel electronics (tyre
pressure sensors) prior to installation. |
| Switch the TPM to wheel set 2. |
| Enter the necessary nominal tyre pressures and the IDs of
the wheel electronics in the system. |
| Continuation for all vehicles |
 Note Note
| The width across flats of the provided wheel bolt adapter
may differ from the width across flats of the adapter set. |
| Special tools and workshop equipment
required |
|
|
|
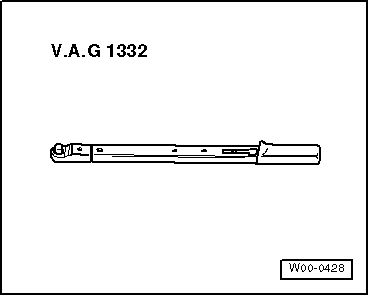
| Torque wrench -V.A.G 1332- |
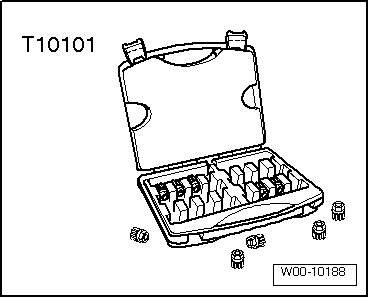
| Adapter set for anti-theft wheel bolts -T10101- |
|
|
|
| Adapter set for anti-theft wheel bolts -T10101 A- |
|
|
|
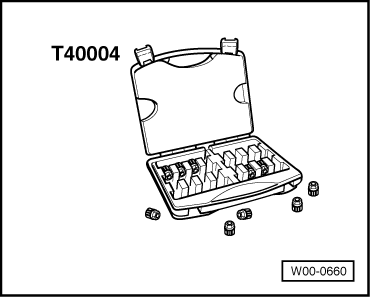
| Adapter set for anti-theft wheel bolts -T40004- |
|
|
|
| – |
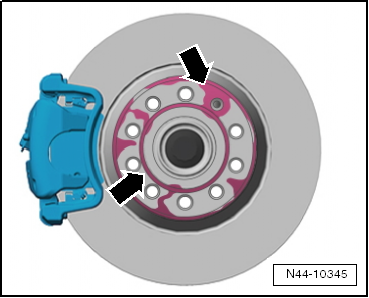
Check to ensure that contact surfaces
-arrows- on brake disc are free of corrosion and dirt. |
|
|
|
| – |
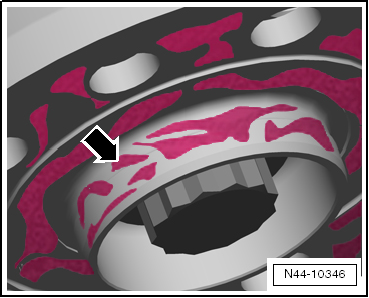
Check to ensure that contact surface
-arrow- on centring seat of brake disc are free of
corrosion and dirt. |
|
|
|
| – |
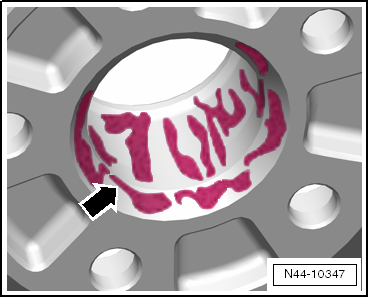
Check to ensure that contact surface
-arrow- on inner side of wheel (rim) and also centring
seat of rim are free of corrosion and dirt. |
| – |
The concave seats * in the holes
for the wheel bolts and the threads of the wheel bolts must also
be free of corrosion and dirt, oil or grease. |
| * The concave seat is the curved
surface of a section of a sphere cut by a plane. |
|
|
|
| – |
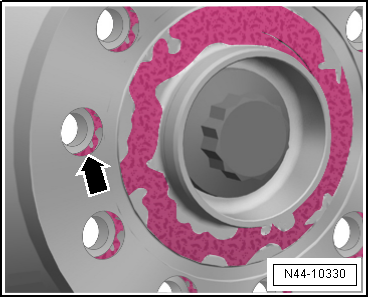
Check whether the wheel bolts can be easily screwed in by
hand. The thread of the wheel bolts must not come into contact
with the bore in the brake disc -arrow-. |
| If the thread of the wheel bolt touches the hole
-arrow-, turn the brake disc
relative to the wheel hub accordingly. |
| If necessary, remove dirt and corrosion: |
| Oil or grease from contact surfaces |
| Oil or grease from threads in wheel hub |
| Oil or grease from threads in wheel bolts |
 WARNING
| Damaged, badly corroded or difficult to remove wheel
bolts must be renewed. |
|
| Applies to alloy and steel wheels |
| When changing a wheel, wheel centring seat should be waxed
using wax spray to prevent corrosion between wheel centring seat
and wheel rim
→ Electronic Parts Catalogue “ETKA”. |
| – |
Thoroughly clean wheel centring seat on wheel hub and the
centring ring of the wheel rim. |
|
|
|
| – |
Apply wax to centring area -arrow-
with a brush. |
| Ensure that only centring ring -arrow-
but not contact surface of wheel rim has been waxed. Otherwise,
the brakes will be soiled, which would reduce the braking
efficiency. |
 WARNING
| Wheel bolts, contact surfaces of wheel hub and wheel
rim and wheel hub threads must not be waxed. Never treat
wheel securing bolts with lubricant or corrosion
protection materials! |
|
| 1 - |
When fitting the wheel, pull in all wheel bolts uniformly by
hand. |
| 2 - |
Tighten wheel bolts in diagonal sequence to 30 Nm. |
| 3 - |
Lower vehicle onto floor. Use torque wrench to tighten wheel
bolts diagonally to specified torque. |
|
|

|
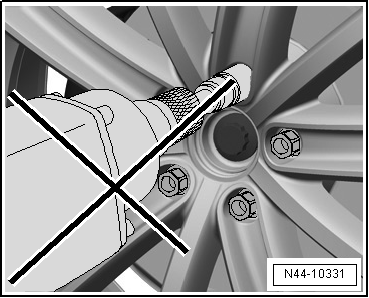
| Do not use an impact screwdriver! |
 WARNING
| Do not use an impact screwdriver to screw in the
bolts. |
|
| → Running gear, axles, steering; Rep. gr.44. |
|
|
|
Vehicles with tyre pressure sensor
If the wheels are changed (e.g. switch from summer to winter
tyres), the wheel electronics transmit data as soon a ...
© 2016-2026 Copyright www.vwgolf.org

 Note
Note Note
Note Note
Note Fitting wheels
 Fitting wheel, fitting instructions for Audi


 WARNING