Volkswagen Golf Service & Repair Manual: Emptying fuel tank when fuel pump is intact
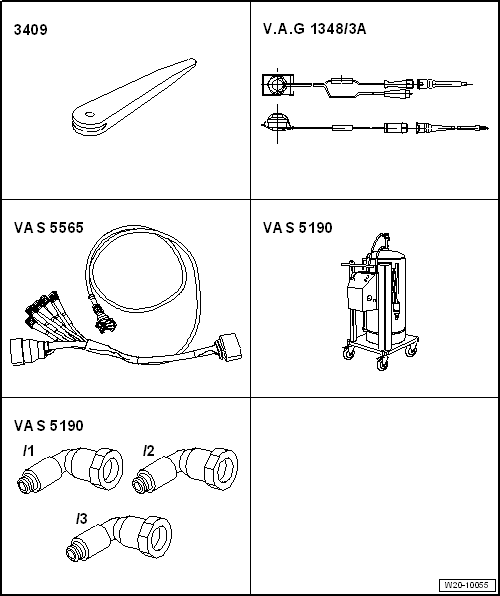
| Special tools and workshop equipment required |
| Remote control -V.A.G 1348/3A- |
| Test instrument adapter/DSO (5-pin) -VAS 5565- |
| Fuel extractor -VAS 5190- |
| Fuel extractor -VAS 5190 A- for E 85 fuel (not shown). |
| Adapter for fuel extraction -VAS 5190- |
 Note Note
| To extract E 85 fuel, use only fuel extractor -VAS 5190 A-! |
|
|
|
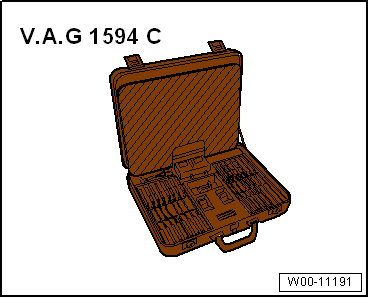
| Auxiliary measuring set -V.A.G 1594C- |
Note
|
|
|
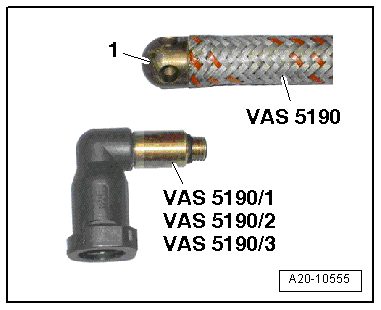
| If the fuel extraction unit -VAS 5190- is still fitted with
the extraction hose with a fixed tip, the extraction hose must
be replaced with the version with a screw-in tip. |
| – |
Observe safety instructions
→ Chapter. |
| – |
Observe rules for cleanliness
→ Chapter. |
|
|
|
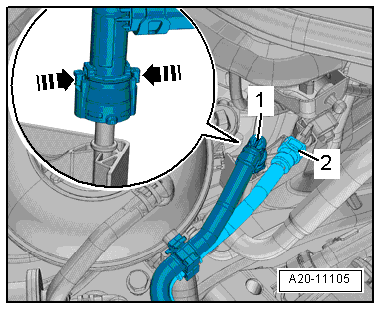
| – |
Pull off fuel supply line -1-.
Separate plug-in connectors
→ Chapter. |
The fuel system is pressurised.Risk of injury due to fuel which may
spurt out.Wear eye protection.Wear protective gloves.Release pressure:
place clean cloth around connection and carefully open connection.
| – |
Collect escaping fuel with a cleaning cloth. |
|
|
|
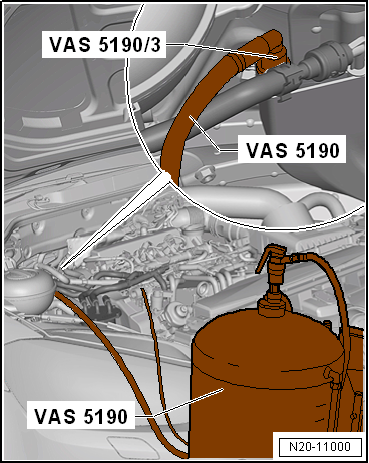
| – |
Connect fuel extractor -VAS 5190- with adapter for fuel
extractor -VAS 5190 /3- to fuel supply line. |
| – |
Secure earth wire of fuel extractor to a bare metal part of
the body. |
| – |
Remove right rear seat
→ General body repairs, interior; Rep. gr.72. |
|
|
|
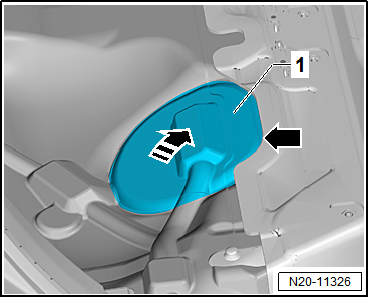
| – |
Partially detach cover -1- in
floor covering at parting line -arrow-. |
| – |
Do not detach cover completely from floor covering in order
to ensure it is reinstalled in the correct installation
position. |
| – |
Detach it just enough that the cover can be folded upwards. |
| – |
Fold up cover in -direction of arrow-. |
| – |
Remove rear bench seat
→ General body repairs, interior; Rep. gr.72. |
|
|
|
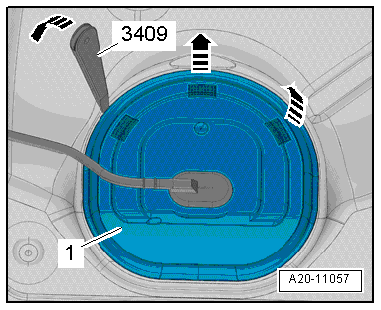
| Continuation for all vehicles: |
| – |
Unclip cover -1- for flange at
retaining tabs -arrows-, using
removal wedge -3409-. |
|
|
|
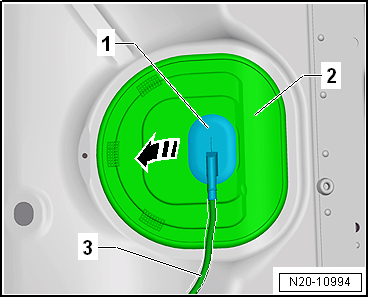
| – |
Unclip sealing grommet -1-
downwards from cover -2-. |
| – |
Push cover -2- back along
wiring harness -3-. |
|
|
|
| – |
Release and pull off connector -1-
on sealing flange. |
|
|

|
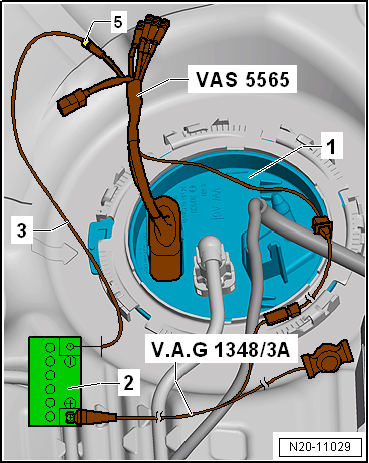
| – |
Connect test instrument adapter/DSO (5-pin) -VAS 5565- to
fuel delivery unit -1-. |
| – |
Connect remote control -V.A.G 1348/3A- to adapter -VAS 5565-
and to battery positive terminal in engine compartment. |
| – |
Connect connection -5- (yellow)
of test instrument adapter/DSO (5-pin) -VAS 5565- to battery
negative terminal using suitable workshop equipment
-3-. |
| – |
Also use auxiliary measuring set -V.A.G 1594C- for this
purpose. |
Note
| This step serves only to have the fuel pump running when the
engine is stopped. |
|
|
|
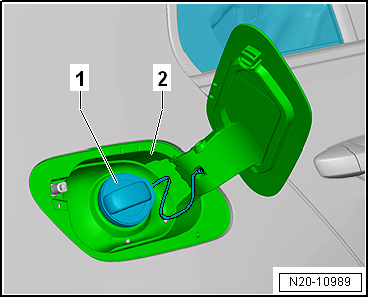
| – |
Open tank flap unit -2-. |
| – |
Clean area around fuel filler neck. |
| – |
Unscrew cap -1- for fuel filler
neck. |
| – |
Operate remote control -V.A.G 1348/3A- and shut-off tap on
fuel extractor -VAS 5190- until fuel tank is empty. |
Note
| Risk of damage to fuel system pressurisation pump -G6- when
the fuel tank is empty. The fuel system pressurisation pump -G6-
must not run »dry«. |
|
|
|
Special tools and workshop equipment
required
Torque wrench -V.A.G 1331-
...
Special tools and workshop equipment required
Removal wedge -3409-
Remote control -V.A.G 1348/3A-
Test instrument adapter/DSO (5-pin) -V ...
Other materials:
Battery with »standard« colour indicator
This is a maintenance-free battery with liquid electrolyte
(wet battery).
WARNING
It is not permissible to test or charge batteries
whose colour indicator is light yellow. Do not
slave/ ...
Assembly overview - radiator grille
Note
Depending on the respective model, optical differences and
different versions must be taken into account; for allocation
refer to
→ Electronic Parts Catalogue “ETKA”
1&nbs ...
Removing and installing cap on ignition key
Removing
–
Lift off lid for battery compartment
→ Chapter.
–
Remove bolt -1-.
–
Push cap -2- out from the ignition key
laterally -arrow-.
Installing
Note
Us ...
© 2016-2026 Copyright www.vwgolf.org

 Removing and installing fuel tank, vehicles with multi-link rear suspension
and fuel tank leakage diagnosis function
Removing and installing fuel tank, vehicles with multi-link rear suspension
and fuel tank leakage diagnosis function Emptying fuel tank with fuel pump intact, engine code CWVA