Volkswagen Golf Service & Repair Manual: Disconnecting and connecting battery, vehicles without high-voltage system
 Caution
| Observe the following instructions and precautions
on safety when working on pyrotechnic components: |
| Contrary to the following description, the battery
must be disconnected with the ignition SWITCHED ON when
working on pyrotechnic components (e.g. airbags, belt
tensioners)
→ General body repairs, interior; Rep. gr.00. |
|
| Special tools and workshop equipment
required |
|
|
|
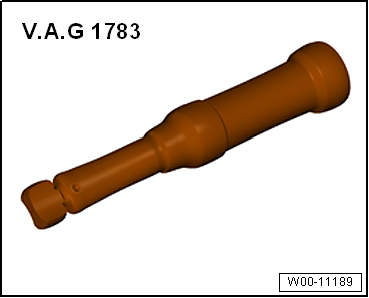
| Torque wrench -V.A.G 1783- |
| – |
Remove ignition key, if inserted. |
|
|
|
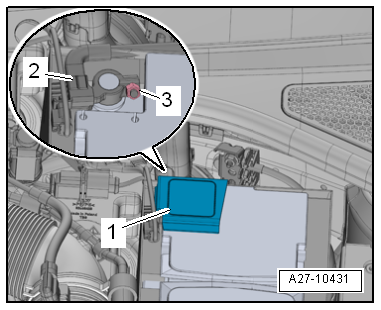
| – |
Open cover -1- for negative
battery terminal. |
| – |
Loosen nut -3- several turns
and disconnect battery terminal clamp -2-
of earth cable from battery terminal. |
| Observe the following when connecting the battery -A-: |
|
|
|
| – |
Unplug electrical connector -2-
at battery monitor control unit -J367--3-. |
| – |
Fit battery terminal clamp of earth cable to negative
battery terminal “–” by hand. |
| – |
Reconnect connector -2- to
battery monitor control unit -J367-. |
| – |
Check time and adjust, if necessary. |
| – |
Open windows completely, then close them. |
| – |
Then, with windows closed, pull window regulator switches
until relay can be heard to switch. |
| – |
Check convenience mode of the window regulators. |
| With convenience closing activated, windows must close fully
without the need for holding the window regulator switch. |
 Note Note
| After the voltage supply has been switched back on, it still
takes several meters of travel for the ESP warning lamp to go
out. |
| → Chapter „Assembly overview – battery, vehicles without
high-voltage system“ |
|
|
 |
Special tools and workshop equipment
required
Torque wrench -V.A.G 1331-
...
Caution
Observe the following instructions and precautions
on safety when working on pyrotechnic components:
...
Other materials:
Connection diagram - activated charcoal filter
Note
Fuel tank leak detection takes advantage of the fact that a
vacuum develops naturally in the fuel system as the fuel in the
tank cools. The variables temperature and pressure are necessary
for fuel tank leak detection. The temperature senso ...
Removing and installing roof end strip
Special tools and workshop equipment
required
Wedges -T10383
Removing
–
Release roof end strip -1- in
area of retain ...
Assembly overview - window regulator
1 -
Front door
2 -
Rear window regulator motor -V26/V27-
The door control unit is installed in door separated from window
regulator motor
Removing and installing
→ Chapter
3 -
Hexagon nut
...
© 2016-2025 Copyright www.vwgolf.org

 Removing and installing battery, vehicles with high-voltage system
 Disconnecting and connecting battery, vehicles with high-voltage system