Volkswagen Golf Owners Manual: Auto Hold function
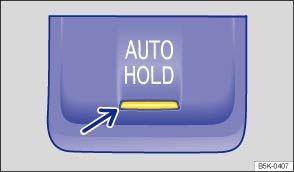
Fig. 146 In lower part of centre console: button for Auto Hold
 First read and observe the introductory information
and safety warnings
First read and observe the introductory information
and safety warnings The indicator lamp in the


 button (arrow)
lights up when the function is switched on.
button (arrow)
lights up when the function is switched on.
When switched on, the Auto Hold function automatically prevents the vehicle from rolling away without having to depress the foot brake.
The Auto Hold function holds the vehicle as soon as it detects that the vehicle
is not moving and the brake pedal is released. The green indicator lamp
 in the instrument cluster display showing that
the vehicle is being held on the electric parking brake will light up.
in the instrument cluster display showing that
the vehicle is being held on the electric parking brake will light up.
When the driver pulls away, the Auto Hold function releases the electronic parking
brake again. The green indicator lamp in
the instrument cluster display will go out again and the vehicle will start to move
in accordance with the incline of the road.
Requirements for holding the vehicle using the Auto Hold function:
- The driver door is closed.
- The driver is wearing a seat belt.
- The engine is running.
If any of the conditions for the Auto Hold function change while the vehicle
is stationary, the Auto Hold function will switch off automatically and the green
indicator lamp in the instrument cluster display
will go out, along with the yellow indicator lamp in the
button.
The electronic parking brake may close automatically to park the vehicle securely .
Switching Auto Hold on and off manually
Press the
button . The indicator lamp in the button
(arrow) goes out when the Auto Hold function is switched off.
Switching Auto Hold on and off automatically
If the Auto Hold function has been switched on using the
button before
switching the ignition off, the Auto Hold function switches on automatically when
the ignition is switched on the next time. The same applies if the Auto Hold function
is switched off – it will remain switched off when the ignition is switched on again.

 WARNING
- Never leave the vehicle if the engine is running and the Auto Hold function is switched on.
- Auto Hold cannot hold the vehicle in all hill start situations (e.g. if the ground is slippery or icy).

 NOTICE
 Indicator lamps
First read and observe the introductory information
and safety warnings
Lit up
Possible cause
Solution
The vehicle is being held by ...
 Start/stop system
Fig. 147 In the centre console: button
for the start/stop system
First read and observe the introductory information
and safety warnings The start/stop system automatically switches the engine ...
Other materials:
Removing and installing intermittent wiper switch -E22-
Note
The turn signal switch -E2-, cruise control system switch
-E45- and intermittent wiper switch -E22- are combined to form
the steering column combination switch -E595-.
These switches cannot be separated.
...
Checking for leaks
Note
The average air pressure of the earth's atmosphere at sea
level is 1013 mbar and decreases steeply as the altitude
increases (approx. 100 mbar/1,000 m altitude). Local and time
fluctuations also influence vacuum generation.
...
Removing and installing front footwell light -K269-, front passenger side
Removing
–
Using a flat screwdriver, press in locking lug
-1- at point indicated by arrow
-A-.
–
Lever out footwell light -2-.
–& ...
