Volkswagen Golf Service & Repair Manual: 1-pack fill clean spray can -LLS MAX 112-, Aqua Premium system
| 1-pack fill clean spray can -LLS MAX 112-, 400 ml for
water-based mixing paint “Aquaplus premium system” |
| The product is an aerosol can, pre-filled with solvents and
propellant, and especially designed for use with the “Aquaplus
System” and the “Aqua Premium system”. |
| For filling the aerosol can, only the special FillClean
equipment may be used. |
| Field of application: Clever Repair only. |
| The product is an aerosol can, pre-filled with solvents and
propellant, and especially designed for use with the “Aquaplus
System” and the “Aqua Premium system”. |
| The aerosol can does not contain any paint when delivered.
It is a semi-finished product. |
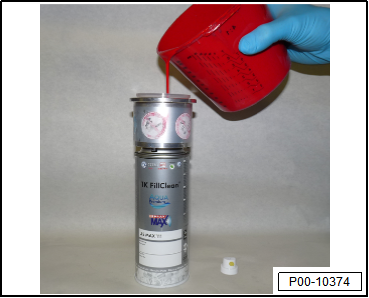
| The ready-to-use end product is produced through filling the
pre-filled aerosol can with 100 ml of undiluted Aquaplus or Aqua
Premium basecoat using the special FillClean equipment. |
| The ready-to-use (filled with paint) aerosol must always be
labelled accordingly, prior to further use. For this purpose, a
special label indicating the respective colour, generated and
printed by the tinting system, can be used. |
| It is essential to ensure that all the data given in the
example below is present on this label. |
| Indicating content and and pre-filling |
| The content of 316 ml (0.32 l) declarated on the label
refers to the final product (after filling with paint). |
| The aerosol can, pre-filled with 294 ml propellant and
solvents, is filled with additional 100 ml of ready-to-use Aqua
Premium basecoat, incl. additive for Aqua Premium -LVM 035 200-
or additive for Aqua Premium -LVM 035 301-. |
 Note Note
| Protective garments and equipment in accordance with work
safety regulations must be worn. |
| Set up the FillClean equipment in a well ventilated room. |
| The maximum capacity of the aerosol can must not be exceeded
when filling. Risk of explosion! |
| No poisonous carcinogenic substances or halocarbons must be
used for filling the aerosol cans. |
| Warning: electrostatic discharge! Only use a damp cloth for
cleaning of plastic parts. |
| Any repairs must be performed by a qualified technician. |
| Paint residues must be removed from the machine at regular
intervals. Use a cloth and an appropriate solvent for this
purpose. |
| The pressure supply line must be checked at regular
intervals. |
| Mixing instructions for “Aqua Premium system” |
|
|
|
| Mixing containers: |
Plastic containers or tinplate
containers with inner coating |
| Sieves: |
Waterproof-glued or waterproof
125 μm strainers |
| Additive: |
Additive for Aqua-Premium -LVM
035 200/300/301- (at normal or high temperatures and low humidity
depending on size of object) |
| Pot life: |
Should be processed within 24
hours after adding the additive for Aqua-Premium LVM 035 200/301, if
possible. |
| Additive at 20 °C material
temperature: |
20 % Additive for Aqua
premium -LVM 035 200/300/301- |
| Special notes: |
Recommendation for solid
colours: for optimum application behaviour it is recommended to always
use additive for Aqua Premium -LVM 035 301-. |
| FillClean filling process |
| Observe the operating instructions of the filling equipment. |
|
|
|
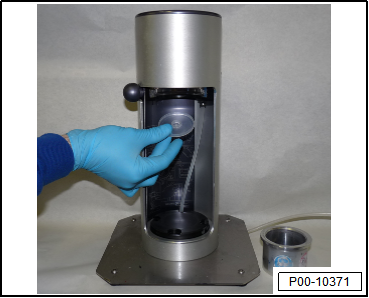
| – |
Put filling pad on indenter. |
|
|
|
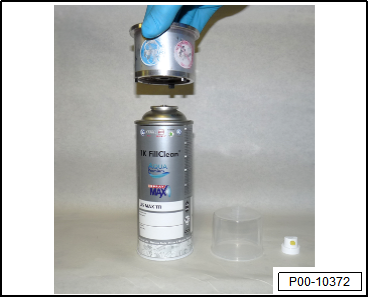
| – |
Fit FillClean filling cylinder onto spray can. |
|
|
|
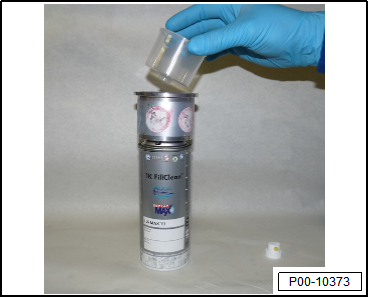
| – |
Fit and push down the FillClean cap. |
|
|
|
| – |
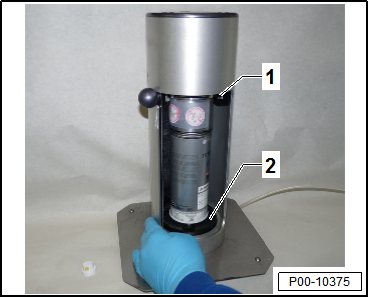
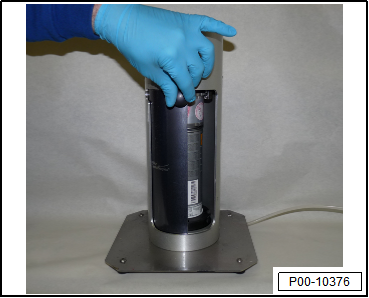
Set FillClean can and filled cylinder into upper groove
-1- of the FillClean machine. |
 Note Note
| When the FillClean can is inserted into the upper groove
-1-, the lower rotating plate
-2- must first be positioned at the
very bottom. As soon as the FillClean can has been inserted into
the upper groove -1-, turn the
rotating plate -2- upwards to use
it as a counterhold. |
|
|
|
| – |
Push the button to the right to trigger filling. Wait
approx. 10 seconds. |
|
|
|
| – |
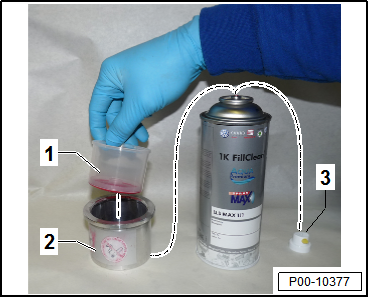
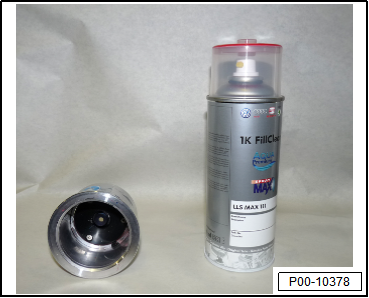
After filling, remove filling cylinder
-2- from FillClean can. |
| – |
Remove FillClean cap -1- from
filling cylinder -2-. |
| – |
Fit spray nozzle -3- onto
FillClean can. |
|
|
|
| – |
Leave the pad in the cap to indicate the filled colour tone. |
| – |
The FillClean can is now ready to use. |
| 1-pack wash primer -LVM 044 007 A2-/-LVM 044 171 A2- |
| 2-pack plastic adhesion surfacer -LKF 696 009 A2-/-LKF 696
040 A2- |
| For plastic surfaces, refer to
→ Remark. |
|
|
|
| – |
Thoroughly clean factory or old paintwork and/or 2-pack HS
surfacer using silicone remover -LSW 019 000 A5-. If severely
soiled, pre-clean with slow-drying silicone remover -LVM 020 100
A5-. |
|
|
|
| – |
Dry-sand using orbital sander with P500-grain sandpaper and
dust collector. |
|
|

|
| – |
Wet-sand with P800 to P1000-grain sandpaper. |
|
|
|
| – |
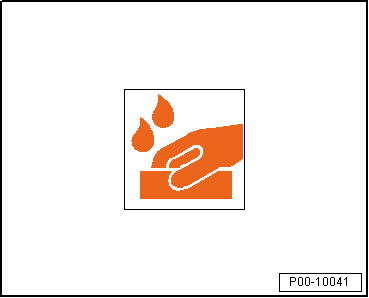
Before recoating the sanded substrates, thoroughly clean
them of dust, sanding residue and other dirt using silicone
remover -LSW 019 000 A5-. |
| Wipe off any excess silicone remover with a lint-free cloth,
leaving no streaks. Observe technical data sheet
→ Chapter „Silicone remover“. |
| Areas sanded to bare metal must be primed with 1-pack wash
primer -LVM 044 007 A2-/-LVM 044 171 A2-. |
| Bare metal spots must not be larger than 5.0 cm in diameter. |
| If 2-pack HS surfacer is used, bare metal spots must be
primed using 2-pack wash primer -LHV 043 000 A2- or 1-pack wash
primer -LVM 044 007 A2-/-LVM 044 171 A2-. |
| It is recommended to test the colour tone on a spray sample
prior to application. |
|
|

|
| – |
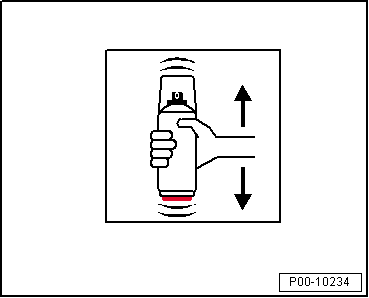
Shake aerosol well (at least 2 minutes) to ensure proper
mixing. |
|
|
|
| Method of application: “spray”. |
| – |
Maintain a distance of 20-25 cm. |
| – |
The specified thickness for the dry film is 15-20 µm. |
|
|
|
| – |
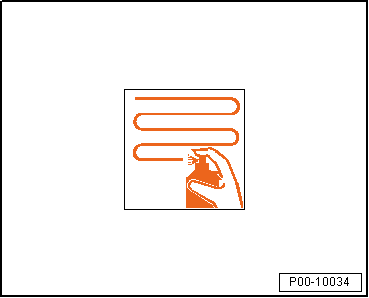
Apply in 2 spray passes (1 normal coat followed by 1 finish
coat) with 5-10 minutes intermediate flash-off time. |
| – |
The specified thickness for the dry film is approx. 15 to
20 µm. |
 Note Note
| With low opacity colours, it may be necessary to apply an
additional spray cote (wet-on-wet). |
| As an alternative, wait until the paint film appears matt
prior to the application of the additional spray coat. |
| To prevent clogging of the nozzle, after each use (or any
interruption of the spray operation), hold the can upside down
and press the spray button until the material flow stops (i.e.
until the valve is empty). |
|
|
|
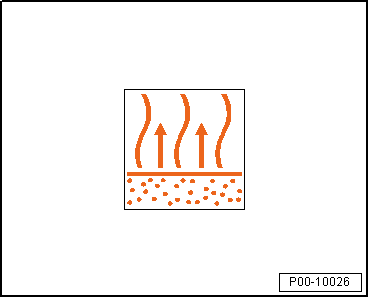
| The drying time/flash-off time for clear coat application is
15 to 30 minutes at +20°C. Important note: Observe flash-off
time (coated surface must appear matt). |
| 2-pack HS clear coat (see relevant data sheet). |
| 2-pack clear coat -LLS MAX 210- (also recoatable with other
2-pack HS clear coats). |
 Caution
| Protective garments and equipment in accordance with
work safety regulations must be worn. |
| Observe safety information sheets as well as
warnings on the label of the spray can. |
| After filling the can, shake it for approx
2 minutes. |
| Before applying, shake can for approx 2 minutes. |
| Shake again briefly before spraying each coat. |
| After fully emptying the spray can, dispose of as
recycling material |
|
|
|
|
| VOC content:
2004/42/IIB(e)(840)690 |
The EU limit value for this
product (product category IIB.b) in ready-to-spray form is max. 840 g/l
of volatile organic compounds. The VOC content of this product in
ready-to-spray form is max. 690 g/l. |
| The guaranteed shelf life of pre-filled aerosol (without
paint) is 24 months. |
| After filling with paint, the shelf life of the aerosol is
1 week. |
|
|
|
Designation:
1-pack FillClean spray can -LLS MAX 099-, 250 ml for
waterborne mixing paint “Aquaplus system”
1- ...
Designation:
2-pack surfacer -LLS MAX 202 M2-, medium grey
Issued 03.2013
Product description
...
© 2016-2026 Copyright www.vwgolf.org

 Note
Note Note
Note Note
Note 1-pack fill clean spray can -LLS MAX 099-, -LLS MAX 100-, Aquaplus system
 2-pack surfacer




 Caution
