Volkswagen Golf Service & Repair Manual: Removing tyres, run-flat tyres, ultra-high-performance tyres
| Only trained personnel may perform any assembly work on
run-flat tyres and ultra-high-performance tyres. |
| If fitted, check tyre pressure sensor using vehicle
diagnostic tester, and renew it as necessary. |
 Note Note
| The tyre pressure sensor must not come into contact with
water or be blown upon with compressed air when the wheel rim is
cleaned. |
| If bonded wheel trims are fitted, treat them with great
care. The surface is susceptible to scratches. |
| If the wheel trim is damaged, renew wheel rim. |
|
|
|
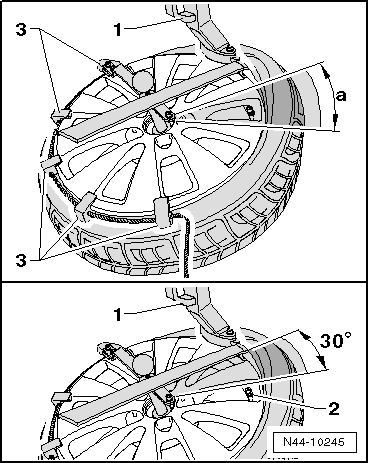
| – |
Turn wheel, until tyre valve or tyre pressure sensor are
positioned at least at 30° ahead of assembly head. |
| – |
Insert depressor -3- opposite
to assembly head -1- on wheel rim. |
| – |
Using assembly lever, lever upper tyre bead over assembly
finger. |
|
|
|
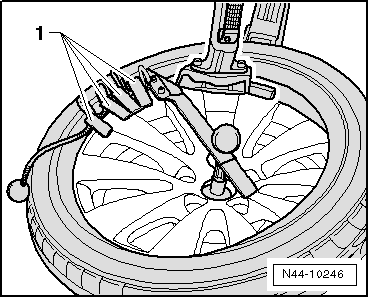
| – |
Run tyre fitting unit clockwise until upper tyre bead is
fitted completely over wheel rim flange. |
| This action will push the depressor
-1- up against the assembly head. This allows it to be
removed easily. |
|
|
|
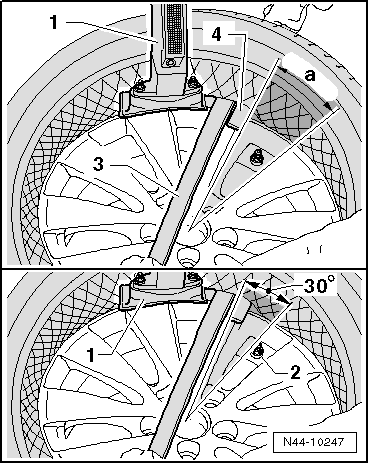
| – |
Turn wheel, until tyre valve or tyre pressure sensor are
positioned at least at 30° ahead of assembly head. |
| – |
Now lever tyre bead over assembly finger on assembly head
using assembly lever -3-. |
| – |
Using assembly lever, lever lower tyre bead over assembly
finger. |
| – |
Insert plastic assembly lever -4-. |
| – |
Remove assembly lever -3-. |
|
|
|
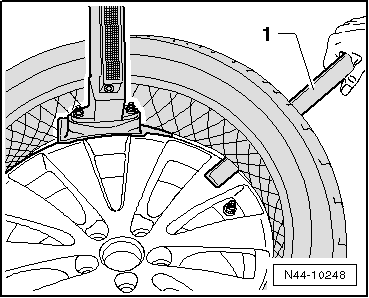
| – |
Using plastic assembly lever -1-
and working from outside, hold bead over wheel rim flange, and
run tyre fitting unit clockwise until tyre is completely removed
from wheel rim. |
Note
| Check that the tyre pressure sensor is not loose or damaged.
If the screwed connection is loose, replace the union nut, the
valve core, the seal, the sealing washer and the valve cap with
new parts from the repair set
→ Electronic Parts Catalogue “ETKA”. |
| Remove tyre pressure sensor if damaged
→ Chapter. |
|
|
|
If fitted, check tyre pressure sensor using vehicle
diagnostic tester, and renew it as necessary.
Note
The tyre pressure s ...
Caution
Risk of damage to tyres due to excessive heat.
Never heat tyres with a radiator o ...
Other materials:
Warning and indicator lamps
First read and observe the introductory information
and safety warnings
Lit up
Possible cause
Solution
Diesel engine is preheating before starting.
.
Brake pedal not depressed.
Press the brake pedal to ...
Checklist
Observe the following information both before and during every journey
to ensure your own safety, and the safety of all passengers and other road users
:
Check that all lights and turn signals
are working properly.
Check the tyre pressure ( Wheels and
tyres Wheels and tyres ...
Removing and installing switch module in centre console -EX23-/-EX30-
Special tools and workshop equipment
required
Removal wedge -3409-
Caution
Danger of damage to component surfaces.
...
© 2016-2026 Copyright www.vwgolf.org

 Removing tyres, wheels without and with tyre pressure monitoring
 Ensuring proper assembly temperature for tyres