Volkswagen Golf Service & Repair Manual: Removing and installing valve, description of the valve
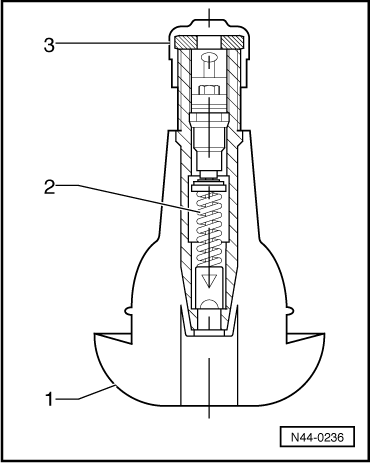
| The rubber valve for tubeless tyres is designed to create an
air-tight seal in the hole in the rim. The elastic material of
the rubber valve body presses tightly into the hole in the rim. |
| In the case of valves with a threaded metal base, a rubber
seal is used to seal the rim. The lateral faces of the rim hole
are sealing surfaces. They must therefore be free of rust and
dirt and must not be damaged. |
| The valve insert has the most important job in the valve. It
creates a seal and enables the regulation of the air pressure.
The small flat seal on the valve core can only function
correctly if it is free of foreign particles, dirt and moisture.
The compressed air system must be free of water and oil! |
| A valve cap must always be screwed onto the valve. It
prevents dirt from getting into the valve. Dirt which may be in
the valve would reach the seal of the valve plate when the tyre
is inflated and cause a leak. |
| The valve must be renewed every time a new tyre is fitted. |
| If the vehicle is driven without caps on the valves, there
is the danger that dirt may get into the valve. This leads to a
gradual loss of air, which in turn can lead to the destruction
of the tyre. |
| Separation of carcass and rubber
→ Fig. |
| Wide, circumferential furrows near the bead
→ Fig. |
| Stripped tread or stripped protector
→ Fig. |
 WARNING
| The valve cap must be fitted tightly to ensure
air-tight sealing. |
|
|
|

|
Ensure that the wheel rim is clean.
–
Insert new tyre valve with -VAS 6459--1-.
...
Other materials:
Front axle
Overview of fitting locations - front axle
I -
→ Chapter „Subframe“
II -
→ Chapter „Suspension strut, upper suspension link“
III -
→ Chapter „Lower suspension link ...
Removing and installing window slot inner seal
Note
Removal and installation are only described for the left
window slot inner seal. Removal and installation of the right
window slot outer seal are similar.
Removing
–
R ...
Removing and installing coolant pipes for auxiliary heater
Special tools and workshop equipment
required
Torque wrench -V.A.G 1410- (4…20 Nm)
Hose clamps, up to 25 mm -3094-
...
© 2016-2026 Copyright www.vwgolf.org

 Removing and installing valve, rubber valve
 WARNING
