Volkswagen Golf Service & Repair Manual: Removing and installing parking brake motor -V282-/-V283-
| Special tools and workshop equipment
required |
|
|
|
| Torque wrench -V.A.G 1331- |
| Vehicle diagnostic tester |
 Note Note
| Switch off ignition for at least 30 seconds before
disconnecting connector. |
|
|
|
| – |
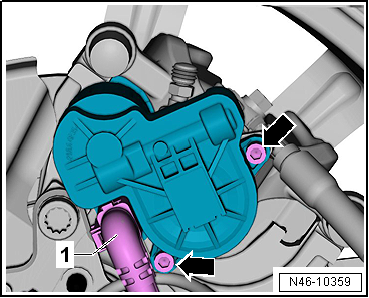
Disconnect connector -2- from
parking brake motor -1-. |
|
|

|
| – |
Unscrew both hexagon socket head bolts
-arrows- from parking brake motor. |
| – |
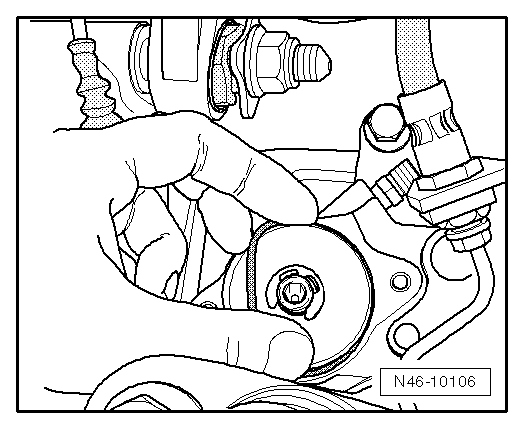
Pull parking brake motor off brake caliper while twisting
parking brake motor back and forth slightly. |
Note
| Take care not to damage annular groove for seal and contact
surface on parking brake motor. |
| – |
Clean annular groove and contact surface of parking brake
motor. |
|
|
|
| – |
Lightly grease new seal and install it, taking care not to
twist or damage it. |
| – |
Grease Torx socket on input shaft of parking brake motor
completely. |
Note
| The sealing ring must not be allowed to turn out while the
parking brake motor is being installed! |
| – |
Carefully push parking brake motor onto brake caliper while
ensuring that seal is seated correctly. |
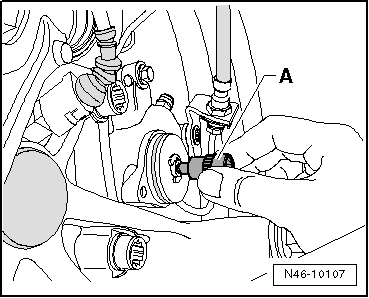
Note
| If necessary, turn input shaft back slightly using an E11
Torx socket -A- until parking brake
motor can be properly fitted. |
|
|
|
| – |
Turn parking brake motor until bolt hole and thread align. |
Note
| Make sure that parking brake motor is flush with brake
caliper. Never pull parking brake motor onto brake caliper using
securing bolts. |
|
|
|
| – |
Position hexagon socket head bolts
-arrows- by hand and tighten them. |
| – |
Carry out basic setting of brake system using
→ Vehicle
diagnostic tester. |
| → Chapter „Overview of fitting locations - parking brake“ |
|
|
|
1 -
Hexagon socket head bolt
8 Nm
2 -
Parking brake motor
Left parking brake motor -V282-, fitting location: on ...
Other materials:
Removing and installing air filter housing
Removing
–
Detach air hose -2-.
–
Lift air cleaner housing -1-
off ball studs.
–
Release hose clips -3- and
-4- and ...
System limits
First read and observe the introductory information
and safety warnings The area monitoring system (Front Assist) has physical
and system-related limits. The driver may therefore feel that, in certain circumstances,
some Front Assist reactions occur unexpectedly or with a delay. You should t ...
Removing and installing air duct for centre dash panel vent
Removing
–
Remove dash panel
→ General body repairs, interior; Rep. gr.70.
–
Remove air duct for centre dash panel vent
-1- upwards from ...
© 2016-2026 Copyright www.vwgolf.org

 Overview of fitting locations - parking brake
 Brake pedal