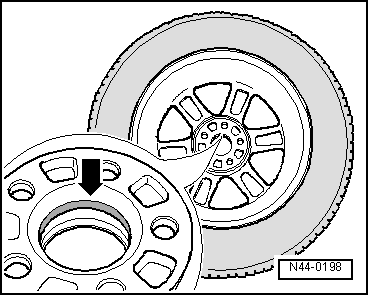
Volkswagen Golf Service & Repair Manual: Wheel change, protecting wheel centring seat against corrosion
| Applies to alloy and steel wheels |
| When changing a wheel, wheel centring seat should be waxed
using wax spray to prevent corrosion between wheel centring seat
and wheel rim
→ Electronic Parts Catalogue “ETKA”. |
| – |
Thoroughly clean wheel centring seat on wheel hub and the
centring ring of the wheel rim. |
|
|
|
| – |
Apply wax to centring area -arrow-
with a brush. |
| Ensure that only centring ring -arrow-
but not contact surface of wheel rim has been waxed. Otherwise,
the brakes will be soiled, which would reduce the braking
efficiency. |
 WARNING
| Wheel bolts, contact surfaces of wheel hub and wheel
rim and wheel hub threads must not be waxed. Never treat
wheel securing bolts with lubricant or corrosion
protection materials! |
|
| – |
Install wheel and tighten bolts or nuts
→ Chapter. |
|
|

|
Ensure that the wheel rim is clean.
–
Insert new tyre valve with -VAS 6459--1-.
...
Warming cold tyres to minimum installation temperature
Note
This instruction also applies to ultra-high performance
tyres (h ...
Other materials:
Notes for vehicles with start-stop system
Observe the safety precautions for vehicles with a
Start/Stop system
→ Chapter.
The following abort conditions deactivate the
start-stop-function:
The Start/Stop system has been switched off via th ...
Checking fuel pressure
Special tools and workshop equipment required
Removal wedge -3409-
Pressure tester -VAS 6550-
Connector cable -VAS 6550/3-3-
Connector cable -VAS 6550/3-4-
Vehicle diagnostic tester
...
Assembly overview - brake servo/brake master cylinder, RHD vehicles
Note
Only use new brake fluid conforming to VW standard (VW 501 14).
1 -
Cap
2 -
Brake fluid reservoir
With brake fluid level warning contact ...
© 2016-2026 Copyright www.vwgolf.org

 Mounting tyre
 Wheel change, installation requirements
 WARNING