VW Golf manuals

Volkswagen Golf Service & Repair Manual: Removing and installing moulded headliner, estate

Special tools and workshop equipment required


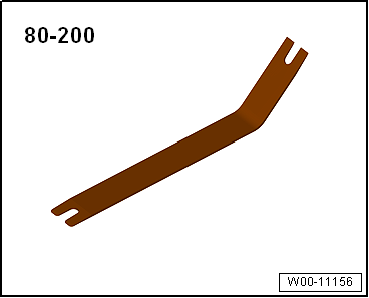
Removal lever -80 - 200


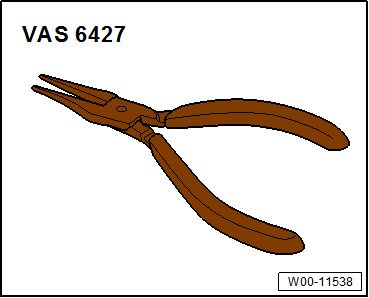
Release pliers -VAS 6427

Removing
Vehicles with sunroof
–  Open sliding sunroof completely.
–  Open sun blind at about 2/3.
–  Clean removal lever -80 - 200- to prevent the moulded headliner from getting soiled.
–  Run removal lever -80 - 200- between trim frame -2- and moulded headliner -1- until you feel one of the retaining clips -3-.
–  Unclip -arrow- trim frame -2- all round in area of retaining clips -3- using removal lever -80 - 200-.
Continued for all vehicles
–  Unclip upper A-pillar trims in area of overlap to moulded headliner → Chapter.
–  Remove upper B-pillar trims → Chapter.
–  Remove C-pillar trims → Chapter.
–  Remove D-pillar trims → Chapter.
–  If necessary, remove interior mirror covers → Chapter.
–  Remove sun visors → Chapter.
–  Remove sun visor centre mount → Chapter.
–  Remove storage compartment in roof headliner → Chapter.
–  If fitted, unscrew bolts for eyelets for net partition. Do not remove eyelets for net partition → Chapter.
–  Remove roof grab handle → Chapter.
–  Remove luggage compartment light -W3- → Electrical system; Rep. gr.96.
–  Fold down rear seat backrests.
–  Move front backrest to 45° position.
–  Disconnect connector for moulded headliner wiring harness in retaining frame for moulded headliner.
  Caution
  •   The moulded headliner is easily kinked.
  •   If kinked, the headliner must be renewed.
  Note
When carrying out the steps below, ensure that release pliers -VAS 6427- are positioned centrally in retaining clips.
 

Removing and installing moulded headliner, estate

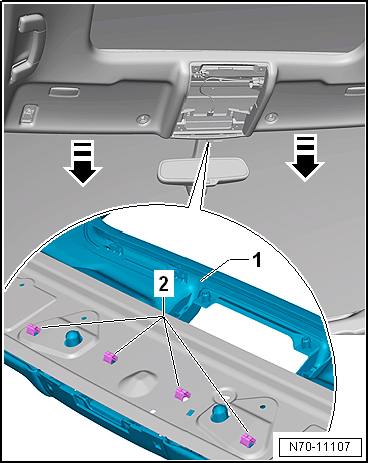
–  Release retaining clips -2- in retaining frame for moulded headliner -1- from body mountings using release pliers -VAS 6427-.
–  Hold moulded headliner -1- in such a way -arrows- that released retaining clips -2- do not engage again.
–  With the aid of a second mechanic, carefully remove moulded headliner -1- from vehicle through rear lid aperture.
Installing
Cutting new cut-outs into a new moulded headliner
On vehicles with illuminated vanity mirrors and/or rain and light sensor -G397- the respective cut-outs must be cut into a new moulded headliner.
–  Cut the required cut-outs into the new moulded headliner using a cutter knife. The moulded headliner is provided with the respective markings.
If possible use the old part as template.
The locations for the vanity mirror lights are indicated by 2 rectangular indentations on the inside of the moulded headliner.
Centre the rectangular cuts in the rectangular indentations:
  Dimensions: 20.5 mm Ч 59.6 mm
Further installation is carried out in reverse order of removal. Observe the following:
  Note
  •   Before installing, check all fasteners for damage and renew if necessary.
  •   Always renew retaining clips for trim frame (qty. 23) before installation.
 

Removing and installing moulded headliner, estate

Removing and installing moulded headliner, saloon
Special tools and workshop equipment required         Wedges -T10383   &nb ...

Installing roof reinforcement to body, estate without sliding sunroof
Special tools and workshop equipment required         Electric cutter -V.A.G 1561A ...

Other materials:

Checking condensation drainage
Checking –  Remove right centre console trim in footwell → General body repairs, interior; Rep. gr.68. –  Carefully fold back floor covering in area of condensation drain hose so ...

Removing and installing fuel gauge sender -G-, vehicles with front-wheel drive
Removing –  Remove fuel delivery unit → Chapter. –  Note colour assignment of cables -1- for re-installation.     –  ...

Removing and installing engine oil cooler
Removing –  Drain coolant → Chapter. –  Remove intake manifold → Chapter.     –  Unscrew bolts -arro ...

© 2016-2024 Copyright www.vwgolf.org