Volkswagen Golf Service & Repair Manual: Installing brackets for parking aid system
| Special tools and workshop equipment
required |
|
|
|
| |
|
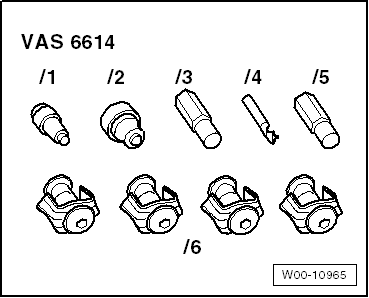
Installation tool for PDC bracket -VAS 6614 |
|
|
|
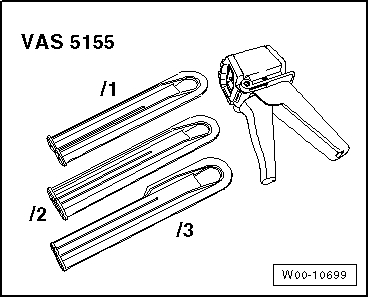
Cartridge gun -VAS 5155- |
| |
2-component plastic adhesive |
|
→ Electronic Parts Catalogue “ETKA” |
| |
Bonding agent for plastics |
|
→ Electronic Parts Catalogue “ETKA” |
|
|
→ Electronic Parts Catalogue “ETKA” |
|
|
→ Electronic Parts Catalogue “ETKA” |
 Note Note
| |
Observe manufacturer's instructions enclosed in the
packaging. |
| |
Observe minimum curing period. |
|
|
|
Note
| The brackets are installed after the bumper cover has been painted. |
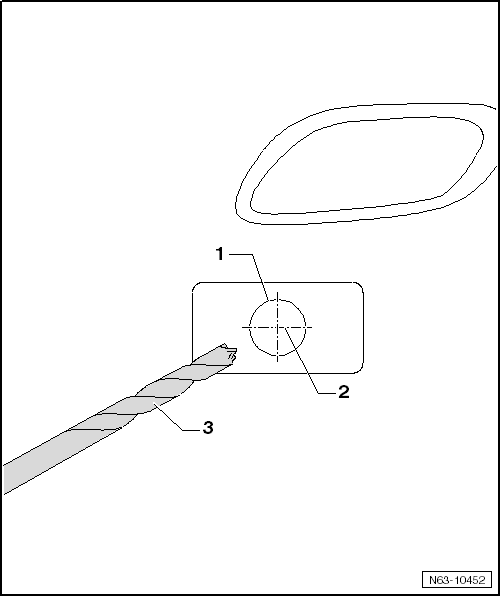
| The 4 markings for brackets -1- can be
found on the inside of the bumper cover. |
| – |
If there are no markings, the centre point -2-
must be determined. |
| – |
The holes must be drilled from the inside to the outside with the
drill in the tool kit -3-. |
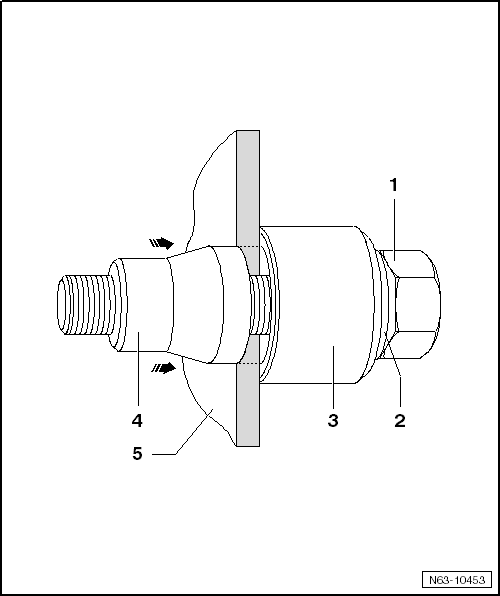
| – |
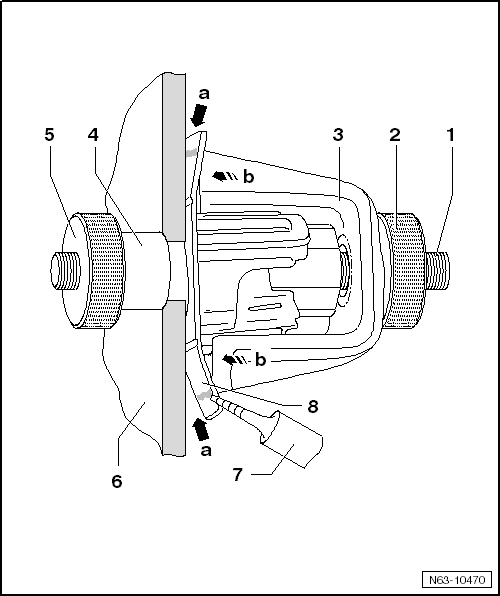
Set hole punch in position with bolt head -1-,
washer -2- and thrust bearing
-3- from inside bumper cover
-5-. |
| – |
Screw on punch -4-, not quite as far as
bumper cover. |
| – |
Press punch -4- against bumper cover. |
| – |
Tighten hole punch -1-. |
Note
| The punch -4- must not turn on the
paint of the bumper cover. |
| – |
Pull the punch -4- through the material
of the bumper cover -5--arrows- by turning
the bolt head -1-. |
| – |
Remove hole punch and make the next holes. |
| – |
Thoroughly clean bumper cover and bracket with cleaning solution. |
Note
| Approx. 1 cm of adhesive from tip should not be applied. |
| – |
Lightly sand inside of bumper cover -6-
and clean thoroughly. |
| – |
Apply a very thin layer of bonding agent for plastics to bumper
cover and bracket and allow to flash off for 10 minutes. |
| – |
Push bracket -8- onto centring pin
-1- and through bumper cover
-6-. |
| – |
Push counterhold -4- on and gently
tighten knurled nut -5-. |
| – |
Push clip -3- on and then place knurled
nut -2- in position but do not tighten it. |
| – |
All the brackets are prepared to this stage. |
Note
| The adhesive must not run into the angle. |
| – |
Apply adhesive as shown in illustration and tighten knurled nut
-2-. |
| – |
Remove all centring pins after minimum curing period. |
| Do not carry out any further work on bumper cover or
brackets until the minimum curing period of 30 minutes has
expired. |
| In this time, the bumper cover must remain where it is and
should not be moved. |
|
|
|
Volkswagen R GmbH, optional equipment, “R Line” and “R”
Removing
...
Other materials:
Removing and installing coolant pump
Special tools and workshop equipment required
Refractometer -T10007 A-
Drip tray for workshop hoist -VAS 6208-
Hose clip pliers -VAS 6340-
Cooling system charge unit -VAS 6096-
Adapter for cooling ...
Removing and installing B-pillar trim on rear door
Note
Removal and installation are described only for the left side.
Removal and installation of the right side are similar.
Removing
–
Run door window down to bottom position.
–
Pull window channel -3- in area ...
2-pack fine filler, flexible
Designation:
2-pack fine filler, flexible -LSP 787 100 A1-
Issued 07.2010
Product description
2-pack fine filler, flexible -LSP 787 100 A1- is a two-pack
filler with g ...
© 2016-2025 Copyright www.vwgolf.org

 Removing and installing impact bar