Volkswagen Golf Service & Repair Manual: Removing and installing lambda probe 1 before catalytic converter
-GX10-/lambda probe 1 after catalytic converter -GX7-
| Lambda probe 1 before catalytic converter -GX10- consists of |
| Lambda probe heater -Z19- |
| Lambda probe 1 after catalytic converter -GX7- consists of |
| Lambda probe after catalytic converter -G130- |
| Lambda probe heater 1 after catalytic converter -Z29- |
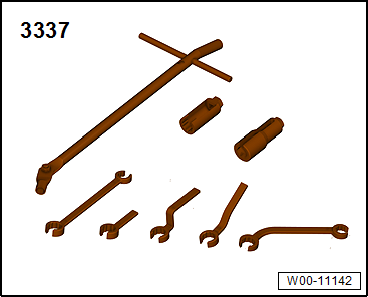
| Special tools and workshop equipment
required |
|
|
|
| Lambda probe open ring spanner set -3337- |
|
|
|
| – |
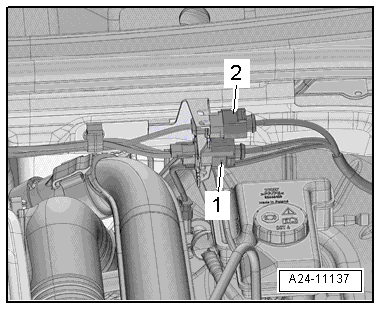
Unplug corresponding electrical connector: |
| 1 - |
For Lambda probe 1 before catalytic converter -GX10-. |
| 2 - |
For Lambda probe 1 after catalytic converter -GX7-. |
|
|
|
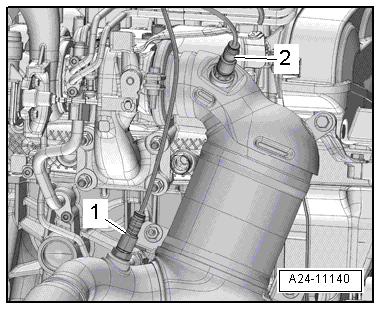
| – |
Unscrew corresponding Lambda probe using a tool from Lambda
probe open ring spanner set -3337-. |
| 1 - |
Lambda probe 1 after catalytic converter -GX7- |
| 2 - |
Lambda probe 1 before catalytic converter -GX10- |
| Installation is carried out in the reverse order; note the
following: |
 Note Note
| New lambda probes are coated with an assembly paste. This
paste must not get into the slots on the Lambda probe body. |
| In the case of a used Lambda probe grease only the thread
with high-temperature paste. This paste must not get into the
slots on the Lambda probe body. High-temperature paste
→ Electronic Parts Catalogue. |
| During installation, the electrical connecting cable of the
Lambda probe must be attached in the same places. The wire must
be prevented from touching the exhaust pipe. |
| → Chapter „Assembly overview - Lambda probe“ |
|
|
|
Note
New lambda probes are coated with an assembly paste. This
paste must not get into the slots on the Lambda probe body.
...
© 2016-2024 Copyright www.vwgolf.org

 Assembly overview - Lambda probe