Volkswagen Golf Service & Repair Manual: Repairing trailing arm
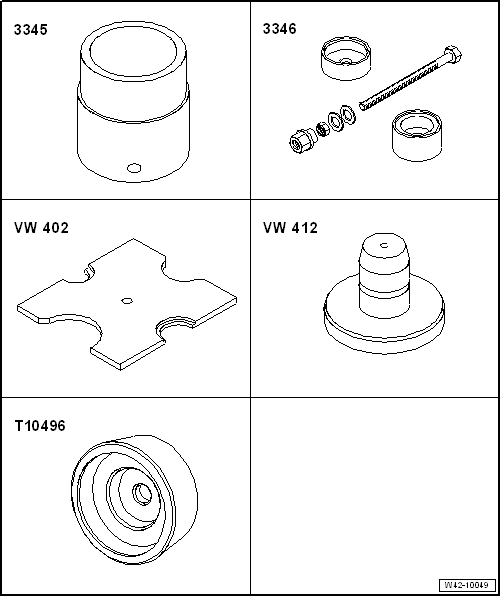
| Special tools and workshop equipment required |
| Tube for wheel bearing -3345- |
| – |
Remove trailing arm with mounting bracket
→ Chapter. |
|
|
|
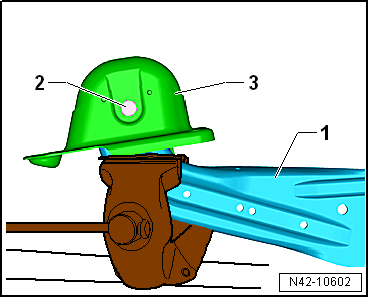
| – |
Clamp trailing arm -1- in vice
using protective jaw covers. |
| – |
Undo bolt -2- and remove
mounting bracket -3- from trailing
arm. |
|
|
|
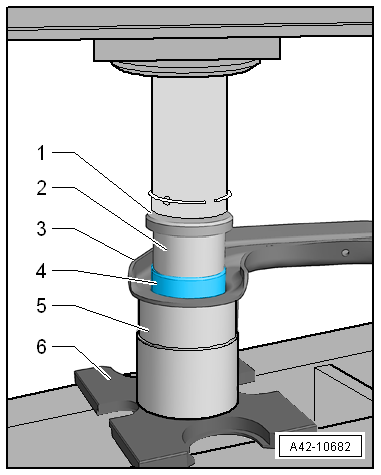
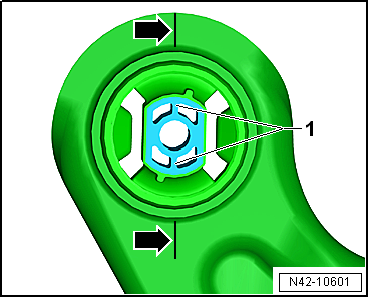
| Pressing out bonded rubber bush |
| – |
Fit tools as shown in illustration. |
| 2 - |
Tube -3346/1- from assembly tool -3346- (the deep recess
must face the bonded rubber bush) |
| 5 - |
Tube for wheel bearing -3345- |
| 6 - |
Thrust plate -VW 402- |
| – |
Press out bonded rubber bush. |
|
|
|
| Pressing in bonded rubber bush |
| – |
Mark position of bonded rubber bush on trailing arm using a
set square. |
| – |
Position outer edge of set square on upper radius of hole
-1- and on lower radius of hole
-2-. |
| – |
Make a mark above and below the trailing arm bush
respectively -arrows-. |
|
|
|
| Position bonded rubber bush on trailing arm so that marked
line -arrows- lies between the ribs
-1-. |
 Note
| Take great care to ensure that the installation position of
the bonded rubber bush is correct relative to the bush in the
trailing arm. |
|
|
|
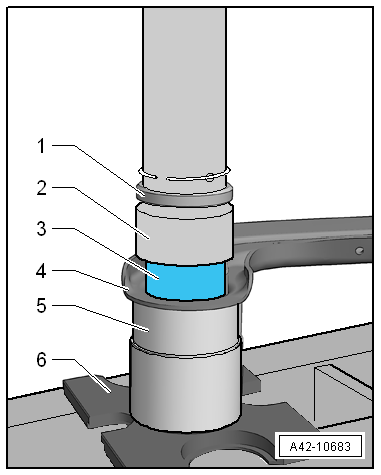
| – |
Fit tools as shown in illustration. |
| 2 - |
Thrust piece -T10496- |
| 5 - |
Tube for wheel bearing -3345- |
| 6 - |
Thrust plate -VW 402- |
| – |
Pressing in bonded rubber bush. |
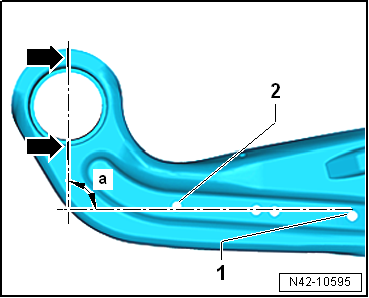
| Determining position of mounting bracket in relation to
trailing arm |
|
|
|
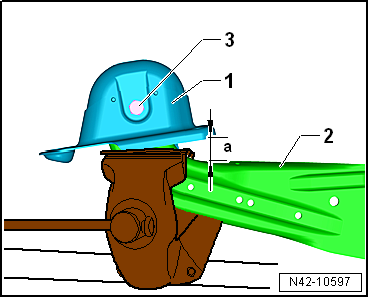
| – |
Clamp trailing arm -2- in vice
using protective jaw covers. |
| – |
Position mounting bracket -1-
on trailing arm -2-. |
| – |
Set dimension -a- to 37 mm and
tighten bolt -3-. |
| – |
Install trailing arm with mounting bracket
→ Chapter. |
|
|
|
Special tools and workshop equipment
required
Torque wrench -V.A.G 1332-
...
Other materials:
Reinforced and Extra Load (XL) tyres
Some tyre manufacturers have for some time replaced the
designation “Reinforced” with the designation “Extra Load”. This
designation has long been standard in non-European countries.
Technically, there is no difference between them.
...
Locking the front passenger door and rear doors manually
Fig. 210 In the end face of the right-hand
door: manual lock covered by a rubber seal
Fig. 211 Manually locking the vehicle with
the vehicle key
First read and observe the introductory information
and safety warningsThe front passenger door and the rear doors can be locked
manually. This ...
Checking cooling system for leaks
Special tools and workshop equipment
required
Cooling system tester -V.A.G 1274 B-
Adapter for cooling system tester -V.A.G ...
© 2016-2024 Copyright www.vwgolf.org

 Removing and installing trailing arm with mounting bracket, except for
e-Golf
Removing and installing trailing arm with mounting bracket, except for
e-Golf Drive shaft