Volkswagen Golf Service & Repair Manual: Renewing left oil seal
| Special tools and workshop equipment
required |
|
|
|
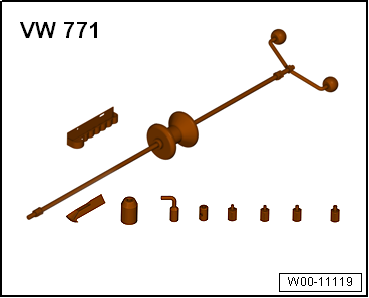
| Multipurpose tool -VW 771- |
|
|
|
| – |
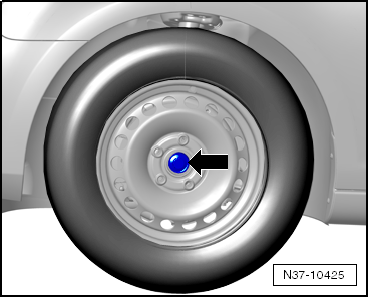
Step on the brake pedal while a second mechanic loosens the
left drive shaft bolt -arrow-. |
| – |
Remove noise insulation
→ General body repairs, exterior; Rep. gr.66. |
| – |
Drain gear oil
→ Chapter. |
| – |
Remove lower part of front left wheel housing liner
→ General body repairs, exterior; Rep. gr.66. |
| – |
Remove left drive shaft
→ Running gear, axles, steering; Rep. gr.40. |
|
|
|
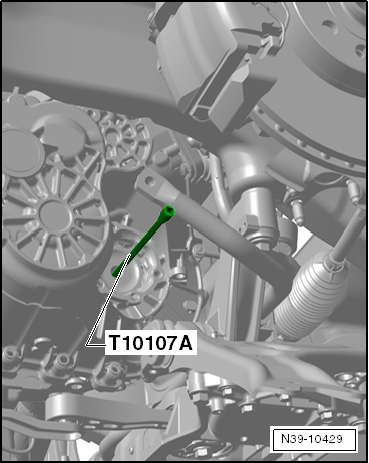
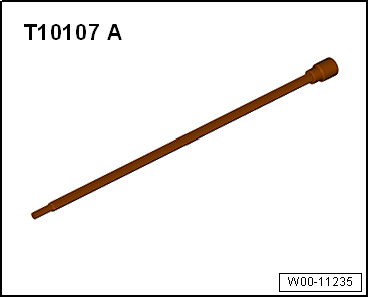
| – |
Remove left flange shaft of gearbox using socket -T10107 A-. |
| Bolt has a 6 mm hexagon socket. Bolt can also be removed and
installed with socket -V.A.G 1669-. |
|
|
|
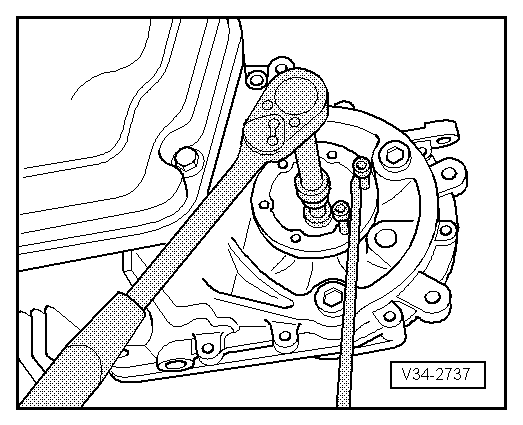
| – |
Screw 2 bolts into flange and counterhold flange shaft with
a lever in order to remove and install flange shaft. |
| – |
Remove flange shaft along with spring, thrust washer and
tapered ring. |
|
|
|
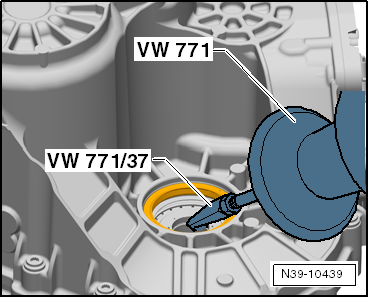
| – |
Pull out oil seal using multipurpose tool -VW 771- and
extractor hook -VW 771/37-. |
| Install in reverse order of removal, observing the
following: |
| – |
Lubricate outer circumference of new oil seal with gear oil. |
|
|
|
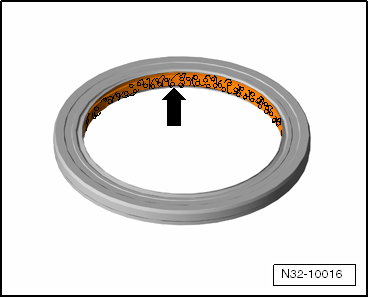
| – |
Fill space between sealing lip and dust lip
-arrow- with sealing grease
→ Electronic Parts Catalogue (ETKA). |
|
|
|
| – |
Drive in new oil seal to stop, being careful not to cant oil
seal. |
 Note Note
| Renew flange shaft countersunk bolt. |
| Press flange shaft against spring force into gearbox so that
bolt engages in threaded piece of differential. |
| – |
Fit flange shaft and secure with new countersunk bolt.
Specified torque:
→ Chapter |
| – |
Install drive shaft
→ Running gear, axles, steering; Rep. gr.40. |
| – |
Install front left wheel housing liner
→ General body repairs, exterior; Rep. gr.66. |
| – |
Install noise insulation
→ General body repairs, exterior; Rep. gr.66. |
| – |
Fill with gear oil
→ Chapter. |
|
|
|
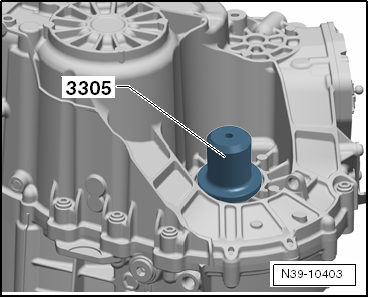
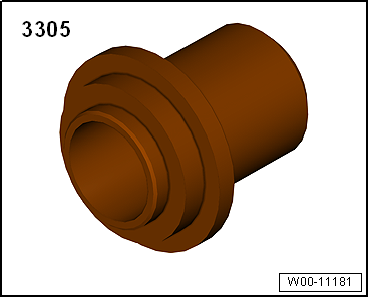
1 -
Left flange shaft
2 -
Bolt
Always renew after removing.
30 Nm
3 -
Seal, left ...
Renewing right oil seal, gearboxes with
flange shaft
Special tools and workshop equipment
required
...
Other materials:
Preparing fibre optic cable
Special tools and workshop equipment
required
Fibre optic cable repair kit -VAS 6223A-
Cutting pliers -VAS 6228-
...
Information on the brakes
First read and observe the introductory information
and safety warnings New brake pads cannot generate the full
braking effect during the first 200 to 300 km and must first be run in . However,
you can compensate for the slightly reduced braking force by applying more pressure
to the br ...
Assembly overview – battery, vehicles without high-voltage system
1 -
Retaining clip
2 -
Bolt
Specified torque: 15 Nm
3 -
Nut
Specified torque: 6 Nm
4 -
Positive cable
With battery terminal clamp
...
© 2016-2026 Copyright www.vwgolf.org

 Overview of fitting locations - seals
 Renewing right oil seal