Volkswagen Golf Service & Repair Manual: Renewing crankshaft oil seal - belt pulley end
| Special tools and workshop equipment
required |
|
|
|
| – |
Remove toothed belt
→ Chapter. |
|
|
|
| – |
Detach crankshaft pulley -1--arrow-. |
Risk of damage to engine caused by incorrect valve timing.Do not turn
crankshaft out of TDC position.
|
|
|
| – |
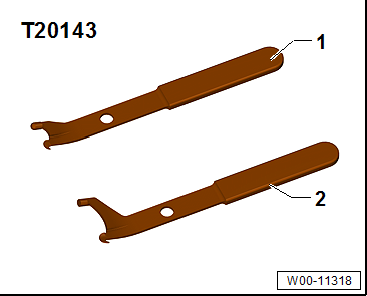
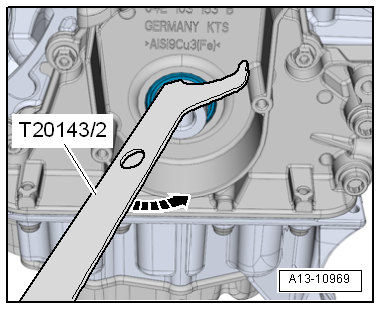
Pry out seal using extractor hook -T20143/2--arrow-. |
| – |
Clean contact surface and sealing surface. |
 Note Note
| Do not lubricate new seal. |
|
|
|
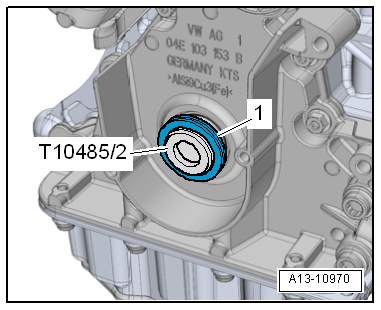
| – |
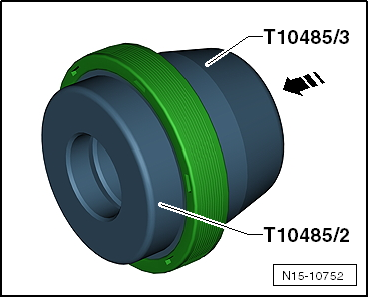
Fit new seal in -direction of arrow-
onto assembly sleeve -T10485/2-. |
|
|
|
| – |
Pull off assembly sleeve -T10485/3- in
-direction of arrow-. |
| Installation position: closed end of seal faces fitting
sleeve. |
|
|

|
| – |
Fit guide sleeve -T10485/2- with oil seal
-1- onto crankshaft. |
|
|
|
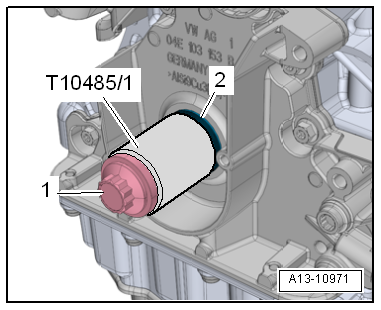
| – |
Use fitting sleeve -T10485/1- and bolt
-1- for poly V-belt pulley to pull in oil seal
-2- onto stop. |
|
|
|
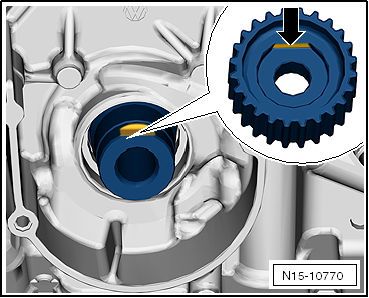
| – |
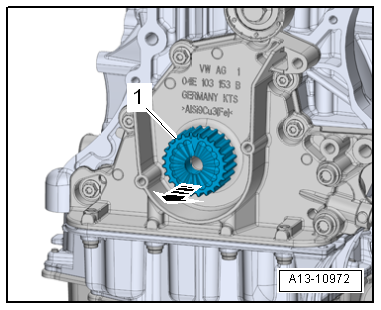
Fit crankshaft sprocket onto crankshaft. |
| The contact surface between vibration damper and crankshaft
pulley must be free of oil and grease. |
| The machined surface -arrow- of
crankshaft pulley must be positioned over the machined surface
of the crankshaft journal. |
| – |
Install toothed belt (adjust valve timing)
→ Anchor. |
|
|
|
Removing
–
Disconnect battery
→ Electrical system; Rep. gr.27.
–
Remove battery tr ...
Special tools and workshop equipment
required
Flat scraper
Sealant
→ Electronic Parts Catalogue
...
Other materials:
Instructions for use of flanging tool
Unbolt relevant brake line at brake caliper or wheel brake
cylinder; catch escaping brake fluid and dispose of this as per
regulations.
–
Cut through brake line at a suitable point (straigh ...
General description
Battery charger - VAS 5906-
WARNING
Danger of injury! Observe warning notices and safety
regulations
→ Chapter!
...
Checklist for evaluating running gear on accident vehicles
Damage to running gear may go unnoticed during repairs to
load-bearing and suspension parts of accident vehicles. Under
certain circumstances, this undiscovered damage could lead to
serious consequential damage during later vehicle operation.
Therefore, ...
© 2016-2026 Copyright www.vwgolf.org


 Removing and installing engine support
 Removing and installing sealing flange on pulley end