Volkswagen Golf Service & Repair Manual: Renewing bonded rubber bush for wheel bearing housing, front-wheel drive
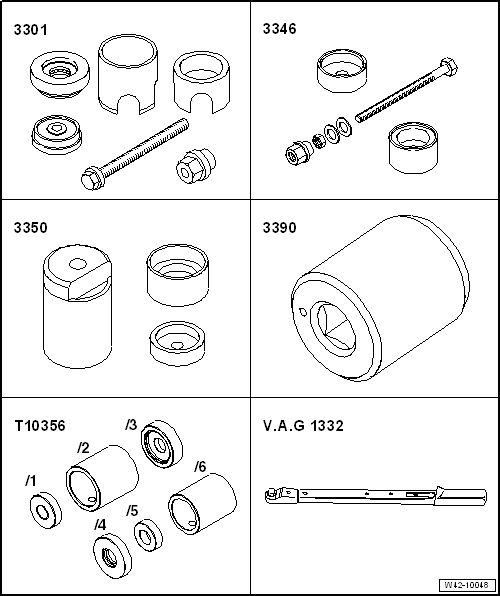
| Special tools and workshop equipment required |
| Torque wrench -V.A.G 1332- |
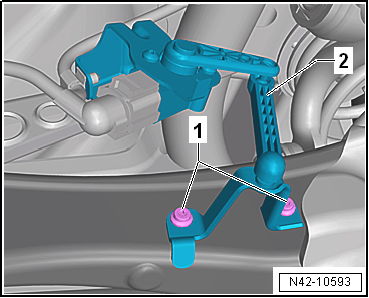
| Vehicles with vehicle level sender |
|
|
|
| – |
Remove retainer for rear left vehicle level sender-2-. |
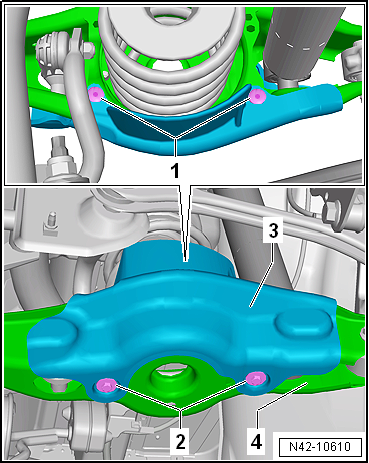
| Vehicles with stone guard |
|
|
|
| – |
Remove spreader rivet -1-. |
| – |
Unscrew bolts -2- for stone
deflector -3-. |
| Continuation for all vehicles |
| – |
Remove spring
→ Chapter. |
|
|
|
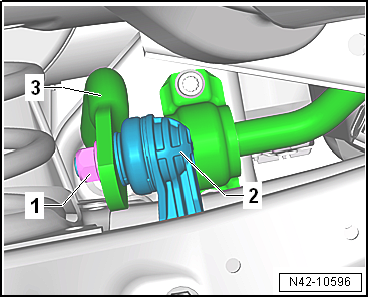
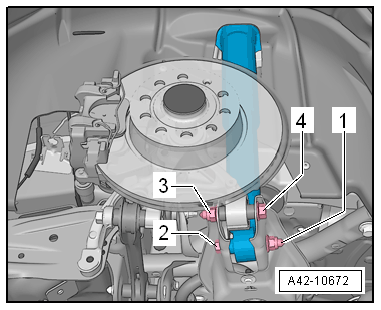
| – |
Unscrew nut -1- from coupling
rod -2-. |
| – |
Pull coupling rod -2- out of
anti-roll bar -3-. |
|
|
|
| – |
Unscrew nut -1- and pull out
bolt -2- securing shock absorber. |
| – |
Unscrew nut -3- and pull out
bolt -4- securing wheel bearing
housing. |
|
|
|
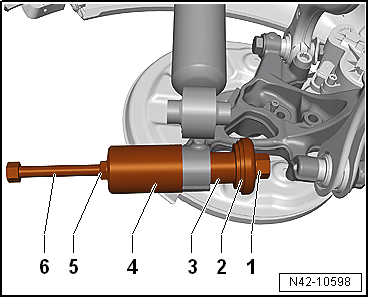
| Pressing out bonded rubber bush |
| 2 - |
Thrust disc from assembly tool -3301- |
| 4 - |
Sleeve from assembly tool -3350- |
| – |
Pull out bonded rubber bush by turning nut -3346/3--1-.
When doing this, counterhold spindle -3346/2--6-. |
|
|
|
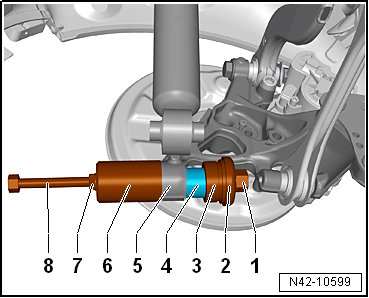
| Pulling in bonded rubber bush |
| 2 - |
Thrust disc from assembly tool -3301- |
| 3 - |
Thrust piece -T10356/5- |
| 5 - |
Wheel bearing housing |
| 6 - |
Sleeve from assembly tool -3350- |
| – |
Pull in bonded rubber bush to stop by turning nut -3346/3--1-.
When doing this, counterhold spindle -3346/2--8-. |
 Note Note
| Insert bearing carefully so it does not cant. |
| Install in reverse order of removal, observing the
following: |
| → Chapter „Assembly overview - wheel bearing assembly“ |
| → Chapter „Assembly overview - suspension strut, shock absorber,
spring, multi-link suspension“ |
| → Chapter „Assembly overview - anti-roll bar, multi-link
suspension, front-wheel drive“ |
| → Chapter „Torque settings for wheel bolts“ |
| The threaded connections to the lower transverse link may
only be loosened and tightened in the unladen weight position
→ Chapter. |
| On vehicles with vehicle level sender, carry out basic
settings for wheel damper electronics → Vehicle
diagnostic tester. |
| On vehicles with vehicle level sender, carry out basic
adjustment of headlights
→ Electrical system; Rep. gr.94. |
|
|
|
Special tools and workshop equipment
required
Torque wrench -V.A.G 1332-
...
Special tools and workshop equipment required
Assembly tool -3301-
Viscous fan fitting tool -3367-
Carrier -3390-
Torqu ...
© 2016-2024 Copyright www.vwgolf.org

 Removing and installing wheel bearing unit, multi-link suspension,
four-wheel drive
Removing and installing wheel bearing unit, multi-link suspension,
four-wheel drive Renewing bonded rubber bush for wheel bearing housing, four-wheel drive