Volkswagen Golf Service & Repair Manual: Removing and installing moulded headliner, saloon
| Special tools and workshop equipment
required |
|
|
|
| |
|
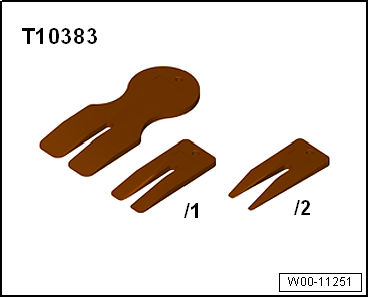
Wedges -T10383 |
| |
|
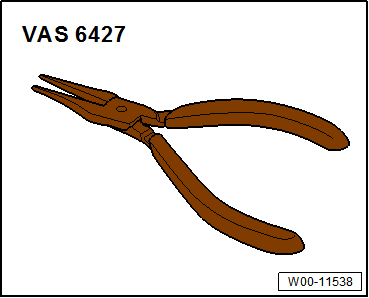
Release pliers -VAS 6427 |
| – |
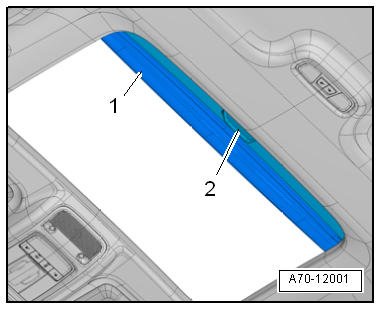
Open sunroof -1- completely. |
| – |
Open sun blind -2- by approx.
2/3. |
|
|
|
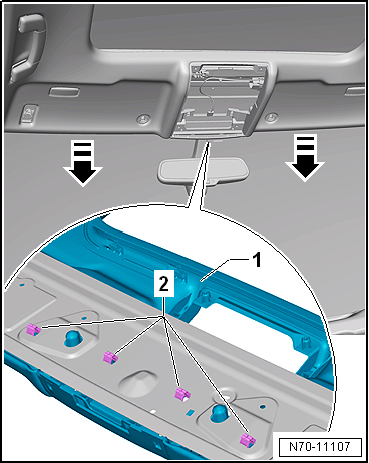
| – |
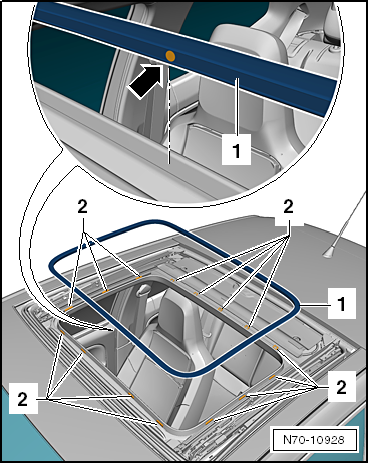
Release retaining clips -2- in
retaining frame for moulded headliner -1-
from body mountings using release pliers -VAS 6427-. |
| – |
Hold moulded headliner -1- in
such a way -arrows- that released
retaining clips -2- do not engage
again. |
| – |
With the aid of a second mechanic, carefully remove moulded
headliner -1- from vehicle through
rear lid aperture. |
| Cutting new cut-outs into a new moulded
headliner |
| On vehicles with illuminated vanity mirrors and/or rain and
light sensor -G397- the respective cut-outs must be cut into a
new moulded headliner. |
| – |
Cut the required cut-outs into the new moulded headliner
using a cutter knife. The moulded headliner is provided with the
respective markings. |
| If possible use the old part as template. |
| The locations for the vanity mirror lights are indicated by
2 rectangular indentations on the inside of the moulded
headliner. |
| Centre the rectangular cuts in the rectangular indentations: |
| Dimensions: 20.5 mm Ч 59.6 mm |
| Further installation is carried out in reverse order of
removal. Observe the following: |
 Note Note
| |
Before installing, check all fasteners for damage and
renew if necessary. |
|
|
|
-
| |
The yellow marking -arrow-
on fastening strip -1- must
point in direction of travel. |
-
| |
Always renew retaining clips
-2- (qty. 15) before installation. |
| – |
Secure fastening strip -1- of
sunroof on retaining clips -2- of
moulded headliner. |
|
|
|
Special tools and workshop equipment
required
Wedges -T10383
...
Special tools and workshop equipment
required
Removal lever -80 - 200
&nbs ...
© 2016-2026 Copyright www.vwgolf.org

 Caution
 Removing and installing roof end strip
 Removing and installing moulded headliner, estate