Volkswagen Golf Service & Repair Manual: Removing and installing fresh air/recirculated air, air flow flap control motor -V425-, LHD vehicles
|
 Note Note
|
|
Note
Note
Note
|
|
 Removing and installing right temperature flap control motor -V159-, RHD
vehicles
Removing and installing right temperature flap control motor -V159-, RHD
vehicles
Special tools and workshop equipment
required
Vehicle diagnostic tester
Bit ratchet
First c ...
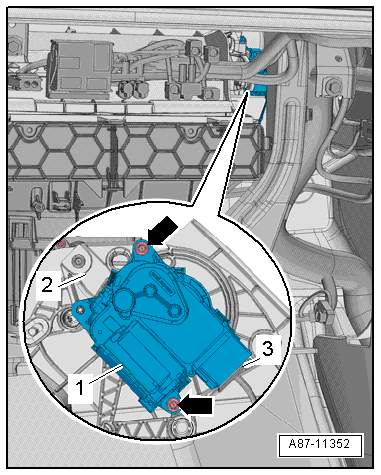
 Removing and installing fresh air/recirculated air, air flow flap control
motor -V425-, RHD vehicles
Removing and installing fresh air/recirculated air, air flow flap control
motor -V425-, RHD vehicles
Special tools and workshop equipment
required
Vehicle diagnostic tester
Note
The control motor has end st ...
Other materials:
Towing attachment type plate
The trailer load and drawbar load details on the type plate
of the towing attachment are test figures for the device. The
approved details for the relevant vehicle could be below the
trailer load and drawbar load specifications of the trailer.
Figures ca ...
Assembly overview - wheel housing trim, estate
Note
The illustration shows the wheel housing trim on the left side.
The right-hand side is similar (mirror image of left-hand side).
I: Vehicles without side padding
II: Vehicles with side padding
1 -
Wheel housing tri ...
Removing and installing manually operated anti-dazzle interior mirror,
without rain and light sensor -G397- and front camera for driver assist systems
-R242-
Removing
–
Turn interior mirror -2- anti-clockwise
-arrow- by 90° (1/4
turn).
–
Remove interior mirror -2- from
glued-on retaining plate -1-.
Installing
Note
...
