Volkswagen Golf Service & Repair Manual: Plug-in connectors
Separating plug-in connectors
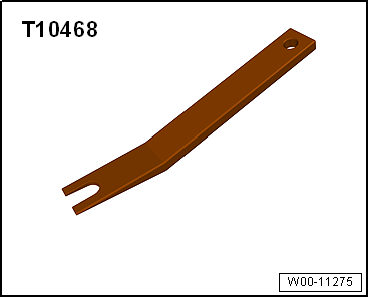
| Special tools and workshop equipment
required |
|
|
|
| Assignment of plug-in connectors |
 Note Note
| The plug-in connectors for fuel, vacuum and breather lines
are colour coded. There is either a coloured dot on the plug-in
connector or the release button is of the respective colour
→ Anchor. |
| Plug-in connectors for fuel lines must engage
»audibly« when joined. |
| Ensure plug-in connector is secured properly by pulling it. |
|
|
|
| Plug-in connector |
Colour
code on plug-in connector |
| Fuel supply |
Black |
| Fuel return line |
Blue |
| Breather |
White, beige |
| Vacuum |
Green |
| The fuel system is pressurised.Risk of injury
due to fuel which may spurt out.Wear eye protection.Wear protective
gloves.Release pressure: place clean cloth around connection and
carefully open connection. |
|
|
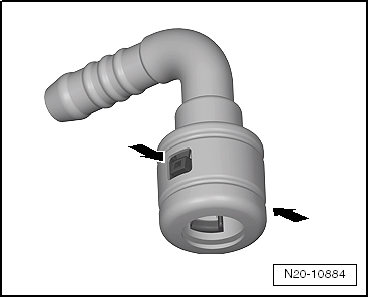
| Plug-in connector with release buttons
-arrows- on right and left |
|
|
|
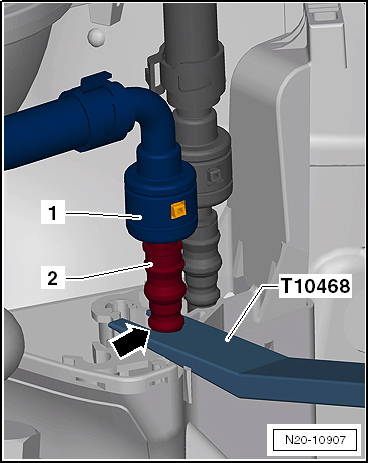
| It is necessary to counterhold the fuel connection
-1- in the engine compartment. |
| – |
Insert lever between heat shield and stop -T10468--arrow-
of fuel line -2- and counterhold. |
|
|
|
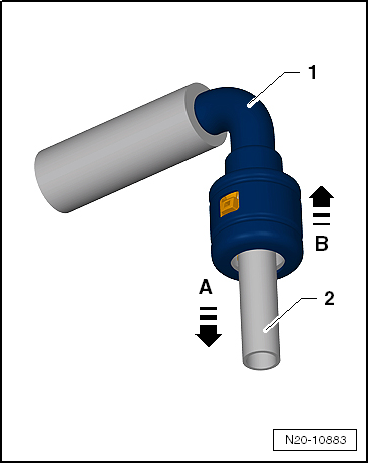
| Continuation for all coupling points of fuel system: |
| – |
Push plug-in connector -1- in
-direction of arrow A-. |
| – |
Press and hold release buttons. |
| – |
Pull plug-in connector -1- off
fuel line -2- in
-direction of arrow B-. |
| Take note of colour assignment during installation
→ Anchor |
| Plug-in connectors for fuel lines must engage
»audibly« when joined. |
| – |
Ensure plug-in connector is secured properly by pulling it. |
|
|
|
| Push-fit coupling with pull-release mechanism
-arrow-. |
|
|
|
| – |
Push plug-in connector -1- in
-direction of arrow A-. |
| – |
Pull pull-release mechanism -2-
in -direction of arrow B-. |
| – |
Pull plug-in connector -1- off
fuel line -3- in
-direction of arrow B-. |
| Take note of colour assignment during installation
→ Anchor |
| Plug-in connectors for fuel lines must engage
»audibly« when joined. |
| – |
Ensure plug-in connector is secured properly by pulling it. |
|
|
|
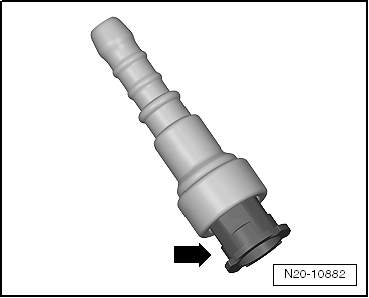
| Push-fit coupling with front button
-arrow- |
| – |
Press release button -arrow-
and pull off plug-in connectors. |
| Take note of colour assignment during installation
→ Anchor. |
| Plug-in connectors for fuel lines must engage
»audibly« when joined. |
| – |
Ensure plug-in connector is secured properly by pulling it. |
|
|

|
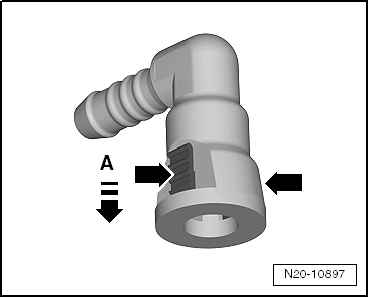
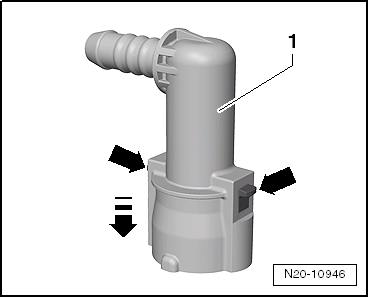
| Push-fit coupling with release button
-arrows- on right and left |
| – |
Push plug-in connector in -direction
of arrow A-. |
| – |
Press release buttons -arrows-
and pull off plug-in connector. |
| Take note of colour assignment during installation
→ Anchor. |
| Plug-in connectors for fuel lines must engage
»audibly« when joined. |
| – |
Ensure plug-in connector is secured properly by pulling it. |
|
|
|
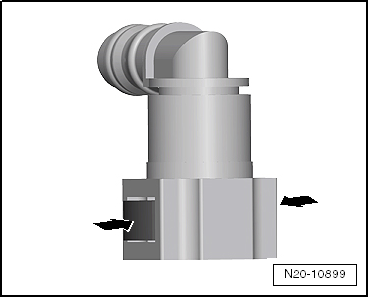
| Push-fit coupling with release buttons
-arrows- on right and left |
| – |
Press release buttons -arrows-
and pull off plug-in connector. |
| Take note of colour assignment during installation
→ Anchor. |
| Plug-in connectors for fuel lines must engage
»audibly« when joined. |
| – |
Ensure plug-in connector is secured properly by pulling it. |
|
|
|
| Push-fit coupling with release buttons
-arrows- on right and left |
| – |
Push plug-in connector -1- in
-direction of arrow- and maintain
pressure. |
| – |
Press release buttons -arrows-
and pull off plug-in connector. |
| Take note of colour assignment during installation
→ Anchor. |
| Plug-in connectors for fuel lines must engage
»audibly« when joined. |
| – |
Ensure plug-in connector is secured properly by pulling it. |
|
|
|
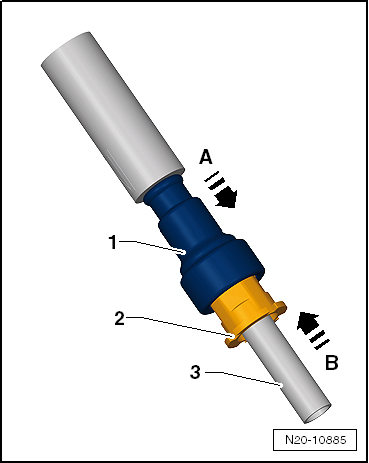
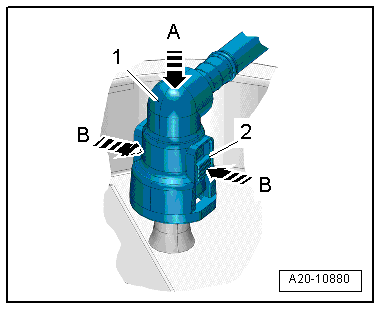
| Plug-in connector -1- with
release buttons -2- on right and
left: |
| – |
Press plug-in connector -1- in
-direction of arrow A- and maintain
pressure. |
| – |
Press release button -2- in
-direction of arrow B- and pull off
plug-in connector -1-. |
| Take note of colour assignment during installation
→ Anchor. |
| Plug-in connectors for fuel lines must engage
»audibly« when joined. |
| – |
Ensure plug-in connector is secured properly by pulling it. |
|
|
|
| Pressure limiting valve and fuel filter are integrated in
fuel delivery unit and cannot be renewed individually
→ Chapter. |
|
|
|
Removing
Fitting location
→ Item:
–
Release and pull off conn ...
Other materials:
Assembly overview - front brakes
Note
After every brake pad change, depress brake pedal firmly
several times with vehicle stationary, so that brake pads are
properly seated in their normal operating position.
Use the brake filling and bleeding equip ...
Tyre lettering
Fig. 204 International tyre lettering
First read and observe the introductory information
and safety warnings
Tyre lettering (example)
Meaning
Brand name, logo
Manufacturer
Product name
Individual tyre lettering from manufacture ...
Contact surface cleaning set -VAS 6410-
Using contact surface cleaning set -VAS 6410-
The contact surface cleaning set -VAS 6410- allows optimal
repair quality to be achieved in the area of vehicle electrics.
The tools allow performing repair work in the area of the sensor
in wiring harnesses for t ...
© 2016-2024 Copyright www.vwgolf.org

 Removing and installing control unit for fuel tank leak detection -J909-