Volkswagen Golf Owners Manual: Operating ParkPilot
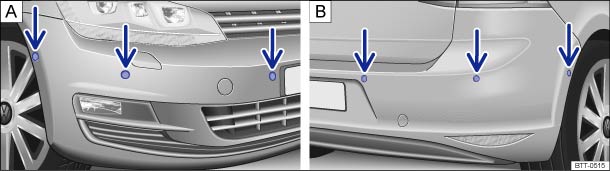
Fig. 148 ParkPilot ultrasound sensors around the vehicle, A: in the front bumper, B: in the rear bumper
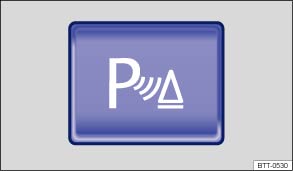
Fig. 149 In the lower section of the centre console: button for switching the ParkPilot on and off
 First read and observe the introductory information
and safety warnings
First read and observe the introductory information
and safety warnings The ParkPilot uses ultraound sensors to determine the distance between the front and rear bumpers and an obstacle. Up to 6 ultrasound sensors for the ParkPilot are located in both the front Aand rear B bumpers (arrows).
The intermittent and permanent acoustic warning signals for the front ParkPilot are of a higher pitch than those for the rear ParkPilot. This is a standard feature.
The warning signals can be adjusted in the infotainment system menu .
Switching ParkPilot on and off
| Function | What to do when the ignition is switched on |
|---|---|
| Switching on the ParkPilot manually. | Press the  button
once. button
once. |
| Switching off the ParkPilot manually. | Press the button again.
|
| Switching off the ParkPilot display manually (sound output remains active). | Press a function selection button on the factory-fitted infotainment system. |
| OR: touch the X function button. | |
| Switching on the ParkPilot automatically. | Select reverse gear or move the selector lever to position R. |
| OR: depending on the vehicle equipment level, when the vehicle rolls backwards. | |
| OR: slowly driving towards an obstacle located in the front area of the vehicle path display at a speed lower than 10 – 15 km/h (6 – 9 mph). The obstacle is detected at a distance of approximately 95 cm when automatic activation is switched on in the infotainment system. The mini ParkPilot display is shown. | |
| Switching off the ParkPilot automatically. | Move the selector lever to position P. |
| OR: accelerate the vehicle to a speed greater than approximately 10 – 15 km/h (6 – 9 mph). | |
| Temporarily muting ParkPilot: | Touch the
 function button. function button. |
| OR: close the electronic parking brake. The obstacles will be displayed in grey for as long as the electronic parking brake is switched on. | |
| Changing from mini ParkPilot display to full-screen mode: | Press the
button once. |
| OR: select reverse gear or move the selector lever to position R. | |
| OR: depending on the vehicle equipment level, when the vehicle rolls backwards. | |
| OR: touch the mini ParkPilot function button. | |
| Switching to the reverse assist system camera picture as required. | Select reverse gear or move the selector lever to position R. |
OR: touch the
 function button. function button. |
The indicator lamp in the button lights up while the function is active.
Automatic activation
During automatic activation of the ParkPilot, a mini ParkPilot is displayed on the left-hand side of the screen .
Automatic activation of the ParkPilot when driving slowly towards an obstacle
located in front of the vehicle only works when the speed falls below approximately
10 – 15 km/h (6 – 9 mph) for the first time. If the ParkPilot was switched off using
the button, performing one of the following actions
with the ignition switched on can automatically reactivate the ParkPilot:
- If the vehicle is accelerated to a speed greater than 10 – 15 km/h (6 – 9 mph) and then drops below that speed again.
- OR: if the electronic parking brake is closed and then released again.
- OR: if the selector lever is moved to position P and then out of that position again.
- OR: if automatic activation is activated and deactivated in the infotainment system menu.
Automatic activation with mini ParkPilot display can be activated and deactivated in the infotainment system .
When automatic activation is activated, acoustic signals are sounded from a distance of approximately 50 cm from the obstacle.

 NOTICE
 Introduction
This chapter contains information on the following subjects:
→ Operating ParkPilot
→ Acoustic and optical ParkPilot signals
→ ParkPilot menu
→ Vehicle ...
 Acoustic and optical ParkPilot signals
Fig. 150 ParkPilot display of the area
around the vehicle (colour)
Fig. 151 Mini ParkPilot display of the
area around the vehicle (colour)
First read and observe the introductory information
...
Other materials:
Assembly overview - centre armrest
1 -
Intermediate padding
Allocation
→ Electronic Parts Catalogue
Removing and installing
→ Chapter
2 -
Centre armrest
Removing and installing
→ Chapter
3 -
Lid
...
Assembly overview - side trim panel
Note
The illustration shows the side trim panel on the left side. The
right-hand side is similar (mirror image of left-hand side).
1 -
Side trim panel
Removing and installing
→ Chapter
2 -
Clip
...
Switching the auxiliary heater on or off
First read and observe the introductory information
and safety warnings
Switching on the auxiliary heater:
Manually
with the immediate heat button in the air conditioning controls. The indicator
lamp in the button lights ...
