Volkswagen Golf Service & Repair Manual: Notes on treating corroded fold areas
| Examples for corrosion in the fold area of bonnet, door or
rear lid |
| – |
Remove corrosion using
→ Chapter „Pneumatic brush grinder set -VAS 6446-“ or
→ Chapter „Brush grinder set -VAS 6776-“. |
| – |
Smooth off transitions using sandpaper (P360 to P400 grade). |
| – |
Clean substrate using silicon remover. |
| – |
After a corrosion damage has been repaired and before
sealing, isolate substrate using 2-pack wash primer -LHV 043 000
A2-, and then apply 2-pack HS Performance surfacer. |
| – |
As soon as the surfacer is completely dry, treated areas
must be dry-sanded using P400 to P500 sandpaper. When sanding,
take particular care not to “sand through”. Afterwards, clean
sanded surfaces with silicon remover. |
| – |
After sanding the dry surfacer, the metal edges in the fold
area must be sealed with fine seam sealant
→ Chapter „Sealing materials“. Ensure that the fine
seam seals are identical in appearance to the original seam
seals, as specified in the
→ »Vehicle-specific paintwork information« for the
particular vehicle. |
 Note
| |
Seam seals made during repair work must be identical in
appearance and thickness to the original seam seals. |
| |
To avoid damage or faulty operation, brush seam seals smooth
near attachments which must be attached. |
| |
Water drainage holes must remain clear. |
| |
All threaded studs and welded nuts with metric threads as
well as all other studs and contact surfaces for assembly must
be functional following the extent of the sealing work. |
| |
Sealant must never be applied to bare metal. Substrates must
always be coated with surfacer first. |
| – |
Restore paintwork structure according to the paintwork
repair manual. |
| – |
Apply cavity sealant along entire fold area using
→ Chapter „Suction feed spray-gun -V.A.G 1538-“;
→ Chapter „Anti-corrosion materials“. |
Note
| The repair can only be considered successful if the fold
area is sealed air-tight from inside (so that no ingress of
moisture is possible). |
|
|
|
| |
|
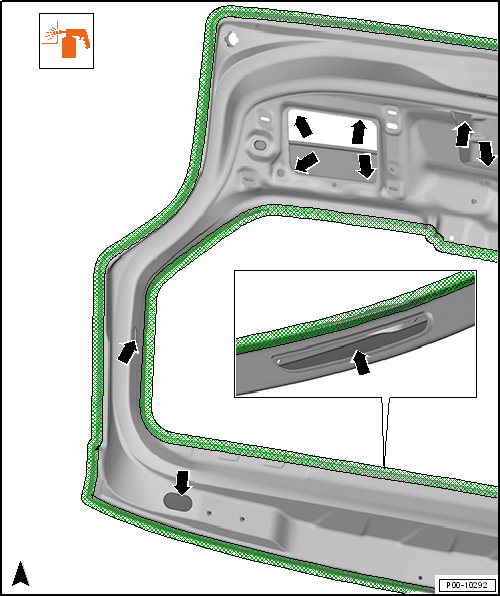
Cavity sealing, rear lid |
| |
|
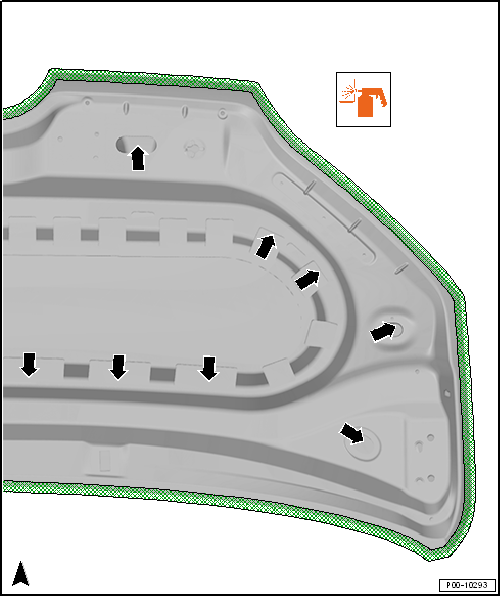
Cavity sealing, bonnet |
| |
|
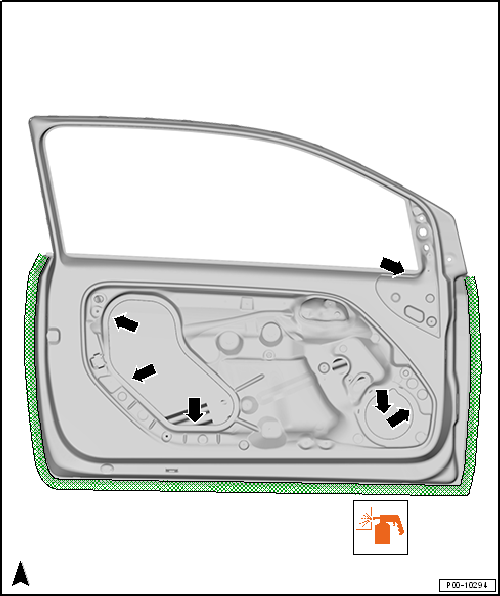
Cavity sealing, door |
Note
The corrosion protection measure is to be carried out in the groove
of the wing of all new replacement parts which have not had the
additional sealant applied ...
Attachments
Wings, doors, covers and flaps must be coated completely on
the inside as well. One wet-in-wet spray pass is adequate for
...
Other materials:
Assembly overview - luggage compartment side trim, saloon
Note
The illustration shows the luggage compartment side trim on the
left side. The right-hand side is similar (mirror image of left-hand
side).
1 -
Luggage compartment side trim
Removing and installing
→ Chapter
...
Removing and installing hazard warning light switch -EX3-
Removing
–
Grasp front passenger side airbag deactivated warning lamp
-K145--1- at sides
-arrows A- and pull it out of dash
panel.
–
Disconnect ele ...
Handling wheels and tyres
Fig. 200 Diagram showing how to swap wheels
First read and observe the introductory information
and safety warnings The tyres are the most used and most underestimated parts
of a vehicle. Tyres are very important as the narrow tyre surfaces are the only
contact between the vehicle and the ...
© 2016-2026 Copyright www.vwgolf.org


 Corrosion protection measures for wing surface in contact with wheel housing
liner
 Corrosion protection for body components, add-on components and welded
components