VW Golf manuals

Volkswagen Golf Service & Repair Manual: Mounting tyre, run-flat tyres, ultra-high performance tyres

Volkswagen Golf Service & Repair Manual / Wheels and Tyres Guide - General Information / Fitting tyre / Mounting tyre / Mounting tyre, run-flat tyres, ultra-high performance tyres

Only trained personnel may perform any assembly work on run-flat tyres and ultra-high-performance tyres.
If fitted, check tyre pressure sensor using vehicle diagnostic tester, and renew it as necessary.
–  Ensure proper assembly temperature for tyres → Chapter.
  Note
If bonded wheel trims are fitted, treat them with great care. The surface is susceptible to scratches.
If the wheel trim is damaged, renew wheel rim.
–  Clean rim.
–  Insert new tyre valve using valve fitting tool -VAS 6459-.
–  Liberally apply tyre assembly paste to wheel rim flanges, tyre beads and inner side of the upper tyre beads.
–  Place tyres with inner side facing downwards onto wheel rim.
   
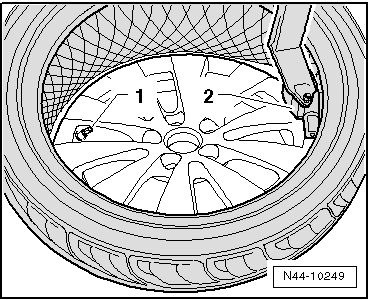
–  Turn wheel rim, until tyre valve or tyre pressure sensor are positioned opposite to assembly head.
 

Mounting tyre, run-flat tyres, ultra-high performance tyres

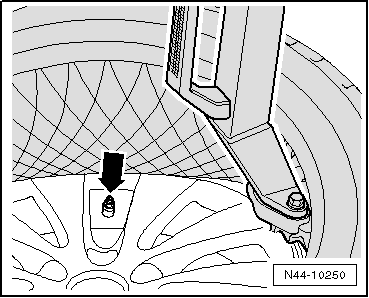
–  Run tyre fitting unit clockwise until assembly head is positioned before tyre valve or tyre pressure sensor -arrow-. The lower tyre bead will now slide over the wheel flange.
 

Mounting tyre, run-flat tyres, ultra-high performance tyres

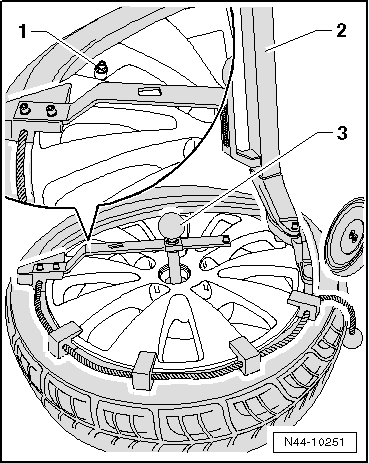
–  Turn wheel rim, until tyre valve or tyre pressure sensor -1- are positioned opposite to assembly head -2-.
–  Insert depressor -3- on the wheel rim.
 

Mounting tyre, run-flat tyres, ultra-high performance tyres

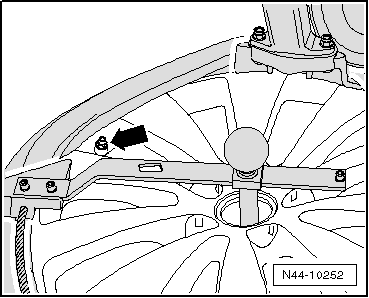
–  Run tyre fitting unit clockwise until assembly head is positioned before tyre valve or tyre pressure sensor. The upper tyre bead will now slide over the wheel flange.
–  Remove depressor from wheel rim flange.
  Caution
Risk of damage to wheel rim and tyre due to excessive bead seating pressure.
Never set the bead seating pressure above 3.3 bar.
–  Fill tyres to a maximum tyre pressure of 3.3 bar (bead seating pressure).
–  When the tyre bead does not lie completely against the wheel rim flange: deflate the tyre, press tyre bead off wheel rim flange and generously coat again with tyre assembly paste.
–  If the tyre beads are seated perfectly against the shoulder of the wheel rim, increase pressure to 4 bar.
–  If the tyre beads are not completely seated against the shoulder of the wheel rim, press off tyre → Chapter, and install it again.
–  Screw in valve insert.
–  Inflate tyre until specified tyre pressure is attained.
–  Balance wheel → Chapter.
  Note
Avoid any severe braking and acceleration manoeuvres for the first 100 or 200 km driven. Otherwise, the tyres may turn on the wheel rim due to the tyre assembly paste.
 

Mounting tyre, run-flat tyres, ultra-high performance tyres

Mounting tyre, wheels without and with tyre pressure monitoring
Only trained personnel may perform any assembly work on run-flat tyres. If fitted, check tyre pressure sensor using vehicle diagnos ...

Matching wheel rims and tyres
If necessary, eliminate flat spots caused by storage or handling → Chapter. –  Press tyre off wheel rim →&n ...

Other materials:

Calibrating Blind Spot Monitor control unit -J1086-/-J1087-
  Note Before the actual calibration process of the control units, the calibration unit -VAS 6350- needs to be set up as described in the following chapter. Special tools and workshop equipment required   ...

2-pack spray filler
Designation:   2-pack spray filler -ALN 788 007- Issued 06/2011 Product description The 2-pack spray filler -ALN 788 007- is a two-pack spray filler use in vehicle repai ...

Assembly overview - rear vehicle level senders, multi-link suspension, four-wheel drive
  Note The vehicle level sender is available as a replacement part only complete with coupling rod and upper and lower retaining plates. 1 -  Pop rivet nut 2 -  Electrical connector 3 -  Pop rivet ...

© 2016-2024 Copyright www.vwgolf.org