Volkswagen Golf Service & Repair Manual: Fixing position of subframe, multi-link suspension, front-wheel drive, Golf
GTE
| Special tools and workshop equipment
required |
|
|
|
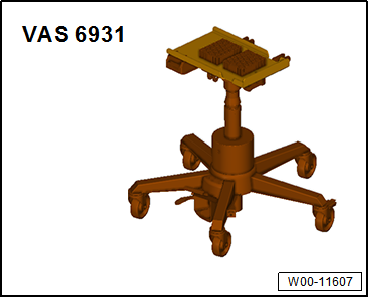
| Engine and gearbox jack -VAS 6931- |
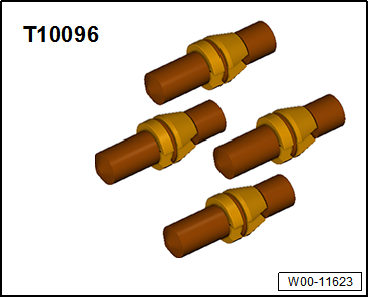
| Installing locating pins -T10096- |
|
|
|
| – |
Position engine and gearbox jack -VAS 6931--1-
underneath subframe, and secure with tensioning strap. |
|
|
|
| – |
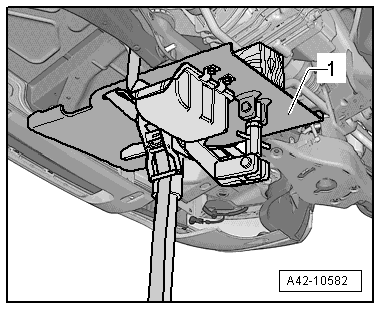
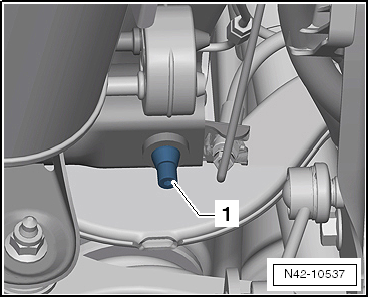
Unscrew bolt -1- on both sides. |
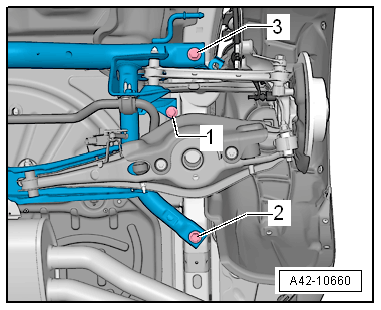
| To fix position of subframe, locating pins -T10096- must be
screwed in successively at positions -2-
and -3- on both sides of vehicle. |
|
|
|
| – |
Remove one of the front bolts of the subframe
-arrow- |
|
|
|
| – |
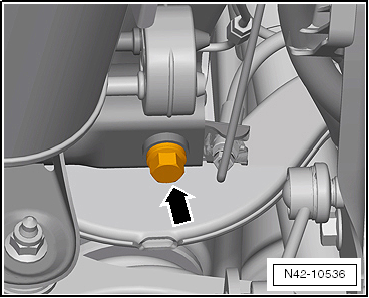
Screw in locating pins -T10096--1-. |
 Note Note
| The locating pins -T10096- may be tightened only to a
maximum of 20 Nm; otherwise the threads of the locating pins may
be damaged. |
| – |
This procedure must now be carried out for the second front
bolt and the rear bolts of the subframe. |
| The position of the subframe is now fixed. |
|
|
|
Special tools and workshop equipment
required
Locating pins -T10096-
...
Special tools and workshop equipment
required
Locating pins -T10096-
...
© 2016-2024 Copyright www.vwgolf.org

 Fixing position of subframe, multi-link suspension, front-wheel drive,
except for e-Golf and Golf GTE
Fixing position of subframe, multi-link suspension, front-wheel drive,
except for e-Golf and Golf GTE Fixing position of subframe, multi-link suspension, four-wheel drive