VW Golf manuals

Volkswagen Golf Service & Repair Manual: Checking outer constant velocity joint

The joint is to be dismantled to renew the grease if it is heavily soiled, or to check the running surfaces of the balls for wear and damage.
Removing
   
–  Before dismantling, mark position of ball hub in relation to ball cage and joint body with an electric scriber or oil stone -arrow-.
–  Swivel ball hub and ball cage and take out balls one after the other.
 

Checking outer constant velocity joint

–  Turn cage until the two rectangular windows -arrow- lie on joint body.
–  Take out cage with hub.
 

Checking outer constant velocity joint

–  Swivel one segment of the hub into one of the cage openings.
–  Tip hub out of cage.
  Note
The six balls for each joint belong to a tolerance group. Check stub axle, hub, cage and balls for small indentations (pitting) and traces of seizing.
Too much circumferential backlash in the joint becomes noticeable during load change jolts. In such cases the joint must be renewed.
Smoothing and traces of wear of the balls are no reason to change the joint.
Installing
Install in reverse order of removal, observing the following:
–  Press half of the total amount of grease from repair kit into the joint body.
–  Fit cage with hub into joint body.
  Note
Make sure cage is inserted in correct position (i.e. sides facing in same direction as original position).
–  Press in opposing balls one after the other; the original position of the hub relative to the cage and joint body must be restored.
–  Fit new circlip in shaft.
–  Distribute remaining grease in boot.
 

Checking outer constant velocity joint

Loosening and tightening threaded connections of drive shaft
Special tools and workshop equipment required     Socket, 24 mm -T10361A-   ...

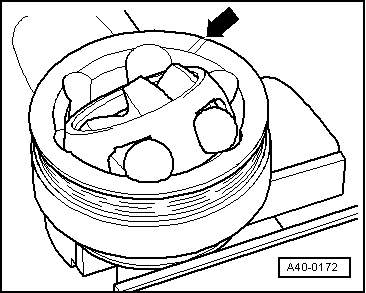
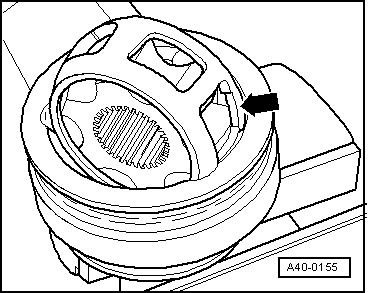
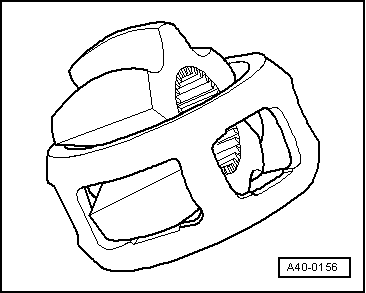
Checking inner constant velocity joint
The joint is to be dismantled to renew the grease if it is heavily soiled, or to check the running surfaces of the balls for wear and damage.   ...

Other materials:

Controls for the air conditioning system
Fig. 181 In the centre console: air conditioning controls (manual) Fig. 182 In the centre console: Climatronic controls First read and observe the introductory information and safety warnings Press the corresponding button to switch a function on or off. Press the button again to switc ...

Checking fuel pressure, engine code CWVA
Special tools and workshop equipment required Removal wedge -3409- Pressure tester -VAS 6550- Connector cable -VAS 6550/3-3- Connector cable -VAS 6550/3-4- Vehicle diagnostic tester   ...

Removing and installing LED modules for daytime running light and side light -L176-/-L177- (does not apply for “GTE”)
  Note Left LED module for daytime running light and side light -L176- and right LED module for daytime running light and side light -L177- are only fitted on gas discharge headlights. The daytime running light and sid ...

© 2016-2024 Copyright www.vwgolf.org