Volkswagen Golf Service & Repair Manual: Assembly overview - pistons and conrods
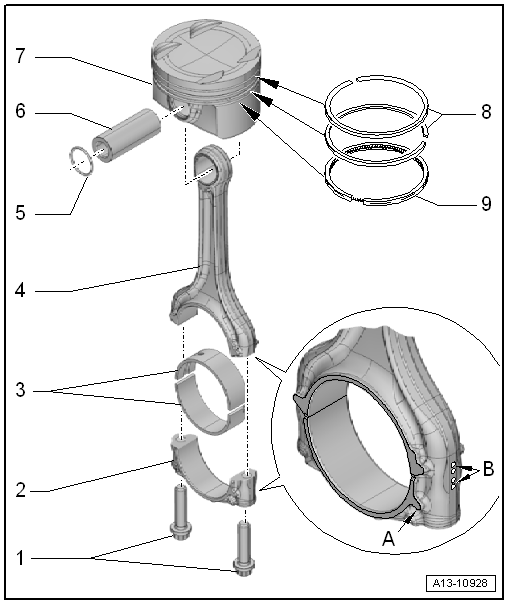
| Oil threads and contact surface |
| The conrod bearing cap only fits in one position and only on the
appropriate conrod due to the breaking procedure (cracking) separating
the cap from the conrod. |
| Mark allocation to cylinder and conrod in colour
-B-. |
| Installation position: Lug -A- on
conrod bearing cap faces towards pulley end |
| Installation position → Fig. |
| Renew worn bearing shells |
| With industrially cracked conrod bearing cap |
| Mark allocation to cylinder and conrod bearing cap in colour
-B-. |
| Measuring radial clearance
→ Chapter |
| Separate new conrod → Fig.. |
| Installation position: Lug -A- on
conrod bearing cap faces towards pulley end |
| Removing and installing
→ Chapter „Removing and installing pistons“ |
| Mark installation position and cylinder number
→ Fig.. |
| Removing and installing
→ Chapter |
| Checking piston and cylinder bore
→ Chapter |
| Measuring ring gap
→ Fig. |
| Measuring ring-to-groove clearance
→ Fig. |
| Use commercially available piston ring pliers to remove and install. |
| Installation position: marking “TOP” or side with lettering towards
piston crown |
| Measuring ring gap
→ Fig. |
| Measuring ring-to-groove clearance
→ Fig. |
| Use piston ring pliers to remove and install. |
| Installation position: marking “TOP” or side with lettering towards
piston crown |
| Offset gap 120° relative to lower compression ring |
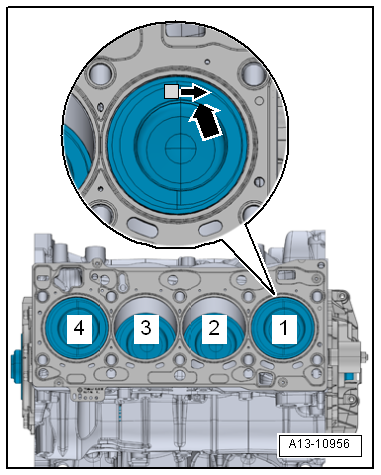
| Installation position and allocation of piston to cylinder |
| Arrow on piston crown points to pulley end
-arrow-. |
|
|
|
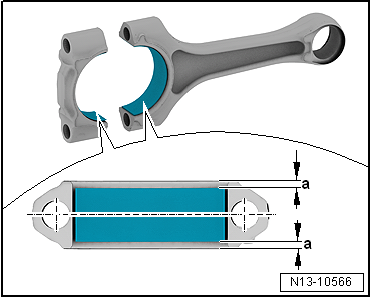
| Bearing shells - installation position |
| – |
Centre bearing shells on conrod and on conrod bearing cap. |
|
|
|
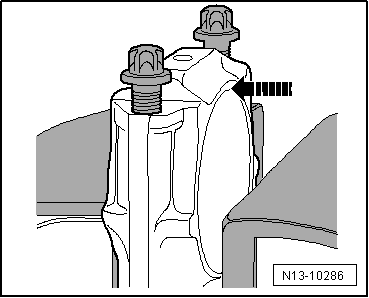
| On new conrods it is possible that the breaking point is not
fully separated. When the conrod bearing cap cannot be removed
by hand, proceed as follows: |
| – |
To avoid damage, gently clamp conrod in a vice with
protection jaws, as shown in illustration. |
| Clamp conrod below dashed line. |
| – |
Unscrew bolts -arrows- around 5
turns. |
|
|

|
| – |
Using a plastic hammer, carefully knock against conrod
bearing cap -arrow- until it is
loose. |
|
|
|
Special tools and workshop equipment
required
Drift -VW 222 A-
Piston ring ...
© 2016-2026 Copyright www.vwgolf.org


 Removing and installing pistons