Volkswagen Golf Service & Repair Manual: Renewing left oil seal
| Special tools and workshop equipment
required |
|
|
|
| Multipurpose tool -VW 771- |
|
|

|
| – |
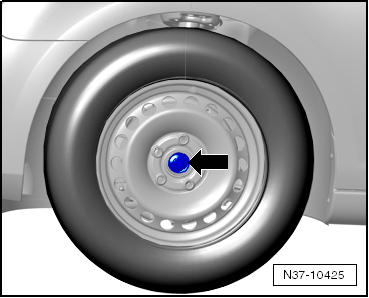
Step on the brake pedal while a second mechanic loosens the
left drive shaft bolt -arrow-. |
| – |
Remove noise insulation
→ General body repairs, exterior; Rep. gr.66. |
| – |
Drain gear oil
→ Chapter. |
| – |
Remove lower part of front left wheel housing liner
→ General body repairs, exterior; Rep. gr.66. |
| – |
Remove left drive shaft
→ Running gear, axles, steering; Rep. gr.40. |
|
|
|
| – |
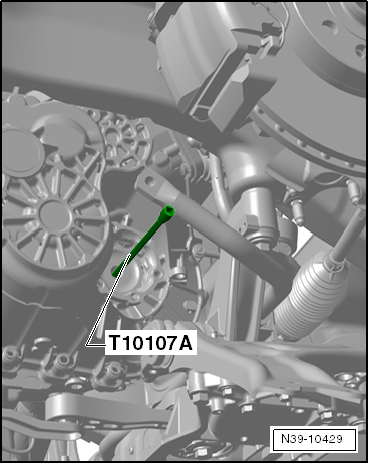
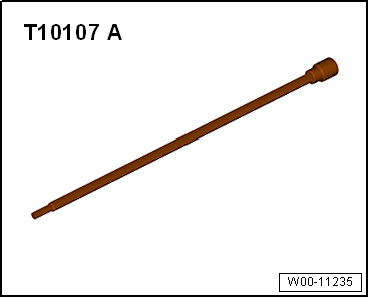
Remove left flange shaft of gearbox using socket -T10107 A-. |
| Bolt has a 6 mm hexagon socket. Bolt can also be removed and
installed with socket -V.A.G 1669-. |
|
|
|
| – |
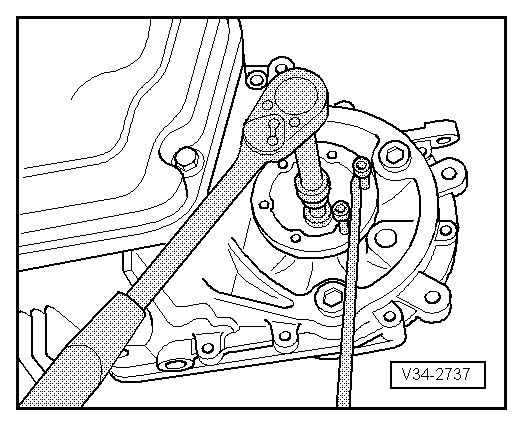
Screw 2 bolts into flange and counterhold flange shaft with
a lever in order to remove and install flange shaft. |
| – |
Remove flange shaft along with spring, thrust washer and
tapered ring. |
|
|
|
| – |
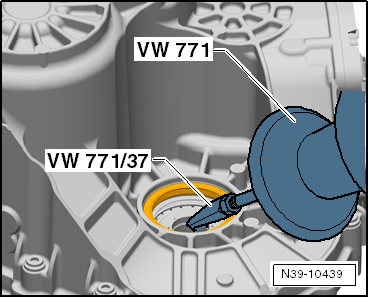
Pull out oil seal using multipurpose tool -VW 771- and
extractor hook -VW 771/37-. |
| Install in reverse order of removal, observing the
following: |
| – |
Lubricate outer circumference of new oil seal with gear oil. |
|
|
|
| – |
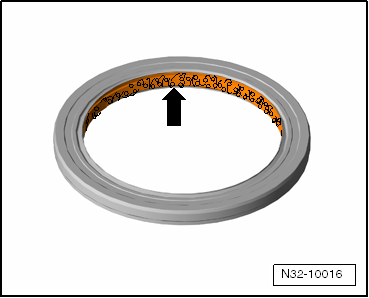
Fill space between sealing lip and dust lip
-arrow- with sealing grease
→ Electronic Parts Catalogue (ETKA). |
|
|
|
| – |
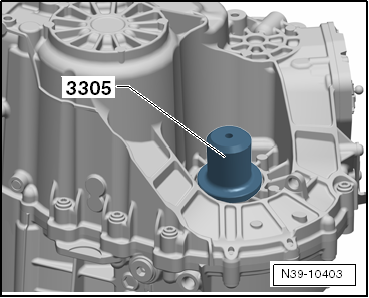
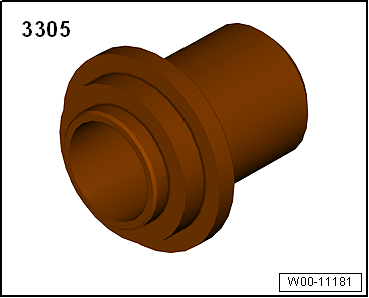
Drive in new oil seal to stop, being careful not to cant oil
seal. |
 Note Note
| Renew flange shaft countersunk bolt. |
| Press flange shaft against spring force into gearbox so that
bolt engages in threaded piece of differential. |
| – |
Fit flange shaft and secure with new countersunk bolt.
Specified torque:
→ Chapter |
| – |
Install drive shaft
→ Running gear, axles, steering; Rep. gr.40. |
| – |
Install front left wheel housing liner
→ General body repairs, exterior; Rep. gr.66. |
| – |
Install noise insulation
→ General body repairs, exterior; Rep. gr.66. |
| – |
Fill with gear oil
→ Chapter. |
|
|
|
1 -
Left flange shaft
2 -
Bolt
Always renew after removing.
30 Nm
3 -
Seal, left ...
Renewing right oil seal, gearboxes with
flange shaft
Special tools and workshop equipment
required
...
© 2016-2024 Copyright www.vwgolf.org

 Overview of fitting locations - seals
 Renewing right oil seal