Volkswagen Golf Service & Repair Manual: Removing and installing tank flap unit, e-Golf
|
| – | Remove wheel housing liner → Chapter. |
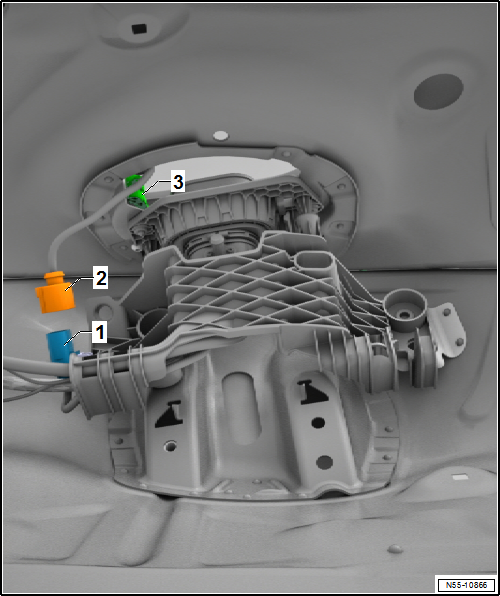
| – | Disconnect connector -2- for switch -3-. |
| – | Remove bolt -3-. |
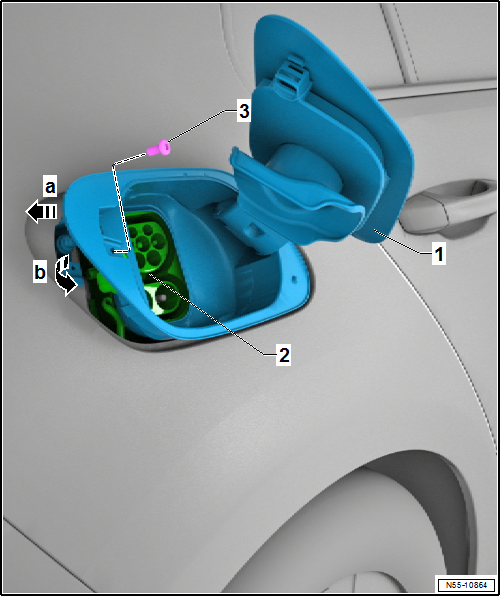
| – | Slightly pull tank flap unit towards rear -arrow a- out of catches. |
| – | Swing tank flap unit -1- out of the side panel -arrow b-. |
|
| – | Push electrical wiring for switch into side panel, and connect it. |
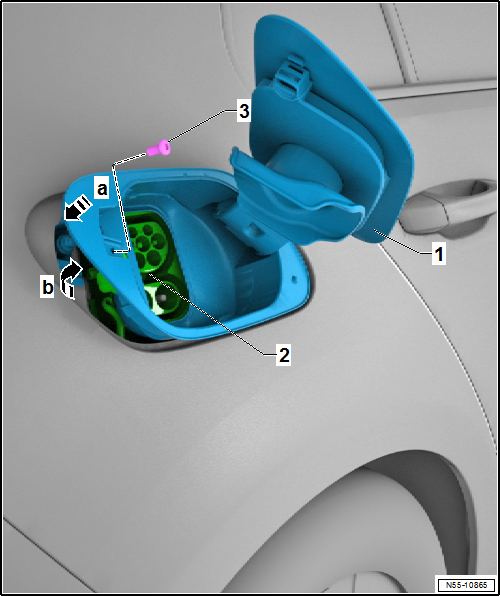
| – | Swing tank flap unit -1- into the side panel -arrow b-. |
| – | Then, push tank flap unit completely into side panel -arrow a-. |
| – | Tighten bolt. |
| l | Check function of release components. |
| Specified torques |
- Bolt → Chapter
 Removing and installing tank flap unit
Removing
–
Screw off tank cover.
–
Remove bolt -3-.
–
Slightly ...
 Removing and installing fuel tank flap
Removing
–
Push tank flap -1- out of catches of
tank flap unit -2--arrows-.
–
Remove tank flap.
Installing
...
Other materials:
Assembly overview - three-point seat belt, 2-door model, without belt
tensioner
1 -
Belt inertia reel
Removing and installing
→ Chapter
2 -
Bolt
If removed due to an accident with seat belt fastened, renew bolt
40 Nm
3 -
Bolt
If removed due to an accident w ...
Tyre sizes for vehicles with four-wheel drive
The following points must be observed for vehicles with
four-wheel drive:
Only tyres of the same make, design and tread pattern may be
fitted to the front and rear axles.
Different tyre rolling circumferences ...
Removing and installing window slot inner seal
Note
Removal and installation are only described for the left
window slot inner seal. Removal and installation of the right
window slot outer seal are similar.
Removing
–
R ...
